Roku はプロジェクタで動作しますか?
多くの「コード カッター」が Roku などのストリーミング デバイスに切り替えて、Netflix、Hulu、およびその他のストリーミング サービスからお気に入りの番組を再生するにつれて、新たな問題が提起されています。 Roku を最大限に活用したい場合は、プロジェクターに接続できるかどうか疑問に思うかもしれません。
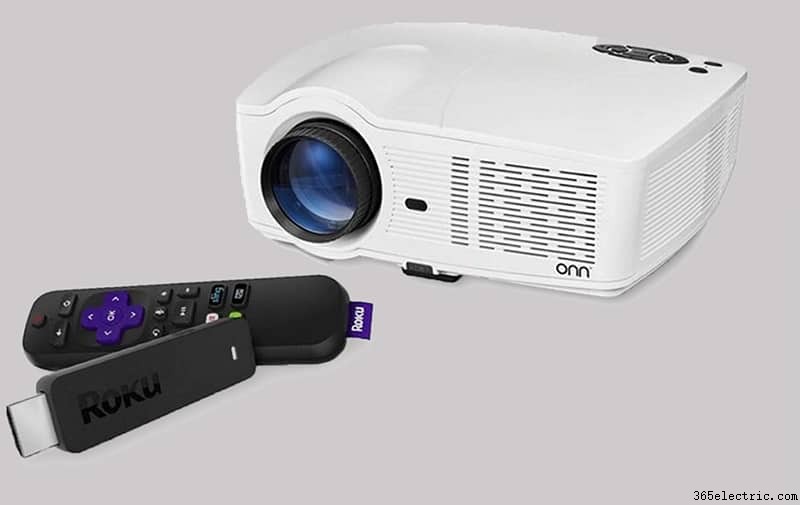
はい。Roku を HDMI ポートに差し込んで WiFi に接続することで、プロジェクターに接続できます。 Roku Streaming Stick + と Roku Express は、WiFi ダイレクトを提供するため、プロジェクターの使用に最適です。
他のモデルでは、投影デバイスを WiFi に接続する必要があります。スピーカーシステムをお勧めします。
プロジェクターのおすすめをチェックしてください。
もちろん、さまざまなモデルのプロジェクターがあるため、単に Roku をプラグインしてすぐにお気に入りのヒントやトリックのストリーミングを開始できるデバイスとして使用するよりも、もう少しクリエイティブになる必要があるかもしれません.
ただし、古いプロジェクターを使用している場合でも、2 つのデバイスをペアリングできるソリューションが見つかる可能性があります。詳しく見てみましょう。
こちらもご覧ください:Google Chromecast はプロジェクターで動作しますか?
プロジェクターに最適な Roku のモデルはどれですか?
Roku にはさまざまなモデルがあり、それぞれに独自の利点があります。この種のストリーミング サービスを使用するには、Roku TV または別のバージョンのスマート TV を使用するのが最善の策であると考える人もいます。
他の人は、Roku スティックの携帯性が (HDMI ポートを備えた) ほぼすべてのテレビをスマートテレビに変えることができるため、よりうまく機能することを発見しました.
同じ原理がプロジェクターにも当てはまります。プロジェクターで Roku デバイスを使用すると、プロジェクターをスマート デバイスに変換できます。特に、WiFi に直接ペアリングできる Roku のモデルを使用している場合 (プロジェクターを WiFi 自体に接続する必要はありません)。 .
このため、プロジェクタで最適に動作する Roku の 2 つの最適なモデルは、Roku Streaming Stick+ と Roku Express (Amazon で参照) です。
これらをポータブル デバイスとして使用できます。WiFi に接続すると、プロジェクターの HDMI ポートに差し込むだけで、すぐにお気に入りの番組の再生を開始できます。
Roku の他のモデルはプロジェクターで動作しますが、正しく機能し始めるにはもう少し手間がかかる場合があります。
たとえば、WiFi Direct を備えていない Roku のモデルを使用している場合でも、お気に入りの番組や映画をプロジェクターからストリーミングできます。ただし、最初にプロジェクターを WiFi に接続し、次に (非 WiFi ダイレクト) Roku デバイスを接続して、この方法でストリーミングを開始する必要があります。
これは追加の 1 つのステップにすぎませんが、より大きな影響を与える可能性があります。まず、プラグアンドプレイの代替手段の利便性に影響を与えます。
さらに重要なことに、Roku デバイスをプロジェクタから自宅の別のテレビに持ち込む場合、Roku デバイスの転送可能性が制限されます。
WiFi Direct を備えた Roku のモデルを使用する場合、WiFi 機能を使用してスピーカー システムとペアリングすることもできます。
スピーカーが WiFi に接続できるか、(それ自体が) WiFi に接続されているデバイスに接続されていると仮定すると、このブリッジを使用して Roku ストリーミング デバイスとペアリングできます。そうすれば、オーディオをセットアップする手間や、プロジェクターから直接供給される最小限のオーディオ容量に制限されることを回避できます。
そうです、Roku の他のモデルをプロジェクターで動作させることはできますが、それらは理想的ではなく、操作も簡単ではありません。
Roku Streaming Stick + と Roku Express を WiFi ダイレクトで使用して (スマート) サウンド システムとペアリングし、すぐにストリーミングを開始できるだけでなく、プロジェクターの HDMI ポートに差し込むだけで簡単に最小限のご家族やご友人との楽しい映画鑑賞会のイライラするオプションです。
Roku スティックをプロジェクタに接続するにはどうすればよいですか?
お使いのプロジェクターに最適な Roku のモデルがわかったので、次はそれらを接続して映画鑑賞パーティーを開始する方法を説明する詳細に焦点を当てます。幸いなことに、Roku スティックをプロジェクターに接続するのは比較的簡単です。
Roku スティックをプロジェクターに接続するときは、次の手順に従ってください:
1. Roku スティックをプロジェクターの HDMI ポートに接続します
最も基本的な機能から始めて、Roku スティックを HDMI ポートに接続することが重要です。お使いのプロジェクターにラベルが付いている場合もあれば、形状が一致していることを確認する必要がある場合もあります。いずれにせよ、これをプラグインするのは非常に簡単です。
この進行状況の次のステップに進むと、たとえば、Roku スティックを別のオーディオに接続する必要がある場合、Roku スティックをスプリッターなどの接続デバイスに接続する必要があることに気付くかもしれません。
But, unless you know that you need to do this for some reason, then you can assume that plugging it in is the best place to start.
When you turn on your projector, you might have to go through a few steps, but we will get to that in the next step. What you need to know before that is that not all projectors are made the same. Pay attention to the specifications on your device if you are having any issues.
2. Manage the projector settings
Managing the projector settings should be pretty simple, too. There will likely be a button on the top or side of your projector that has the word “Settings” on it. Here, you can change the Input so that the HDMI port is being correctly received.
As mentioned above, not all projectors are created the same. If you are having issues with audio, for example, you might have to adjust where the volume is streaming from. In this case, you might have to turn off the automatic HDMI input setting (if the volume is not streaming).
But, in general, you can plan on adjusting the standard projector settings to receive the input of your Roku from the HDMI port that it is plugged into. Realistically, this should not be too hard of a process, either.
3. Connect the audio
Connecting the audio to your projector is likely something that you have done before you began working with a Roku.
However, the input from your Roku might be slightly different, or there might be a few things that you need to adjust before the audio will be captured from whatever show you are streaming (or attempting to stream) from your Roku stick.
Since not all projectors are the same, not all of them are equipped to be compatible with the most updated versions of technology. This might mean that they cannot stream the latest version of the shows you are watching and capture the most appropriate video or audio input.
In the case of audio, this might mean that the audio needs to stream from another source outside of the projector itself. Ideally, you will be using a speaker system anyways, but if not, then it might be time to invest in a home speaker system.
When connecting your Roku with the audio, this might have a few variables to consider depending on if your Roku stick is able to be connected to WiFi directly or if it needs an additional connection. Also, the specifications of your projector and sound system will matter.
When working with a system (speakers, projector, and Roku stick) that are all able to be connected to WiFi independently, this is the most ideal option. You can connect them to the same network and then begin connecting them to one another from there.
If you are working with a system in which not all components are able to be connected to WiFi independently, then you might have to purchase an audio extractor to connect your Roku to both your projector and your sound system.
Either way, you will obviously need your audio to be working to be able to enjoy what Roku has to offer.
4. Connect all devices on the same WiFi network
When at all possible, connecting the entire system to your home WiFi network is going to be the most efficient way to manage your Roku device, projector, and speakers in your sound system. Of course, not all people who are using either of these components are using the latest WiFi-compatible options.
But, in the instance that you are, then it is important to connect these devices as soon as possible in order to begin enjoying the ease of use that it provides. To do this, you will simply connect each device to the same (generally, protected) home WiFi network.
Then, you can download the Apps associated with your particular device (or use a remote that is connected to the main Roku device) to manage the various settings and options available.
Once they are all connected, it will be much easier to use one main control setting to most efficiently enjoy the live streaming options available to you via your Roku and projector.
Check out my top picks for Home Theater Media Streaming Players