Hoover WindTunnel のトラブルシューティングに関する 12 のガイドライン – ビデオを含む
Hoover WindTunnel を使い慣れていると、うまく動かなかったり、動かなくなったりすることがあります。今日は、Hoover WindTunnel のトラブルシューティングについて説明します。さて、先に進む前に、過去に戻る必要があります。
私は自分の愛犬であるチョコレート研究所をこよなく愛していますが、最近、家から悪臭が漂い始めました。キャニスター掃除機を交換するには、別の掃除機が必要だったのかもしれません。

特定の年齢であるため、私は長年のハウスクリーニングの経験がありました。私はキャニスター掃除機で育ち、主要な人生でキャニスター掃除機を使用しました。いいえ、同じものではありません。もっとありました。
毎回バッグを交換しているにもかかわらず、現在の掃除機からの放電臭が嫌いで、ペットの毛をどれだけ拾っているか疑問に思っていました.
Google で少し調べたり、さまざまなレビューの専門家に確認したりして、100 ドル以下で最高の掃除機を見つけました。
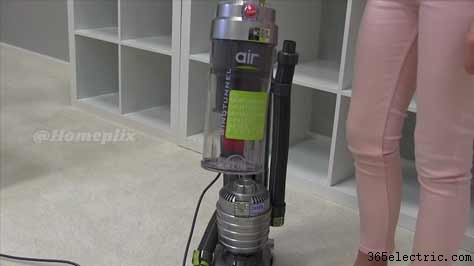
そして、このフーバー ウィンドトンネル モデルは救世主として登場し、価格もそれほど高くありませんでした.ですから、良いアプライアンスにいくらかのお金を投じることは通常、悪い戦略ではないと私は考えています.
この Hoover WindTunnel は、何年も洗っていないかのように毛布やカーペットを掃除し、一晩で家の匂いが良くなりました。私のマットは明るくなり、快適になりました。本当に–それは質量を持ち上げました。控えめに言っても、私は幸せです。そして、それが私の家を掃除し続ける限り、私はその悪いことを喜んで表現します.
Hoover WindTunnel を使用していると、うまく機能しない、または機能しなくなることがあります。
今日はこの問題を解決します。
トップ 12 のガイドライン
これは、Hoover WindTunnel の最も一般的な問題の 1 つです。以下で説明する問題の理由。
詰まりをチェック
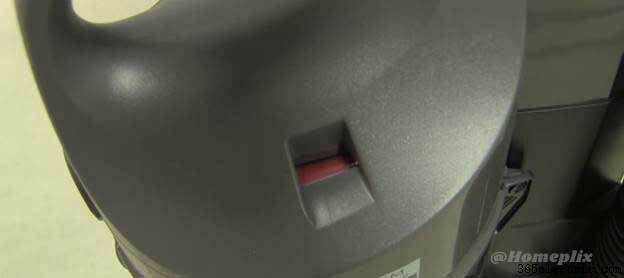
まず、パフォーマンス インジケータ ライトを確認します。赤に変わったら、通常、何かが掃除機を詰まらせていることを意味します。
つまり、詰まりが掃除機の停止の原因です。
両端からホースを取り外し、すべてをチェックします。 ほうきの柄を取る スティックで掃除して、詰まっている可能性のあるものをすべて取り除きます。
次に、ノズルからフードを取り外し、下部ホースを確認します。
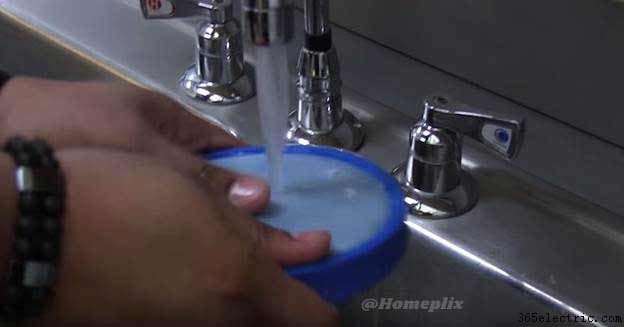
適切に機能しない場合は、フィルターの目詰まりである可能性があります これを確認するには、ダストカップを取り外してフィルターを持ち上げます。
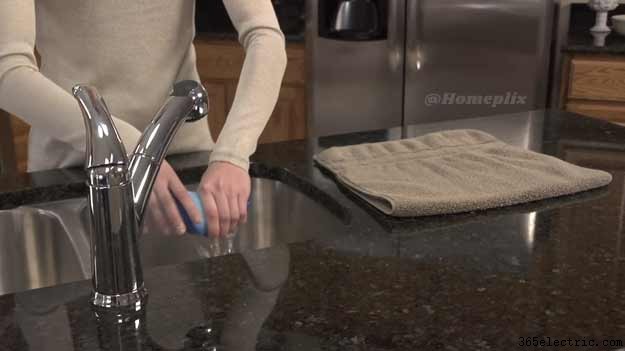
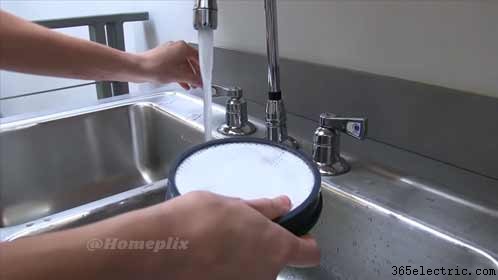
ホコリを落とし、ぬるま湯で 1 ~ 2 分すすぎ、丸 1 日乾燥させます。
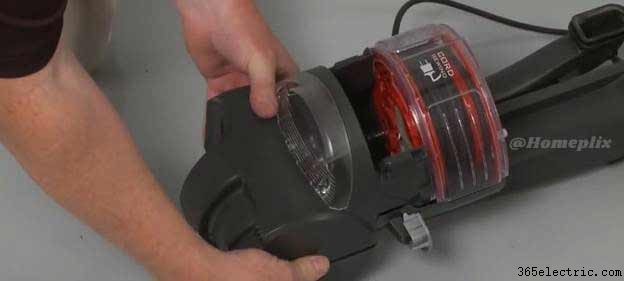
ブラシロールをチェック
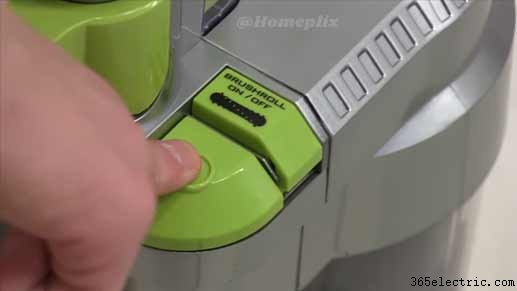
WindTunnel のブラシ ロールを確認してください .ブラシが回転しない場合は、スイッチ モードを再確認して、開始のみのモードではないことを確認してください。
詰まりや髪の毛がある場合は、このブラシロールに沿ってナイフでカットし、形から余分な髪の毛をすべて取り除きます.
簡単に実行できます。ソールプレートのネジを外して、マシンからソールプレートを引き抜き、ベストを交換するだけです。メンテナンスはこれだけです。
このベルトはほとんどの場所で見つけることができ、問題を解決するはずです。
詰まったブラシ バーのほとんどのケースは簡単に掃除できます。ブラシ バーから破片を引き抜くだけです。
しかし、一部の真空では、この方法は適切に機能しません。 Dyson ブラシ バーが回転しないなどの問題のある詰まりを解消する必要がある場合は、ブラシ バーをハウジングから簡単に取り外すことができるため、迅速なメンテナンスが可能です。
フィルターのクリーニング
WindTunnel には 2 つのフィルターがあります。一次フィルターは、必要に応じて 2 か月ごとにクリーンアップする必要があります。
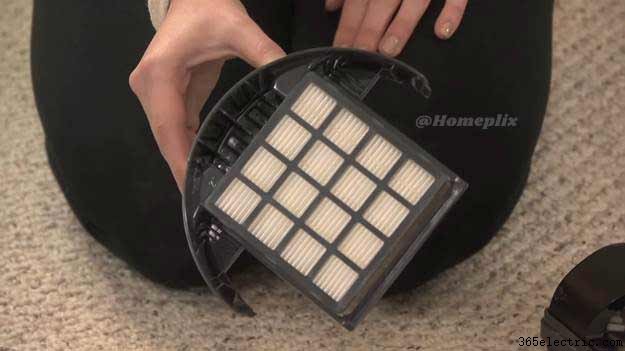
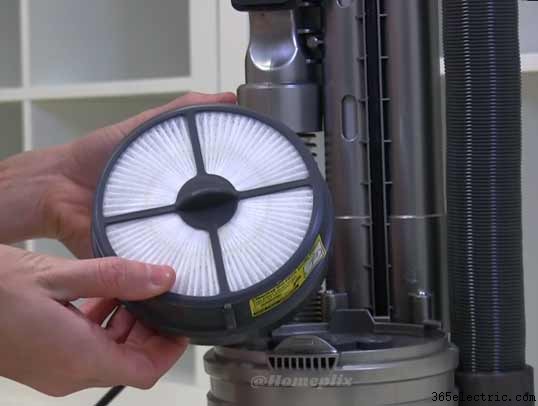
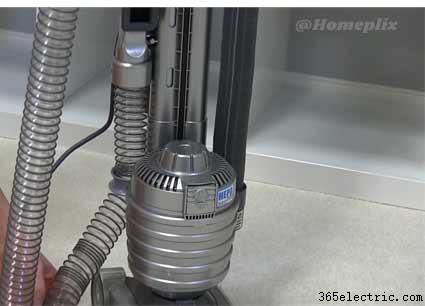
最後に、それでも問題が解決しない場合は、HEPA フィルターを引き抜いてチェックし、フィルターが非常に汚れているか磨耗している場合は、クリーニングする必要があります。
Hoovers の公式ウェブサイトで交換用フィルターを約 10 ドルで注文できます。Amazon で見つけることができます。
掃除機に他の問題がある場合は、カスタマー ケア サービスに連絡してください。このマシンには 2 年間の限定保証が付いています。
WindTunnel が吸引力を失った場合の簡単な解決策があります。通常、詰まりの原因になります。
まず、ダート カップの上部にあるインジケータ ライトを確認します。 .赤の場合は、空気の流れを妨げているものがあります。
これを修正する方法について説明します。
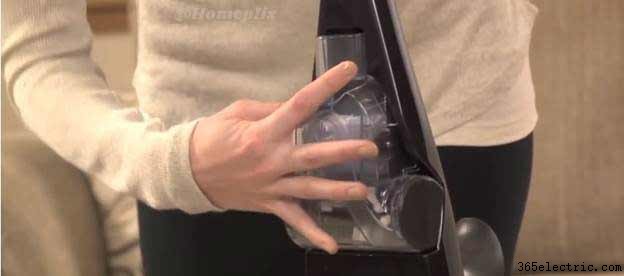
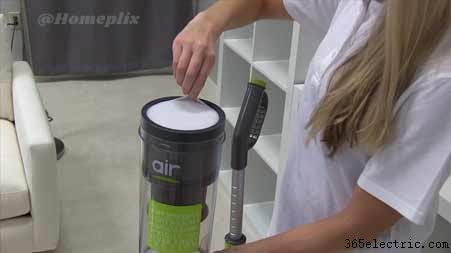
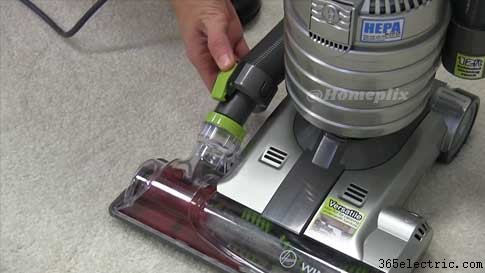
まず、ダストカップを取り外して開き、フィルターを確認してください。
汚れている場合は下側を確認し、ぬるま湯ですすぎ、乾燥するまで 24 時間待ちます。
均等に乾くように、必ず端に置いてください。定期的にすすいだとしても、ダート カップに完全に戻らないフィルターを配置すると、フィルターがさらに詰まりやすくなる可能性があります。
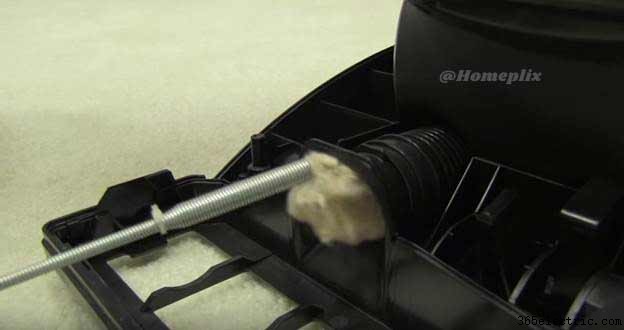
次に、メイン ホースの詰まりを確認します。機械から取り外し、ほうきの柄を使用して、そこに詰まっている可能性のある破片を叩き出してください。
確認できる場所がもう 1 つあります。この 2 つが明確で、まだ吸引力が強くない場合。
フードを取り外してブラシロールを取り出し、下部ホースに障害物がないか確認してください。

グラバー ツールを使用できます 詰まりを取り除きます。
グラバー ツールは、Shark 真空モーターのリセットなどの同様のトラブルシューティングを行う前に必要な重要なツールです。トラブルシューティングを開始する前に、それらがあることを確認してください。
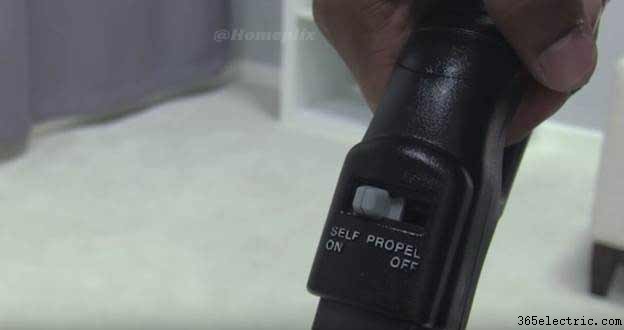
次に、WindTunnel 自走式修理ガイドについて説明します。
テイクを押しにくい場合は、自走式ボタンがオンになっていることを確認してください。
すぐに改善が見られない場合は、ハンドルが緩すぎる可能性があります。
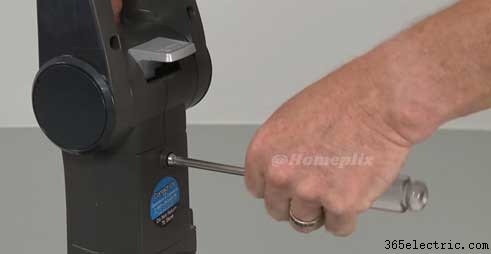
最初にフーバーの電源を切ってプラグを抜くだけで簡単に解決できます。次に、ハンドルの後ろからネジを外します。
ハンドルの自走式スイッチと電源スイッチがオフになっていることを確認してください。
また、マシン本体の電源スイッチがオフになっていることを確認してください。
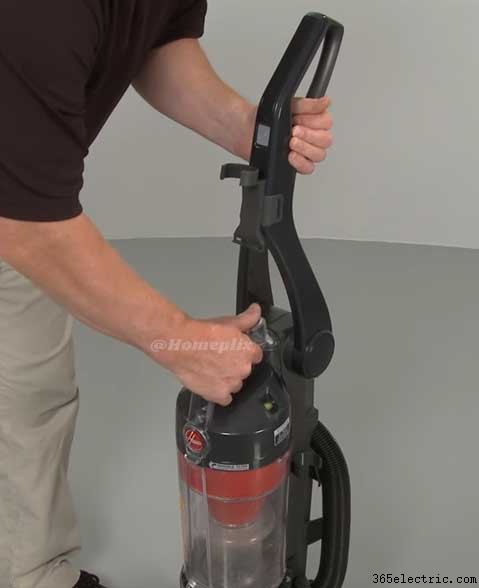
同様に、ハンドルをユニットに戻し、しっかりとねじ込みます。プラグを差し込んで電源スイッチをオンにし、自走式機能をオンに切り替えます。
最後に高さ調整について。最初は、最高の設定から始めなければなりません。
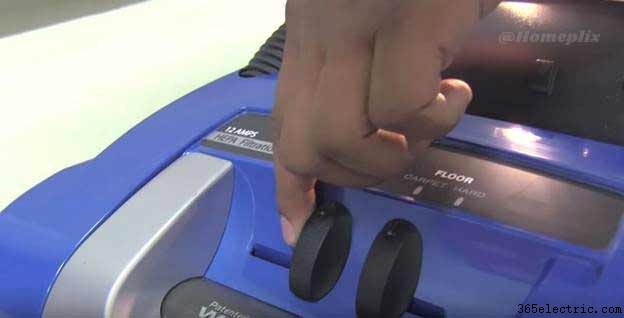
次に、ブラシ ロールの剛毛がカーペットに触れる音が聞こえ、掃除機がカーペットを滑らかに横切るのを感じるまで、下方向に作業します。
フィルターを掃除すると、WindTunnel 掃除機を最高のパフォーマンスで稼働させることができます。
最適なパフォーマンスを得るには、プライマリを 2 か月ごとまたは必要に応じてクリーニングする必要がある 2 つのフィルターがあり、HEPA フィルターを 6 か月ごとにクリーニングする必要があります。
開始するには、クリーナーを直立位置に置きます。電源を切り、電源コードを抜きます。
ダストカップをクリーナーから取り外し、ふたをひっくり返して開きます。次に、すすぎ可能なフィルターを取り外し、水で 2 分間または水がなくなるまですすぎ、余分な水を絞り出し、少なくとも 24 時間乾燥させます。
濡れたすすぎ可能なフィルターをクリーナーに戻さないでください。完全に乾いたらフィルターを交換し、ダストカップのふたをひっくり返して閉じます。
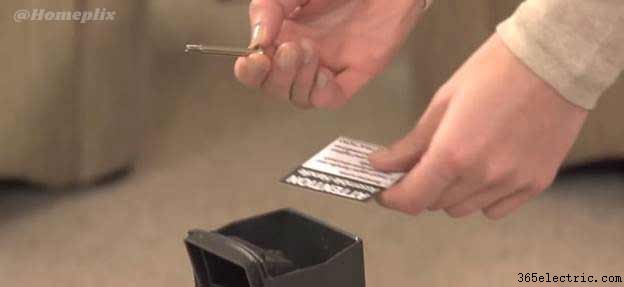
2 番目のフィルターは HEPA フィルターです。ベースプレートの上にあるので、掃除してスライドさせて取り出すことができます。
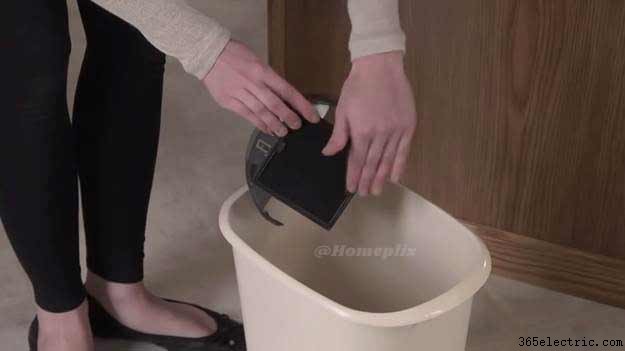
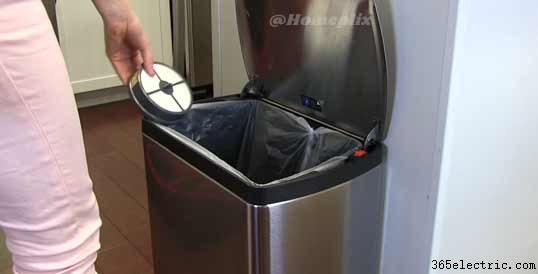
このフィルターを水で洗わないでください。フィルターをゴミ箱の内側に叩きつけて、汚れや破片を叩き出してください。
フィルターを交換し、カチッとはまる音が聞こえることを確認してください。フィルターを交換するには、認定されたフーバー部品のみを使用してください。
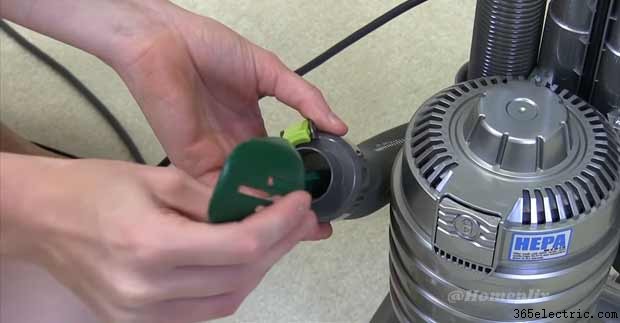
最初に、HEPA フィルターを削除する必要があります プラスチック フィルター フレームを引き出します。フィルターはたたくだけできれいにし、HEPA フィルターを洗ったりすすいだりしないでください。
フィルターを軽くたたいた後、フィルター フレームをフーバー ベースにカチッと音がするまで再度挿入します。
適切に使用および維持されていれば、保証期間内に HEPA フィルターを交換する必要はありません。
交換が必要な場合は、掃除機用に設計されたフーバー HEPA フィルターを必ず入手してください。
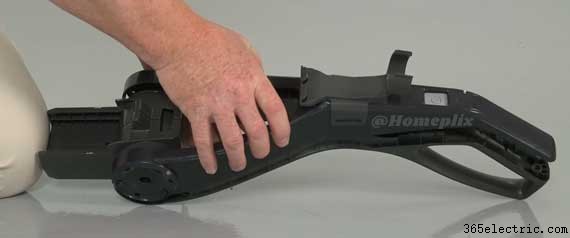
Hoover WindTunnel repairs will require you to disassemble the product before you attempt this make sure the power cord is unplugged.
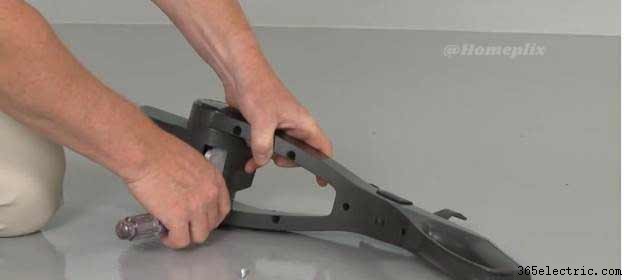
To access the belt or brush roll you will need to remove the bottom plate.
The plate may be secured by screws or by latches remove the screws or slide the latches out of the way and pull the plate off.
Then you should pull out the brush roll and detach it from the belt if necessary.

When the repair is complete first loop the belt around the brush roll and aligns the tabs on the sides of the roll with the notches in the frame.
Then reposition the bottom plate and secure the latches or screws. To access the start switch first remove the upper filter assembly.
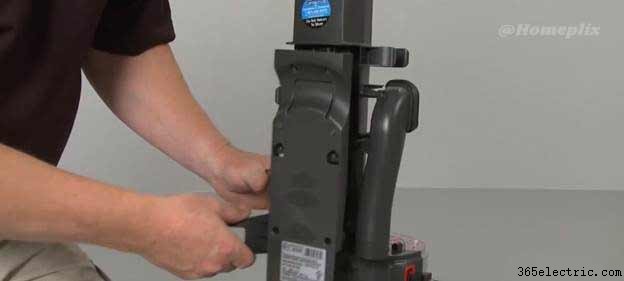
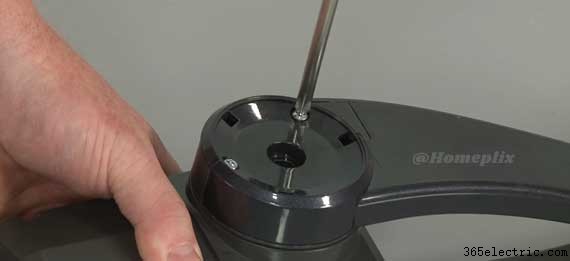
Now remove the screw to release the handle assembly.
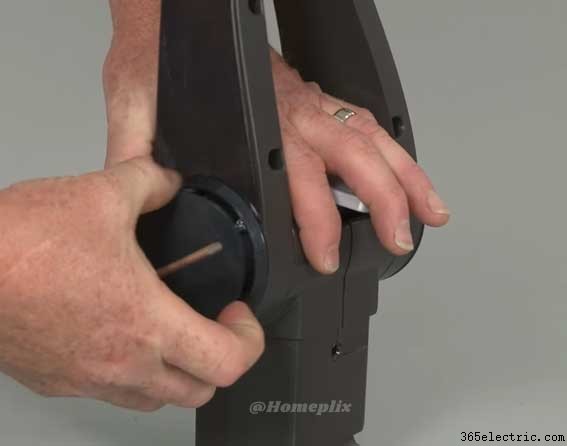
Remove the screws holding the handle assembly together use a small flat-head screwdriver to detach the hinge caps.
Now remove the bolt and remove the hinge screws to separate the two halves of the handle assembly.
When the repair is complete join the two halves of the handle assembly together.
Replace the hinge screws then insert and secure the bolt. Snap-on the hinge caps. Reinstall the rest of the handle assembly screws and slide the handle into position.
Secure the screw and snap the upper filter assembly into place.
If applicable to your model you can access the rewind cord housing and motor assembly by first removing the HEPA filter.
Now lift off the upper filter assembly and remove the screws to release the cord housing plate.
Your next step is to remove the hose.
Now uninstall the screws to release the hose fitting remove the screws securing the vacuum cleaners back panel and any guides or supports.
Then pull the panel off.
Remove the screws securing the hinge covers and unclip both covers.
Now unhook the belt from the motor shaft and lift the handle cord reel and motor assembly of the base.
Remove the screws securing the motor housing pull off the retaining clip if necessary and separate the housing.

If required you can now remove all of the screws securing the cord housing cover.
When the repair is complete reinstall the cord housing cover and secures the screws.
Join together the two halves of the motor housing. Snap the retaining clip into place if necessary and replace the screws to secure.
Now align the motor housing with the base and hook the belt onto the motor shaft.
Snap the hinge covers into place and replace the screws to secure. Next, reposition the back panel as well as any guides or supports and secure them with the screws.
Realign the hose fitting and secure the screws, reattach the hose replace the cord housing plate and reinstall the screws to secure.
Reposition the upper filter assembly and reinsert the HEPA filter with the vacuum cleaner fully reassembled you should test the product to make sure it’s functioning properly.
The main pieces to your WindTunnel Hoover are.
- The vacuum base
- The handle
- The dirt cup
- Extension tube
- Crevice tool
- Upholstery tool
- An air-powered turbine hand tool
To assemble first remove the main screw from the handle base.
Slide the handle into the vacuum base push down firmly and tighten the screw with a Philips screwdriver.
Attach the dirt cup by sliding it in. Attach your tool so you’ll be able to easily reach for them. When you need them to put the air-powered turbo tool on the handle.
Slide the crevice tool into the extension tube and place it on the left side of the cleaner and the upholstery tool goes on the right side.
Set the hose onto the carriage. There is an automatic cord rewind feature that lets you pull out and rewind the power cord to need easy storage.
Your cleaner is now fully assembled and ready to use. A few things to keep your WindTunnel to rewind running well.
There are two filters the primary should be cleaned every two months or as needed and the HEPA filter should be cleaned every six months.
You will need to keep your brush roll clear of thread pet hair and other debris. See the maintenance and troubleshooting topic for more detailed guidance.
Hoover WindTunnel has some pro feature and innovative technology like
- Automatic rewind cord
- Five-position adjustment
- Easy maintenance filter
- Other accessories
Automatic rewind cord
Hoover WindTunnel holds 27 feet rewind power cord and that is very enough long to clean any large space and it doesn’t need to plug out and replug the power cord.
Five-position adjustment
Five-position adjustment of Hoover one of the innovative technology. This five-position adjustment very effective to clean all types of floors and surfaces.
Easy maintenance filter
This WindTunnel represents a bagless technology and it maintains optimal suction power. It has a rinsable filter that can be cleaned with warm water. It also has a high-quality HEPA filter.
Other accessories
- Comfortable grip handle
- Fingertip nozzle
- Thirteen and a half-inch wide nozzle
- No-scuff bumper
- 12-inch extension wand
- A crevice tool
We sometimes hear from you guys that your WindTunnel is overheating and shutting off. This can happen when there’s a clog somewhere in the system.
On some of the versions of the vacuums, you might hear a whistling or hissing sound when your vacuum is on the verge of shutting off.
That’s the system performance indicator. First, turn the vacuum off and remove the dirt cup.
Take the lid off and inspect the filter, if it’s dirty.
Rinse it with warm water for two minutes and let it dry for at least 24 hours.
Your vacuum also contains a HEPA filter. Take the cover off and check this filter.
If it’s dirty. Don’t get it wet instead, tap it into a wastebasket.
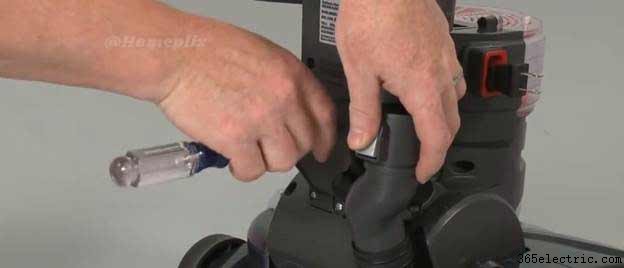
Next release the hose by pressing green clip.
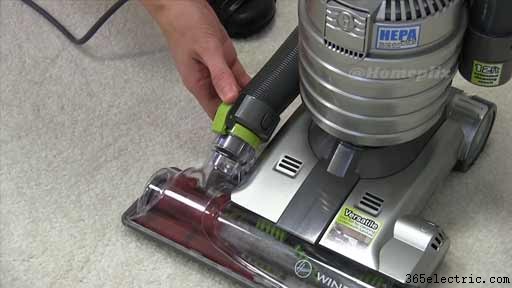
It’s on most versions of the WindTunnel and sees if there are any blockages inside of it.
You can use a wooden spoon handle or another household object. Just don’t use anything sharp that could damage your hose.
Lastly, leave your vacuum turned off for about half an hour.
The thermal protector that activated the shut-off will deactivate.
You can start cleaning again. These tips should get your WindTunnel in great working.
I’ll be showing you, how to replace a Hoover WindTunnel power cord.
The power cuts out, then do check the main cable, with the cable still plugged in and the machine running give the wire a wiggle around. If the power cuts on and off either at the plugins or at the machine end, then the cable has failed and it needs replacing.
Safety first! Always unplug an appliance before carrying out any work.
I’ll be doing this fix on this Hoover vacuum cleaner.
The process should be quite similar to your make and model.
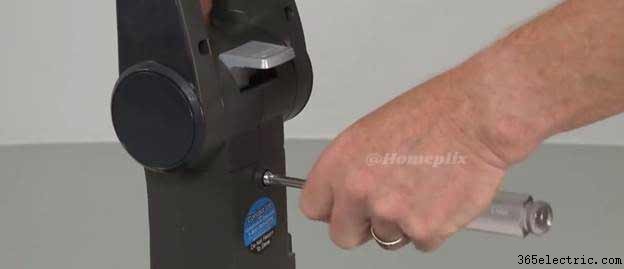
To access the mains cable, I need to first remove the underneath of the vacuum cleaner by undoing the screws that hold it in place.
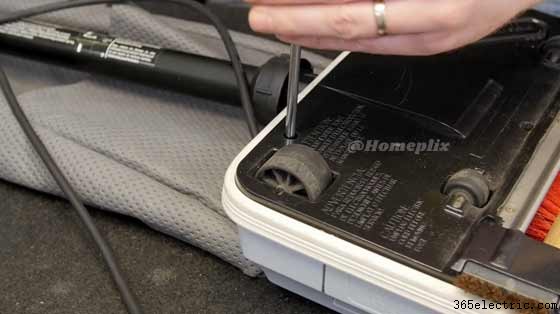
To access where the cables are going, the mains cable comes directly into the machine.
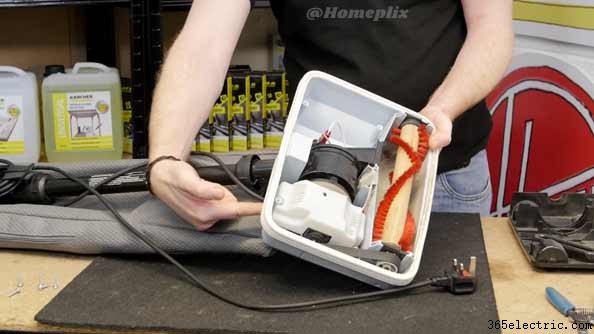
Wires go underneath this cover. I’m going to remove this cover by undoing the two screws that hold it in place.
If the motor cover removed, we can see the cable clamp that holds the main cable in place.
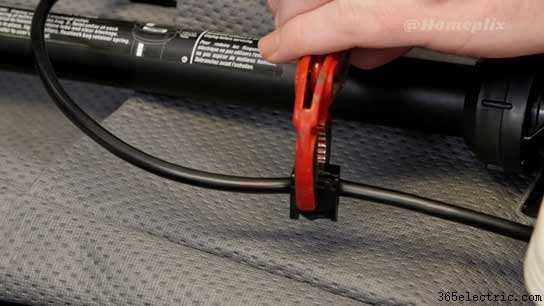
To release cable, I’m just going to take a pair of pliers and pinch the two tabs should release the mains cable from the back of the machine.
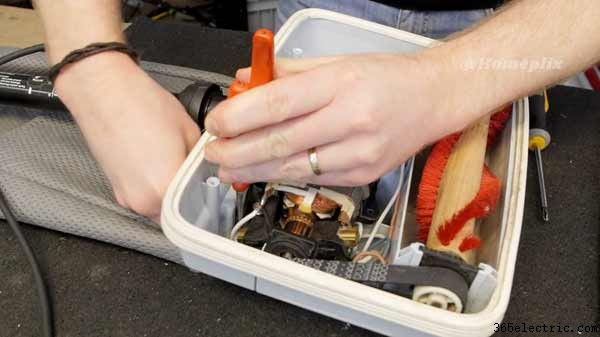
Then you can just use a screwdriver just to push the wire down.
The mains cable released.
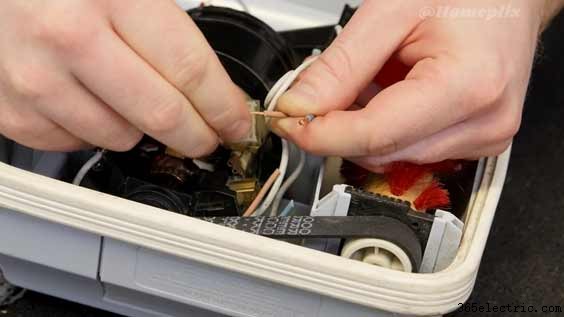
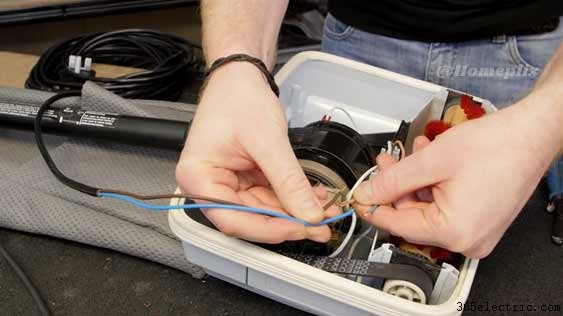
I forget to give it a little pull. I can tell which wires are connected inside, if I just pull these wires out as well you can see that more clearly.
It’s the blue and the brown here that are connected inside the mains cable.
What I want to do, because these the blue has been crimped here and I don’t want to disturb the brown wire that goes to the switch.
There is a little bit of space next to the motor, where I can put a terminal block and connect the new wires from the new mains cable to the old wires inside the machine.
The new mains cable does not come with any connection.
I’ll be using this electrical terminal block to connect the wires.
I’m going to snip the brown and the blue wire. Then feed those out by the old mains cable. I’ll just cut those cables now.
I’m also going to do is just strip back the insulation to expose the copper inside.
Then give a nice twist. It looks nice and solid and then just fold it back on itself, that it will fit nice and firmly inside the terminal block.
I’ll do exactly the same with the brown one.
I can then remove the mains cable from the vacuum cleaner.
Now the old cable is out of the way. I can grab my new one. Now what I’ve done is pre-stripped down the insulation. It gives me enough space to feed the wires under the motor. Of course, connect blue to blue and brown to brown using the terminal block.
It’s worth pointing out that the new mains cable. The two ends have been crimped already. So, I don’t have to prepare those.
You can use a terminal block to connect the wires up.
With the wires all wired up nicely in the terminal block. I’m just going to push them down the side of the motor.
I need to do is to replace the old clamps that were on the old mains cable and put them on the new one.

The clamp-on your model may take a little bit of squeezing to get it into position. So, I’m just using a pair of pliers to do that on this one.
With the mains cable now in position. I can replace the motor cover. I’m just going to make sure there are no wires in the position of the screw holes. So, they’re not being pinched by the motor cover.
Lastly, now I can replace the base.
We have it one brand new mains cable fitted to this Hoover vacuum cleaner.
It has been having problems with, my Hoover vacuum cleaner switch.
I’ve decided to replace it.
This is a Hoover WindTunnel.
To replace the switch, remove the attachment.
Just connect hose again.
I’m going to remove screws from Handel.
Remove the canister.
Once you have that out, you can remove that holds the switch.
Once that’s done remove the two screws on the bottom and separate the unit using just a standard screwdriver.
I’ve got my unit apart here and see here is the link between the vacuum cleaner and the switch.
There’s your switch and there’s your link, at this point you’re going to just connect those two electrical contacts.
Remove the switch and pull it out. I was able to kind of pull it out with my bare hands.

I’m going to disconnect these two wires take the switch out of this housing.
You can see the housing that holds the switch has those two little clips on it.
I’m going to take a screwdriver, stick it under there and remove the switch from the Hoover housing.
So, you can see I’m about to take this switch out of here.
Let’s go and push up on it.
Take my new switch. Put it in the housing.
Put your switch back in the vacuum cleaner.
You have it reroute your wires screw everything back together be good to go.
I’m going to take apart or don’t get you.
Just steps there back together make sure that your peace doesn’t fall into the wrong orientation as you close it.
Just make sure this you have put all your screws back in and you’ve got a functioning switch.
Today we’re going to change the filters on the Hoover self-propelled WindTunnel vacuum cleaner.
- First, make sure that your vacuum is unplugged out of the wall.
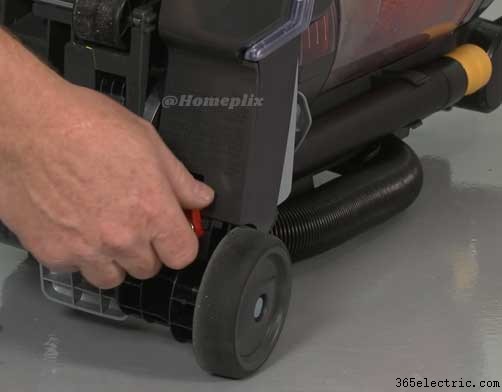
- Click the switch and lay vacuum down.
- Lay your vacuum down on a raised surface such as a table.
- Remove the top sole plate first.
- Take out the bag.
- Take out the filter cover.
- Replaces the old filter.
- Take the cover motor filter cover put that on top.
- Replace your final filter for this vacuum.
- Take out the old filter.
- Replace it with your new vacuum filter.
- Replace your bag.
- Pop the top back on.
Final Sentences
Hoover WindTunnel gets four-star up with positive reviews in different marketplaces. Hoover WindTunnel is easy to move, simple maneuverability. You can get optimal suction power from it.
Your Hoover WindTunnel is your most precious cleaning partner and it cleans different types of surfaces like hardwood floors or carpet.
Sometimes your Hoover WindTunnel needs troubleshooting. Here we have solved all Hoover WindTunnel possible problems. If you have a Bissell vacuum and experiencing any difficulty with this, then you can also read our Bissell Proheat troubleshooting guideline.