アクション カメラを (どこにでも) 取り付ける方法 (および場所)
アクション カメラの写真やビデオは素晴らしいものです。しかし、どうすれば最高のショットを撮ることができますか?カメラの取り付けがすべてです。その方法を説明します。
アクションカメラはどこに、どのように取り付けますか? アクション カメラを取り付ける場所として最も一般的なのは、カーブ マウントを使用したヘルメットです .ただし、移動するほとんどすべてのものにカメラを取り付けることができます。方法については、以下をお読みください。カメラの配置ごとに異なるマウントがあります。数多くのユニークなマウントが市場に出回っています。独自のマウントを DIY することもできます。マウントと、おそらく複数のマウントが必要になります。アクション カメラで使用できる多くのマウントのいくつかを紹介します。
ハウツー:ガイド
アクション カメラに付属のマウントの良いところは、ほとんど何にでも使用できることです。通常、カメラにはカーブ マウントとフラット マウントがあり、マウント バックルとマウント フレームもあります。これらを複数購入して、さまざまな表面で使用することをお勧めします。それらを取り外すには、マウントを固定している接着剤にヘアドライヤーまたはヒートガンを当てるだけです.
アクション カメラをさまざまな表面に取り付ける方法は次のとおりです。
ヘルメット マウント
スケートボード マウント
サーフボード マウント
サッカー ゴール マウント
カーマウント
ATV/ボート マウント
リスト マウント
釣り糸マウント
ドッグマウント
ソードマウント
アクション カメラのマウント タイプが異なる場合
GoPro は、スロットと横向きのネジを備えたタイプのマウントを使用します。多くのアクション カメラ メーカーは、カメラに同じマウントを使用して、同じアクセサリを使用できるようにしています。ただし、アクション カメラが垂直ネジなどの別のマウント タイプを使用している場合、上記のすべてのマウントをこのタイプに適合させるために必要なものは次のとおりです。
マウント
1. ヘルメット マウント
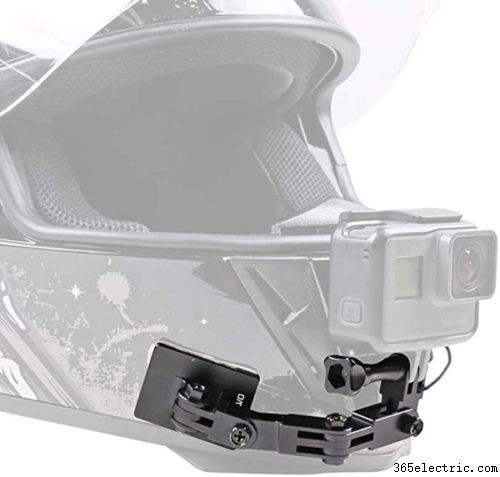
これは、配置するのが最も簡単で最も人気のあるマウントです。カメラを取り付ける場所に応じて、カーブ マウントまたはフラット マウントを使用して、マウントのベースをヘルメットに取り付けるだけです。 24 時間待てば準備完了です。
ヘルメットカムにはチンマウントをお勧めします。その方法については、次のとおりです。
- マウントを取り付ける前に、ヘルメットをきれいにして乾かしてください。接着剤はきれいな表面に貼り付けてください。
- 湾曲したマウントから接着剤を取り除きます。
- 湾曲したマウントをヘルメットの口の穴の下に置きます。接着剤がくっつくように、マウントをしっかりと押し下げます。
- マウントをテープで覆います。これにより、台紙が適切に固定され、乾燥するまで所定の位置に保持されます。
- 乾燥するまで 24 時間待ちます。
- テープをはがしてください。
- カメラに付属のネジを使用して、コネクタ (付属している必要があります) をマウントに取り付けます。
- 別のネジを使用してカメラをコネクタに取り付けます。
- カメラを少し動かして、好きな角度で撮影できるようにします。
- 素晴らしいビデオを撮りに行きましょう。
チン マウント プロセスがアクション カメラに最適であることがわかりましたが、これは文字通りヘルメットのどこにでも配置できます。ヘルメットの側面にカメラが必要な場合はフラット マウントを使用し、ヘルメットの上部にカメラが必要な場合は湾曲したマウントを使用します。
このタイプのマウントを購入するには、ここをクリックしてください。
2. スケートボード マウント
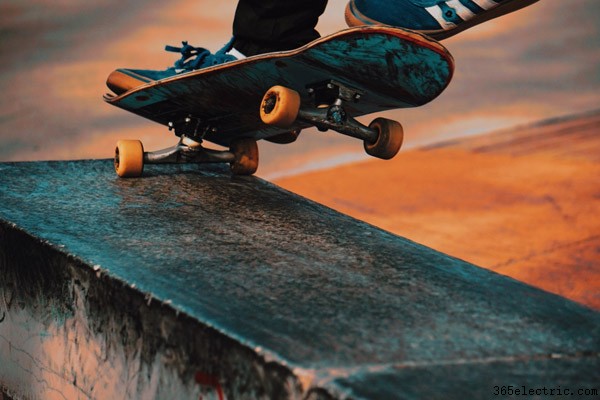
スケートボードで素晴らしい映像や静止画を撮影できます。アクション カメラを使用すると、ヘルメットや手首にカメラを取り付けてアクション ショットを撮ることができますが、スケートボード自体にカメラを取り付けたい場合はどうすればよいでしょうか。それはカメラにとって素晴らしい視点になる可能性があります。心配しないで。私たちはあなたをカバーしています:
- マウントを装着する前に、スケートボード エリアをきれいにして乾かしてください。
- フラット マウントから接着剤を取り除きます。
- フラット マウントを使用して、マウントをスケートボードの底に取り付けます。
- 台紙をテープで覆い、24 時間待って、台紙がスケートボードにしっかりと固定されるようにします。
- テープをはがします。
- マウントにカメラを取り付けます。
- さらに多くのテープを使用して、スケートボードの周囲とカメラの上にテープを巻き付け、カメラをさらにしっかりと固定します。
- テープがカメラのビューファインダーを塞がないことを確認してください。
このタイプのマウントを購入するには、ここをクリックしてください。
これは別のタイプのスケートボード マウントです。
3. サーフボード マウント
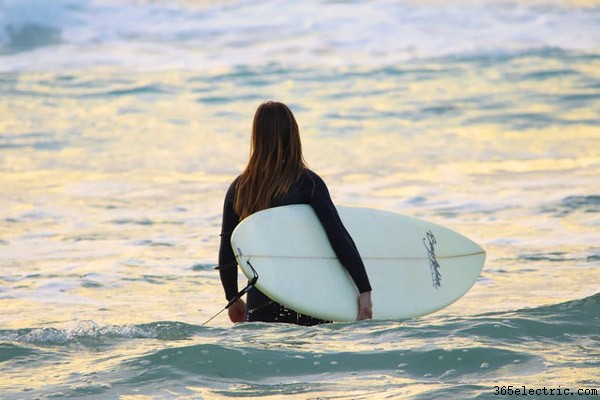
この取り付けには以下が必要です:
- アルコールベースの液体
- クリーニングクロス
- フラット マウント
- テザーピースをマウント
- つなぎ紐
- ロッキングプラグ
- つまみねじ
かなりシンプルなマウントです。あなたがしなければならないことは:
- ボードからワックスを取り除き、アルコール ベースの液体でその部分をきれいにします。
- 患部を完全に乾かします。
- 台紙の接着面から裏紙をはがします。
- マウントをボードに取り付けます。まっすぐにして、力を入れてください。
- マウント テザー ピースから粘着性の裏紙をはがします。
- テザー ピースをメイン マウントのカーブに配置します。圧力をかけます。
- テザー ピースにテザー ストリングを通し、ループに戻します。締めてください。
- アクション カメラ マウントを挿入します。
- ロック プラグをアクション カメラ マウント内のスペースに挿入します。
- テザー ストリングをアクション カメラ ハウジングに通します。
- ロッキング プラグの穴につまみネジを通します。
- 24時間放置
- サーフズ アップ!
このタイプのマウントを購入するには、ここをクリックしてください。
4. サッカー ゴール マウント
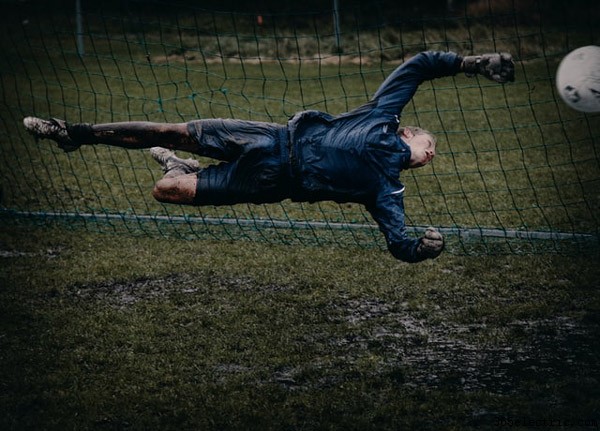
プロのサッカーの試合をテレビで見たことがありますか。 You know those goals where they show the ball going into the net and you are given a great view from the back of the net? Well, we’re going to show you how to achieve that with your action camera. For this, you will need a chest strap mount.
Stretch the strap on the chest mount to the back of the net.
Make sure you stretch the strap as tautly as you can across the net. This will help ensure stability for the camera.
You are going to want to check the angle of your camera to make sure you get the best view of the entire net.
To buy this type of mount click here.
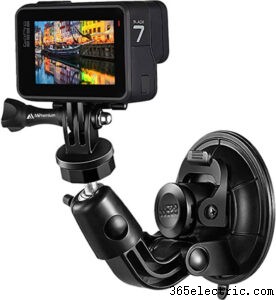
5. Car Mount
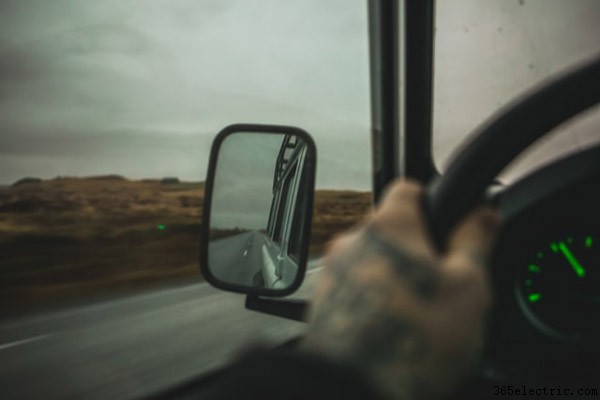
There are many different places to mount an action camera inside of your car. It really depends on what you want to pick up with your camera. For car mounting, we recommend using the suction cup mounting. You can also use a couple of extender bars to increase the angle of the camera. It’s stable and adheres well to the windshield or other areas of the car.
- As always, make sure the area where you will place the camera is clean and dry. An alcohol-based liquid and a clean rag will take care of this.
- To get the driver’s view on the camera, place the suction mount in the middle of the windshield below the rearview mirror.
- You may want to dampen the suction cup before placing it on the windshield, which will help the mount stick.
- To see where you’re going AND where you’ve been, place the suction mount on the passenger side window. Position it so that the camera will pick up both the sideview mirror as well as the view out of the passenger side seat.
- If you have a sunroof, try mounting the suction cup on the inside of the sunroof. With this, you can get a shot of the road as well as your dashboard. For this, you will also need some extender bars.
To buy this type of mount click here.
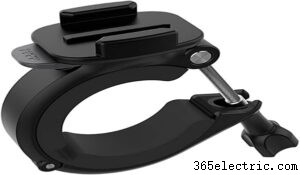
6. ATV/Boat Mount
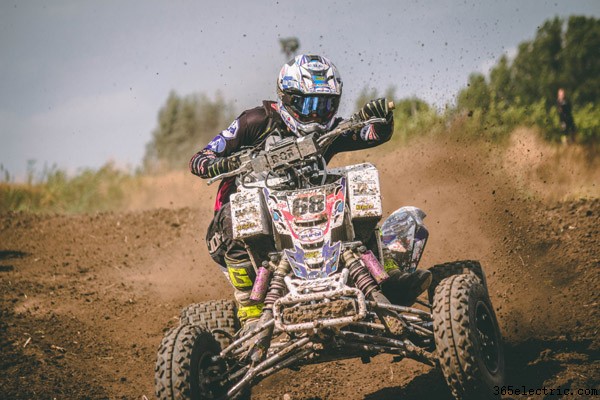
For a tires-eye view of the terrain, you can use a roll bar mount to put your camera directly on the lower part of an ATV grill or winch. The roll bar mount makes this very easy. To attach the roll bar mount, just follow these instructions:
- Unscrew both thumbnuts until the clamp is at a large enough diameter to fit the intended tubing.
- Remove bolt and thumbnut together from one open side.
- Place the clamp on your intended mounting location.
- Tighten both thumbnuts until clamp is secure.
- To mount the camera directly to the clamp, use one of the included pivot bars.
- Adjust your camera to your preferred angle.
- Tighten all mounting hardware so the camera is secure
There are many places you can place your roll bar mount besides an ATV. You can put it on dune buggy roll bars or boats, as well. Really, anywhere there is a round bar, and you want to take some video or photos, you can use the roll bar mount and an action camera to get the shot you need.
To buy this type of mount click here.
7. Wrist Mount
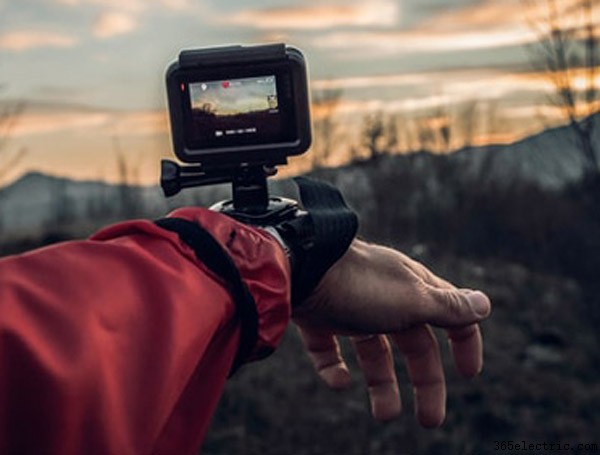
The wrist mount is a separate accessory for action cameras but you can use it to create some really great, hands-free shots. This is especially good for underwater activities such as scuba diving or snorkeling, as it is waterproof.
The strap on the wrist mount is adjustable so you can use it on different body parts besides the wrist. Use it on your arm or leg as well, if you want shots from that angle. It’s very adaptable, with a 360-degree rotation and tilt.
To attach the camera to the strap:
- Place camera in mount on strap.
- Use provided thumb screw to tighten camera onto mount.
To attach the strap to your hand:
- With the strap on your hand, adjust the strap on the thumb side first.
- These are velcro straps so all you have to do is pull and place to adjust the strap.
To attach the strap to your wrist:
- Take wrist strap and attach it by threading the strap through the rotating mount, hook side down.
- Place over your wrist and adjust your strap.
The wrist mount also comes equipped with an arm and leg strap. These can give you some different shots you wouldn’t ordinarily get.
To attach the strap to your arm or leg:
- Thread the arm and leg strap through the rotating mount.
- Wrap around your arm or leg and pull both straps until it tightens.
- Use the velcro to stabilize the straps.
The wrist strap is a versatile, hands-free way to take your favorite action shots.
To buy this type of mount click here.
8. Fishing Line Mount
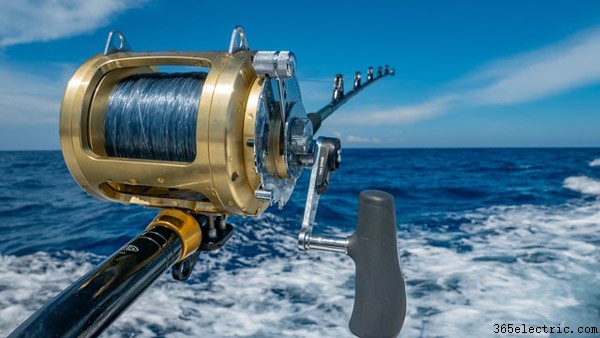
Want some cool underwater fishing video? We can help with that. For this, you will need some heavy-duty fishing line and a tool that allows you to string two action cameras together. One item you can use would be a Mule Mount and you can find those at the link below.
Use these DIY instructions to mount a camera to your fishing line:
- Take the floating back door off the action camera.
- Attach the camera to the mule mount using the thumb screws.
- Using the heavy-duty fishing line, run line through the Mule Mount.
- Put a weight on the other end of the line and Mule Mount.
- Add the fishing hook to the end of the line you ran through the Mule Mount.
- Go Fishing.
You’re going to want to be careful with this mount. Make sure everything is attached tightly. Do not go fishing in murky waters where you can’t see underwater. Do not go fishing where your line is liable to get tangled. With some consideration, you can take some great underwater video of fishing.
To buy this type of mount click here.
9. Dog Mount
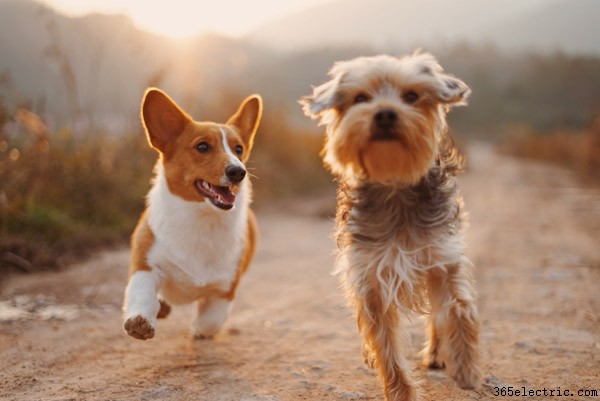
Do you wonder what your dog does when you’re not around? Does your dog get out of your yard and you want to see where he/she goes? Mount an action camera on your dog and find out what your pets do when they’re away from you.
For this mount, you can use an adjustable wrist mount:
- Thread the dog’s collar through the adjustable wrist mount straps.
- Tighten securely.
- Put collar on dog with camera facing on side of head.
- Make sure camera is away from dog’s ears.
With this mount, you should be able to follow your furry friend anywhere.
To buy this type of mount click here.
There is another new option for this now, its an actual dog mount! If you have the money for another mount, you can find it here.
10. Sword Mount
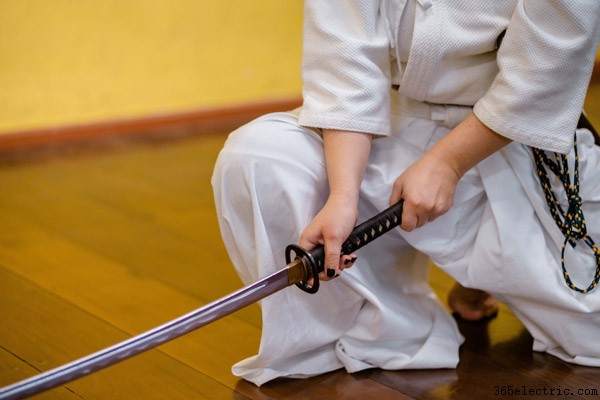
This is a really fun way to get some incredible footage or shots from the point of view of a sword. For this, you will need the wrist mount and an extender bar.
To attach the mount to the sword:
- Attach the camera to the extender bar.
- Attach the extender bar to the wrist mount.
- Using the wrist strap, wrap it around the hilt of the sword.
- Pull straps tightly to make sure the strap is secure.
- Fasten velcro.
This is for sword play, but you could feasibly use this on any type tool, such as:
- Axe
- Shovel
- Nerf Gun
- BB gun
- Bow
To buy this type of mount click here.
To get the extender bar click here.
Accessories You May Want
Your action camera probably came with only a couple of accessories. Standard action cameras usually only come with a mounting frame, buckle and a couple of mounts. You can absolutely use these for your camera in most situations. However, there are some other mounts on the market that can make your life easier:
Chest Strap Mount
Head Strap Mount
Handle Selfie Stick
Floating Hand Grip
Bike Handlebar Holder
Rotating Adjustable Wrist Mount
Removable Suction Cup Mount
Roll Bar Mount
You don’t necessarily have to have these different accessories, but it does make it easy to mount your action camera. We’ll go through these, so you know their use.
1.Chest Strap Mount

The chest strap mount is a harness strap belt that gives a steady recording at chest height. The belt is adjustable, and this is a one size fits most design. You can find this mount here.
2. Head Strap Mount
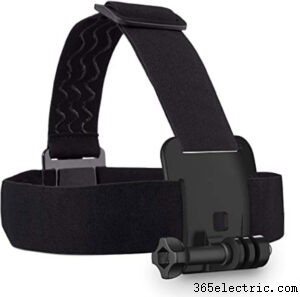
The head strap mount is a secure headband that wraps around your head for a steady shot or video. It keeps your camera in place and is good for sports like:
- Zip Lining
- Snorkeling
- Riding A Bike
Any sport where you need to use your hands would be acceptable for a head strap mount. You can find this mount here.
3. Handle Selfie Stick
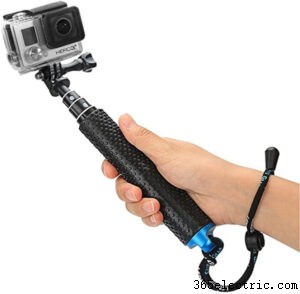
This stick is an extender pole that can extend up to 19 inches. It’s waterproof, so you could use it on a jet ski, and it works with all gopro mount cameras. You can find this mount here.
4. Floating Hand Grip
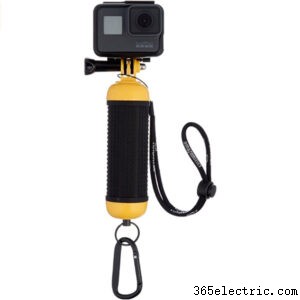
The floating hand grip is a great tool for underwater photography. Waterproof, it has a wrist strap design to keep the camera secure while you swim. You can find this mount here.
5. Bike Handlebar Holder
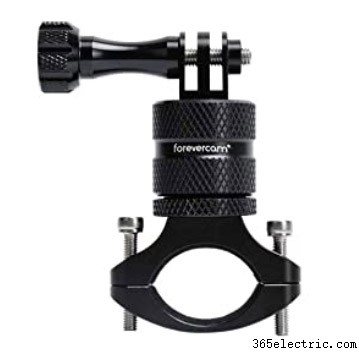
This nifty tool attaches to your bike’s handlebars. You place the camera on the mount and go for a ride. The camera does the rest. You can find this mount here.
6. Rotating Adjustable Wrist Mount
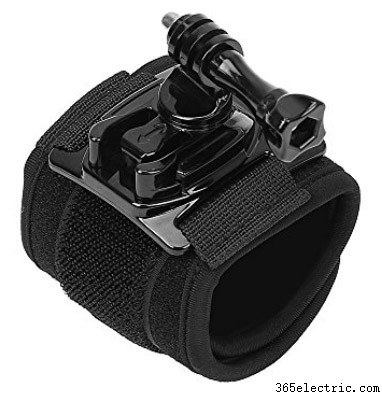
The wrist mount is a 360-degree rotating adjustable wrist mount. You can secure your camera flat against your wrist for easy convenience. It’s made for the wrist, but you can actually strap this to anything that will fit, including:
- Handlebars
- Arm
- Steering Wheel
You can find this mount here.
7. Removable Suction Cup Mount
With the suction cup mount, you can put your camera virtually anywhere suction can take hold. This includes:
- Windshields
- Helmets
- Dashboards
It’s very convenient and easy to move. You can find this mount here.
8. Roll Bar Mount
This mount fits around any bar from 1.4” to 2.5” so you can get some unusual perspective from your action video. It comes with full rotation for adjustability. Place it on a roll bar or any other bar to mount your camera in place. You can find it here.
Tips on Taking the Best Video
As much as we love our action camera, we don’t want video that is shaky or unwatchable. To combat that, we have some handy tips for using your action camera:
- Use a mount. This will stabilize the camera.
- Find a new angle. Don’t just go for the headshot. Strap your mount to your bumper, roll bar or anywhere else you can find for a new view.
- Don’t strap the camera to the top of the helmet. This will result in shaky video. Use the chin strap method instead.
- Use filters, like a red filter for underwater. This will help remove the blue-green colorcast underwater. Use neutral density filters in bright light. Experiment.
- Try out time-lapse shooting. Your action camera should have a time-lapse mode. This can create some unique shots to add to a video.
- Plan ahead. Think beforehand of what you want your video to look like and act accordingly.
We hope this handy guide on mounting an action camera was useful to you. For an article on shooting sports and fast action click the link.
Let us know in the comments if you have found any tricks for other types of mounts.