ベスト ブリッジ カメラ 2022
Bridge カメラは、オールインワン カメラを探しているユーザーにアピールする多くの便利な機能を提供します。野生動物の写真から旅行の写真まで、あらゆる種類のシナリオに適しています。
もちろん、市場にはさまざまなブリッジ カメラがあり、さまざまな価格帯でさまざまな機能を提供しています。
このガイドでは、ブリッジ カメラについて知っておくべきことをすべて共有し、最適なブリッジ カメラを選択できるようにします。ブリッジ カメラに関する質問にお答えし、ブリッジ カメラを購入する際に何を探すべきかを共有します。
また、現在市場に出回っている最高のブリッジカメラをリストしてレビューし、すべての予算に合うオプションを付けます.野生生物、低照度、または旅行写真用のブリッジ カメラを探しているかどうかにかかわらず、この投稿は決定に役立ちます。
この投稿のすべての内容は、プロの写真家としての私の経験に基づいています。私は 30 年以上写真を撮り続けており、その間、さまざまなカメラを使用していました。また、オンライン写真コースで写真を教えています。質問があれば喜んでお答えします。投稿の最後にあるコメントに入力してください。それでは、いくつかの質問に答えることから始めましょう。
ブリッジ カメラに関するよくある質問
カメラの仕様と個々のカメラの推奨事項に入る前に、ブリッジ カメラについてよく聞かれる質問をいくつか取り上げたいと思います.
ブリッジ カメラとは?
ブリッジ カメラは、コンパクト カメラとしても知られるほとんどのコンパクト カメラよりも多くの機能を備えたタイプのカメラですが、一般的に、デジタル一眼レフ (DSLR) のようなレンズ交換式カメラほど機能が豊富で複雑ではありません。 ) またはミラーレス カメラ。
これは、コンパクト カメラと DSLR のような機能豊富なカメラとの間の一種のブリッジとして機能するため、ブリッジ カメラとして知られています。
基本的に、ブリッジカメラは、望遠レンズを備えたデジタル一眼レフカメラに期待されるのと同じ種類の手動制御とズーム機能を提供するカメラを探している市場のギャップを埋めますが、簡単なオールインワンパッケージです。コンパクトカメラのように使用します。ブリッジ カメラは、バードウォッチング、一般的な野生生物、および万能のトラベル カメラとして特に人気がありますが、あらゆるタイプの写真に適しています。
ブリッジカメラは、レンズを取り付けた本格的なデジタル一眼レフカメラよりも一般的に小さいですが、見た目は非常に似ています。コンパクト カメラよりも大きいです。
ブリッジ カメラは、スーパーズーム カメラと呼ばれることもあります。これは、これらのカメラが持つことが多い巨大なズームに関連しています。実際、一部のブリッジ カメラのズームは、ハイエンドのデジタル一眼レフ カメラやミラーレス カメラに専用の望遠レンズを使用した場合でも達成できるズームをはるかに超えています。これについては、以下のズームに関するセクションで詳しく説明します。
ブリッジ カメラという用語はしばらくの間定着する可能性がありますが、スーパーズーム カメラは、他の何かへのブリッジというよりも、実際には独自のクラスに属しています。
ブリッジ カメラは私に適していますか?
良い写真が撮れるロングズームのオールインワンカメラを探しているなら、ブリッジカメラが最適です。
Bridge カメラはさまざまな価格で入手でき、使いやすく、スマートフォンのカメラやほとんどのコンパクト カメラと比較して撮影機能が向上しています。
ミラーレスカメラやデジタル一眼レフカメラのようにレンズを交換する必要はありません。ブリッジカメラに組み込まれているレンズは、あらゆる状況に対応できる汎用性の高いレンズです。つまり、レンズのバッグを持ち歩く必要なく、風景や建物の広角ショットを取得したり、遠くの細部や動物にズームインしたりできます。
ポケットに収まるカメラを探している場合、ブリッジ カメラは最適な選択肢ではありません。代わりに、いくつかのアイデアについてコンパクト カメラの推奨事項を確認してください。
ブリッジ カメラは旅行写真に適していますか?
特に旅行写真に関しては、1 つのレンズでさまざまなタイプの写真撮影状況に適しているため、ブリッジ カメラは優れたオプションです。旅行中は重量が問題になることが多く、ミラーレスカメラやデジタル一眼レフカメラにさまざまなレンズを詰め込むことは、必ずしも現実的な選択ではありません。
ブリッジカメラは、野生動物サファリやバードウォッチング旅行など、野生生物に焦点を当てた旅行に行く人々にとって特に人気のあるオプションです.ズームが長いため、専用のレンズやデジタル一眼レフのセットアップなどの膨大な重量を必要とせずに、遠くの被写体の写真を撮ることができます。
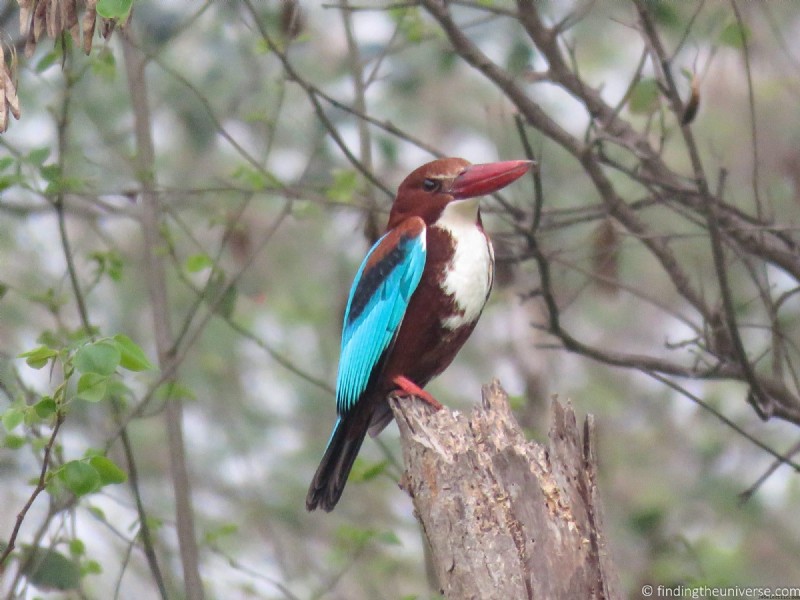
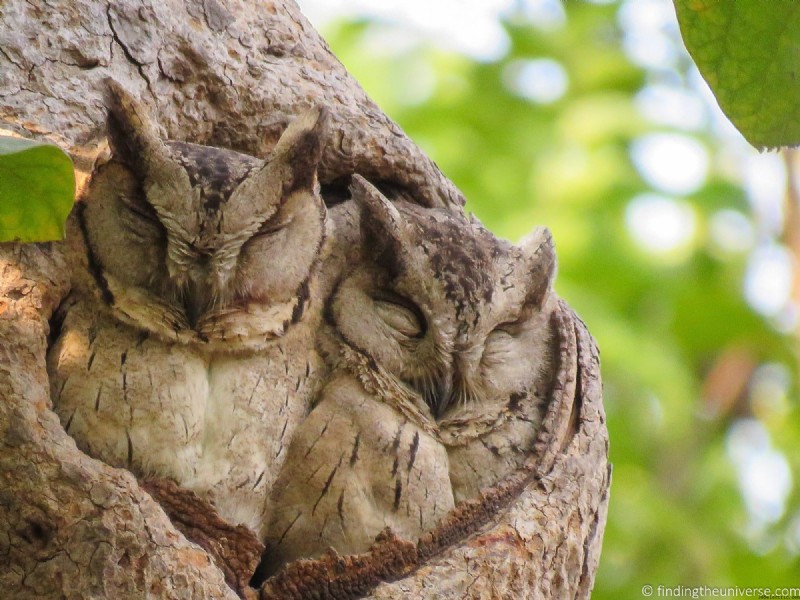
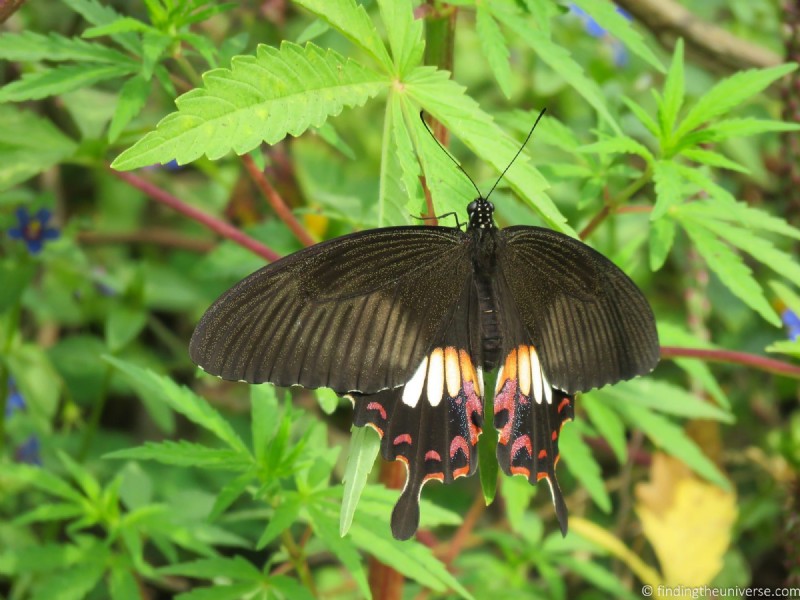
一例として、私の両親は最近、インドへの野鳥観察旅行に出かけました。彼らにとって、ブリッジ カメラは手頃な価格で完璧なツールでした。長いズームは、野生生物や鳥の素晴らしいショットを撮ることができることを意味し、広角は、美しい風景やその他のシーンを捉えることができることを意味しました.
また、ポケットに入れられるコンパクトなカメラも持っていましたが、ブリッジ カメラのおかげで、より多くのクローズアップ ショットを撮影し、必要に応じてより多くの手動制御を行うことができました。
彼らは、ほこりが多く、頻繁に移動する状況でレンズを交換するのに苦労したくありませんでした。また、長いズームが必要だったので、ブリッジカメラは彼らにとって素晴らしい選択でした.この投稿では、海外旅行の写真をいくつか使用して、ブリッジ カメラでできることの例を示しました。
サファリに出かける場合は、最高のサファリ カメラのガイドと、素晴らしいサファリ写真を撮るためのヒントをチェックしてください。

ブリッジ カメラ vs スマートフォン
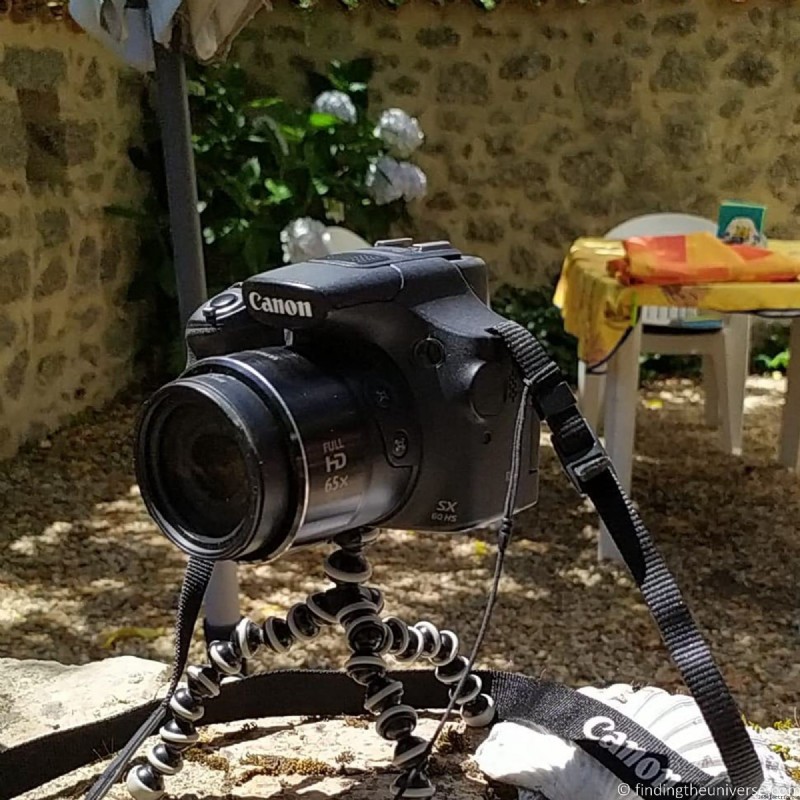
スマートフォンと比較すると、ブリッジ カメラははるかに大きいです。写真からわかるように、ブリッジ カメラの形状は、従来のカメラの外観を想像する方法に似ているため、ポケットには収まりません。
ほとんどのスマートフォンのカメラには、ズームがないか、ズーム機能が非常に限られています。ブリッジカメラは、長いズームと、スマートフォンよりも多くの手動制御を備えています。これは、ブリッジ カメラを使用すると、遠くの被写体の鮮明な写真を簡単に撮影できることを意味します。
ブリッジカメラは、スマートフォンのカメラよりもセンサーが大きいため、暗い場所でのパフォーマンスが向上します。専用のカメラであるため、スマートフォンを 1 日のうちに他の多くのタスクに使用するため、通常、バッテリー寿命もスマートフォンよりも長くなります。
ブリッジ カメラ vs コンパクト カメラ
ブリッジ カメラとコンパクト カメラには多くの共通点がありますが、いくつかの重要な違いもあります。また、小型のブリッジ カメラと大型のコンパクト カメラの境界線が少しぼやけていて、一部のブリッジ カメラがコンパクト カメラとしてラベル付けされている場合もあります。
まず、類似点。センサーサイズは通常、ブリッジカメラとコンパクトカメラの両方で似ています。低価格のコンパクト カメラとブリッジ カメラには 1/2.3 インチ センサーが付属していますが、より高級なブリッジ カメラとコンパクト カメラにはより大きな 1 インチ センサーが付属しています。このガイドでは、センサーのサイズとそれが画像に与える影響について詳しく説明します。
また、コンパクトカメラもブリッジカメラも一体型なので、レンズ交換はできません。
違いに関しては、主な違いはサイズです。ブリッジ カメラは、突き出たレンズとハンド グリップを備えた小さなデジタル一眼レフに似ており、コンパクト カメラよりも大きくなっています。コンパクト カメラはトランプの大きなパックのような形をしているため、ポケットに入れたり、財布やバッグに簡単に入れたりできます。
ほとんどのブリッジ カメラには一連の手動制御が付属していますが、よりプレミアムなコンパクト カメラのみが手動制御を備えています。
ほとんどのブリッジ カメラは写真用の RAW ファイル形式をサポートしていますが、プレミアム コンパクト カメラのみが手動制御を備えています。
コンパクトカメラとブリッジカメラの最大の違いはズーム機能です。ブリッジ カメラは物理的に大きいため、より大きなズームに対応できます。一部のコンパクト カメラはより長いズームを備えていますが、ブリッジ カメラは高品質の長いズームに適合し、遠くの被写体を捉えるのに最適です。
コンパクト カメラに興味がある場合は、旅行に最適なコンパクト カメラのガイドと、コンパクト カメラの使用ガイドをご覧ください。
ブリッジ カメラ vs ミラーレス カメラ
多くの点で、ブリッジ カメラはミラーレス カメラの前身でした。ブリッジ カメラには、DSLR のように内部にミラーがありません。つまり、ミラーレス カメラのように、光学ファインダーはありません。
ブリッジ カメラもミラーレス カメラと同様のサイズですが、どちらのタイプのカメラにもさまざまなサイズがあります。
ミラーレスカメラとブリッジカメラの主な違いは、ミラーレスカメラではレンズを交換できることです。ミラーレス カメラには交換可能なレンズがあるため、カメラのセットアップの柔軟性と選択肢が大幅に広がります。
ただし、非常に長いズームが必要な場合は、長いズーム レンズを備えたハイエンドのミラーレス カメラでさえ、一部のブリッジ カメラのズームに対応できないため、ブリッジ カメラを使い続けることをお勧めします。
もう1つの主な違いはセンサーサイズです。ミラーレスカメラは、ブリッジカメラよりもセンサーが大きくなっています。ブリッジ カメラには 1/2.3 インチ センサーまたは 1 インチ センサーが搭載されていますが、一般的なミラーレス カメラには一般的に APS-C サイズのセンサーまたはフル フレーム センサーが搭載されています。
ミラーレス カメラのセンサーはより大きく、特に暗い場所でのパフォーマンスが向上します。
ただし、これら 2 つの違いを除けば、ブリッジ カメラとミラーレス カメラはコントロールと機能の点でかなり似ており、どちらも通常は完全な手動コントロールと RAW サポートを提供します。
ミラーレス カメラに興味がある場合は、旅行に最適なミラーレス カメラのガイドと、ミラーレス カメラの使用ガイドをご覧ください。
ブリッジカメラ vs DSLR
ブリッジ カメラは、もともとデジタル一眼レフ カメラへの一種の足がかりとして発売されました。 DSLR カメラと同じ機能をいくつか提供しながら、コンパクト カメラのように簡単に使用できるようにすることを目的としていました。
したがって、ブリッジ カメラと DSLR には多くの類似点があり、重要な相違点もいくつかあります。
類似点は、ほとんどのブリッジ カメラが DSLR とかなり似たコントロールを提供し、手動から完全自動までの範囲の撮影モードがあることです。シャッター速度、ISO、絞りなどの主要な設定を調整することも、必要に応じて自動に設定してオートフォーカスのように使用することもできます。
形状とサイズも似ており、ほとんどのブリッジ カメラは小型のデジタル一眼レフに通常のレンズを取り付けた形状に似ています。平均して、ブリッジ カメラは、レンズを取り付けた DSLR よりも小さく、重さも軽いですが、もちろんこの規則には常に例外があります。
もちろん、いくつかの違いがあります。まず、DSLR のようにブリッジ カメラのレンズを交換することはできません。したがって、取り付けられたレンズの機能に制限されます。
また、ブリッジカメラには内部にミラーがないため、光学ファインダーはありません。代わりに、ビューファインダーに目を向けたときに見えるのは、ミラーレス カメラで見られるのと同じ小さな電子ディスプレイです。
この電子ディスプレイは、特定のブリッジ カメラによって品質が異なり、このディスプレイへの電力供給にはバッテリーが使用されます。その結果、ブリッジ カメラのバッテリー寿命は通常、DSLR のバッテリー寿命よりも短くなります。一般に、DSLR カメラは、どのカメラ タイプよりもバッテリー寿命が長くなります。
最後に、DSLR カメラはブリッジ カメラよりも大きなセンサーを備えています。これはミラーレスカメラと同じです。ブリッジ カメラには 1/2.3 インチ センサーまたは 1 インチ センサーが搭載されていますが、コンシューマー向け DSLR カメラには APS-C サイズのセンサーまたはフル フレーム センサーが搭載されています。
DSLR カメラに興味がある場合は、旅行に最適な DSLR カメラのガイドと、DSLR カメラの使用ガイドをご覧ください。
ブリッジ カメラの利点
ブリッジ カメラには、トラベル カメラとして人気を博す多くの機能があります。
まず、ほとんどのブリッジ カメラは、通常少なくとも 40 倍の光学ズームである印象的なズーム機能を提供します。 120 倍以上の光学ズームに対応するものもあります。 DSLR またはミラーレス カメラで同等の光学ズームを取得するには、3000 mm レンズが必要です!
ほとんどの DSLR およびミラーレス カメラ レンズの上限は約 500 mm で、一部のオプションは 800 mm で利用できることを考えると、多くの写真家が遠くの被写体を撮影するためにブリッジ カメラを好む理由がすぐにわかります。特に、野生動物の写真や月の写真は、ブリッジ カメラを所有する一般的な理由です。
また、DSLR やミラーレス カメラの焦点距離が長いレンズは、重くてかさばる傾向があります。それに比べて、ブリッジ カメラははるかに軽く、コンパクトで、持ち運びが簡単です。
例を見て、私の言いたいことを見てみましょう。以下で取り上げるSony RX10 IVは、20-600mmレンズを搭載したブリッジカメラです。重さは 1.1kg / 2.4lbs で、ブリッジ カメラとしてはかなり重いです。
デジタル一眼レフで同様の倍率を得るには、シグマ 150-600mm など、重さが 2kg (4.4 ポンド) のものを購入する必要があります。また、広角で撮影するブリッジ カメラの全範囲をカバーするわけではありません。さらに、DSLR カメラ本体の重量を考慮する必要があります。別の広角レンズとカメラ本体を追加すると、重量が 4kg (9 ポンド) を超えるキット バッグになる可能性があります。
ブリッジ カメラの重量の利点は明らかだと思います。
ほとんどのブリッジ カメラには手ぶれ補正機能も備わっていますが、これは他のカメラではまだ標準ではありません。ブリッジカメラの超長距離ズーム機能は小さな動きを誇張する傾向があるため、これは必要ありません.
これを補うために、ほとんどのブリッジ カメラには何らかの画像安定化機能が搭載されています。カメラはオールインワン ユニットであるため、メーカーはこれをカメラ システムに簡単に組み込むことができます。
ブリッジ カメラのもう 1 つの利点は、通常、完全な手動制御が付属していることです。つまり、カメラのすべての設定を制御できます。これは、必要なショットに合わせてカメラを調整できることを意味します。これは、より高価なオートフォーカスカメラには手動機能が含まれていますが、多くのオートフォーカスカメラよりも確実に有利です.
ほとんどのブリッジ カメラでは RAW での撮影も可能なため、写真の編集に関しては、最終的な画像をより細かく制御できます。
最後に、ブリッジ カメラは、ほとんどの場合、同様に指定された DSLR またはミラーレス カメラよりも手頃な価格です。ただし、すべてのタイプのカメラと同様に、ブリッジ カメラは機能と仕様に応じてさまざまな予算で提供されます。
ブリッジ カメラの短所
ブリッジカメラには多くの利点がありますが、多くの欠点もあります。もちろん、これらが重要かどうかは、カメラに何を求めているかによって異なります。
ブリッジカメラの主な欠点は、センサーのサイズです。センサーは、画像をデジタル ファイルとして記録するカメラの一部であり、現代の古いカメラのフィルム ロールに相当します。
センサーの物理的なサイズは、カメラの機能に直接影響します。ミラーレス カメラや DSLR カメラに見られるような大型のセンサーは、シーン内のより多くの光を捉えることができるため、利用できる光が少ない場合でもより良い画像を生成します。
これは、夕方、夜間、または屋内では、通常、ブリッジ カメラはミラーレス カメラや DSLR ほど良い画像を生成しないことを意味します.
センサーが小さいほど、メーカーはカメラに長いズームを入れることができますが、利用できる光が少ない場合はうまく機能しません.ポイント アンド シュート カメラと比較して、ブリッジ カメラの物理的なサイズは大きくなりますが、センサーのサイズは同じです。
ブリッジ カメラのもう 1 つの問題は、通常、ズームインするほど画質が低下することです。これは物理的な現実ですが、同等の DSLR セットアップと比較したブリッジ カメラの価格については、ほとんどのユーザーが喜んで妥協します。作る。センサーが受け取る画像の品質に関連するオートフォーカスの速度も、ズームインすると遅くなる可能性があります。
全体として、すべてのカメラシステムには、重量、価格、画質、機能など、何らかの妥協点があります。主なことは、写真家として何が重要かを判断し、自分に合ったカメラ システムを見つけることです。
旅行用にブリッジ カメラを購入する際の注意事項
個々のブリッジ カメラの推奨事項に入る前に、ブリッジ カメラを購入する際に注目すべきいくつかの主要な仕様と機能を共有したいと思います.
このセクションの目的は、要件に基づいて適切なブリッジ カメラを選択できるようにすることです。これは、推奨されるオプションの 1 つになる場合とそうでない場合があります。
センサーサイズ
前述のように、カメラのセンサーは最も重要なコンポーネントの 1 つです。センサーはカメラに入る光に反応し、後で表示できる画像ファイルとして保存します。
カメラ内のセンサーのサイズは、カメラの性能に直接影響します。センサーが大きいほど、より多くの光を取り込むことができるため、利用できる光が少ない場合でも高品質の画像を撮影できます。
レンズの開口部の幅やシャッター速度など、カメラセンサーに当たる光の量に影響を与える要因がいくつかあることに注意してください。これら 2 つの変数と、それらが画像にどのように影響するかについて詳しくは、露出トライアングルのガイドをご覧ください。
ズーム距離が長くなると、センサーに当たる光の量も減少する傾向があります。
もちろん、センサーが小さいことには利点があります。センサーが小さいほど大きなレンズは必要ありません。これが、ブリッジ カメラがこのような印象的なズーム レンズを比較的コンパクトなボディに収めることができる理由の 1 つです。さらに、センサーが小さいほど、一般的にカメラ本体が小さくなります。
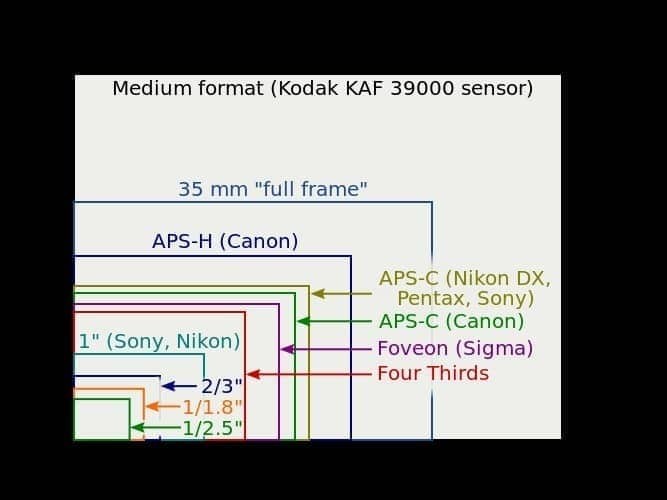
ブリッジカメラの場合、センサーサイズは 1/2.3 インチと 1 インチの 2 種類から選択できます。これらのサイズは、センサーの面積に関連しています。 1/2.3 インチのセンサーは幅約 6mm、高さ 5mm で、1 インチのセンサーは幅約 13mm、高さ 9mm です。
これは、実際には 1 インチ センサーの面積が 1/2.3 インチ センサーの約 4 倍であることを意味し、暗い場所でのパフォーマンスが向上することを意味します。ただし、それに対応するには、物理的に大きなレンズとカメラ本体も必要になります。したがって、ニーズに応じて、両方のセンサー サイズに長所と短所があります。
ブリッジカメラの購入に関しては、通常、センサーサイズが大きいほどプレミアムで高価なモデルが見られますが、センサーサイズが小さいほど低価格のモデルが見られます.また、非常に長いズーム オプションは、小さいセンサー サイズでのみ可能であることに注意してください。これについては、以下のズーム長に関するセクションで詳しく説明します。
これは、比較するさまざまなセンサーサイズの画像です。このことから、フル フレーム センサーがはるかに大きく、実際には 1/2.3 インチ センサーの 30 倍の領域を提供することがわかります!
メガピクセル
カメラセンサーは光に敏感なピクセルで構成されており、各センサーには固定数のピクセルがあります。このピクセル数は通常メガピクセルとして表され、「メガ」は百万を意味します。
たとえば、12 メガピクセルのカメラ センサーには 1200 万個のピクセルがあります。アスペクト比が 4:3 であるとすると、画像ファイルは幅 4000 ピクセル、高さ 3000 ピクセルになります。高さと幅を乗算すると、合計数が得られます。つまり、カメラによって生成される画像ファイルは 1,200 万ピクセルになります。
ほとんどのソーシャル メディアや Web サイトでの使用では、12 メガピクセルを超えるファイル サイズであれば問題ありません。 A3 までの印刷サイズの場合、20 メガピクセルで十分です。より大きなメガピクセル数が必要になるのは、はるかに大きな画像の印刷を開始する場合、または画像を大量にトリミングする予定がある場合のみです.ほとんどのブリッジ カメラでは、ズームは十分であり、クロッピングはあまり必要ありません。
カメラ センサーのメガピクセル数もパフォーマンスに影響します。同じサイズのセンサーの場合、メガピクセルの数が少ないほど、実際には各ピクセルが大きくなるため、より多くの光を取り込むことができます。これが、近年、多くのスマートフォン メーカーが 12MP を適切な量として決定している理由です。これは、ほとんどの用途に十分な大きさの画像を提供しながら、妥当な低照度性能を提供します。
プロが大判印刷や極端なトリミングのために必要とするハイエンドのフルフレームカメラ以外では、通常、はるかに高いメガピクセル数は不要です。ブリッジ カメラを購入するときは、12 ~ 20 メガピクセルの範囲を探すことをお勧めします。
光学ズーム/焦点距離
次に、ブリッジ カメラの非常に興味深い機能であるズーム機能について説明します。
写真用語では、レンズには焦点距離と呼ばれる仕様があります。これは mm 単位で測定されます。焦点距離 (mm) が大きいほど、倍率が大きくなります。焦点距離が短いほど、倍率は低くなります。
レンズが「ズーム」レンズである場合、これは、ある焦点距離から別の焦点距離まで倍率を変更できることを意味します。たとえば、24mm – 70mm ズーム レンズは、24mm からわずかに拡大された 70mm までの比較的広角で撮影できます。
参考までに、フルフレームセンサーを搭載したカメラでは、焦点距離 50mm は人間の視覚とほぼ同じです。 50mm レンズを備えたデジタル一眼レフ フルフレーム カメラを通して見ると、シーンはカメラを使用していない場合と同じように見えます。 50mm 未満に「ズームアウト」すると、シーンは遠くに見えますが、50mm を超えて「ズームイン」すると、シーンは近くに見えます。
焦点距離は必ずしも誰にとっても明らかではないため、固定レンズを備えたカメラでは、代わりに光学ズーム仕様として知られるものを使用することがよくあります。
このシステムを理解することは非常に重要です。なぜなら、カメラを比較する際に混乱を招き、光学ズームに関する誤った仮定につながる可能性があるからです。
光学ズームは、最も広い焦点距離と最も狭い焦点距離の差です。
たとえば、Nikon Coolpix P1000 には 24mm ~ 3000mm のレンズが搭載されています。 3000 を 24 で割ると 125 になります。つまり、このレンズは 125 倍の光学ズームを備えています。
これは、レンズがオブジェクトを目で見るよりも 125 倍大きくするという意味ではないことを理解することが重要です。代わりに、最短の焦点距離と最長の焦点距離の差が 125 の倍数であることを意味します。
異なるカメラの最大倍率を比較したい場合は、レンズの最大焦点距離を調べてください。私が推奨するすべてのカメラについて、これをリストアップしています。
たとえば、Panasonic Lumix FZ80 の焦点距離は 20mm ~ 1200mm (光学ズーム 60 倍) で、Sony Cybershot HX400V の焦点距離は 24mm ~ 1200mm (光学ズーム 50 倍) です。
ご覧のとおり、どちらのカメラも実際には 1200mm 端で同じ倍率を提供するため、両方を完全にズームインすると、倍率に関して同じ結果が得られます。
ただし、光学ズーム倍率 60 倍と 50 倍を単純に比較すると、FZ80 の方が倍率が高いと考えるかもしれません。
代わりに、ズームアウトするとわずかに広角になるだけなので、広角端でより多くのショットを撮影できます.
焦点距離を実際の倍率に換算すると、1倍は約50mmに相当します。つまり、100mm は 2 倍、150mm は 3 倍などです。倍率は、最大焦点距離を 50 で割るだけです。参考までに、優れた双眼鏡の倍率は通常 8 倍から 12 倍です。
人々がブリッジ カメラに投資することを選択する理由の 1 つは、比較的小さくポータブルなパッケージに優れたズーム機能があることです。これにより、ブリッジ カメラは特に野生動物の写真撮影に最適です。
私のお勧めは、12 倍の倍率に相当する少なくとも 600mm の焦点距離を提供するカメラに投資することですが、最近ではもっと高くすることもできます。常に妥協点があり、極端な焦点距離では画像のシャープネスが低下する傾向があることに注意してください.
さらに、非常に長いズーム距離は、センサー サイズが小さいカメラでしか利用できない傾向があります。
光学ズームで考える場合、焦点距離範囲によって異なりますが、25 倍の光学ズームが出発点として適しています。ただし、購入を決定する際は、光学ズームではなく実際の焦点距離範囲を必ず確認してください。
最大絞り
絞りは、光をセンサーに通すためのレンズの内側の開口部です。目の瞳孔のようなものと考えることができます。光量が少ないと瞳孔が大きくなり、光量が多いと瞳孔は小さくなります。
これはレンズと同じです。利用可能な光に応じて絞りのサイズが増減します。これは、画像の明るさを調整するために必要な 3 つの主要なコントロールの 1 つです。これら 3 つのコントロールについて詳しくは、露出トライアングルのガイドをご覧ください。
口径は「f」定格で測定されます。これは、文字「f」の後に数字が続く形で表されます。たとえば、f/2.8、f/4.0。 「f」の後の数字が小さいほど、絞りは大きくなります。
多くのレンズには可変絞りと呼ばれるものがあります。これは、カメラが被写体にズームインするにつれて、最大絞り値が減少することを意味します。たとえば、レンズの絞りが f/2.8 ~ 6.3 の場合があります。つまり、最も広角では最大絞りが f/2.8 になり、ズームインすると最大絞りは f/6.3 になります。
絞りが小さくなると、レンズを通過してセンサーに到達する光が少なくなります。そのため、レンズのサイズと重量と最大口径との間には常にトレードオフがありますが、一般的には口径が大きいほど優れています。
原則として、レンズで利用できるズームが長いほど、最大口径は狭くなります。
レンズには、穴が開く最小の最小口径もありますが、これは仕様としてはそれほど重要ではなく、ほとんどの場合、あまり心配する必要はありません.
ブリッジ カメラを選択する際は、広角で少なくとも f/2.8 の最大口径を持つカメラを選択することをお勧めします。
また、特に同様の仕様のカメラを比較する場合は、完全にズームインしたときの最大絞りにも注意してください。焦点距離全体で開口部が広いほど、センサーに到達する光が多くなり、最終結果が向上します。
手ぶれ補正
画像安定化は、カメラが手の微動を補正して、きれいでシャープな画像を確保する技術です。
手ぶれ補正技術は、動きを補正するモーター付きのフローティング レンズ エレメントから、ジャイロスコープに取り付けられたセンサーまで、さまざまな方法で機能します。
暗い場所で撮影する場合、十分な光が入るようにカメラのシャッター スピードを遅くするのが一般的です。ただし、カメラを手で持っていてシャッター スピードが遅すぎると、画像が乱れることがあります。手を完全に静止させることができないため、ぼやけて出てきます。
カメラを手で持つと、画像がぼやけることなくシャッター速度をどれだけ速くできるか疑問に思うかもしれません。一般的な経験則として、シャッター速度は少なくとも焦点距離の逆数と同じくらい速くする必要があります.
複雑に聞こえるかもしれませんが、心配はいりません。つまり、たとえば焦点距離 60mm で撮影する場合、シャッター スピードは 1/60 秒以上にする必要があります。 2000mm の焦点距離で撮影する場合、1/2000 秒以上のシャッター速度が必要です。
カメラに画像安定化機能がある場合は、これらの数値を減らすことができます。たとえば、カメラは 4 ストップの画像安定化機能を備えていると主張する場合があります。つまり、シャッタースピードを 4 倍遅くすることができます。たとえば、1/2000 秒から 1/125 秒にすることができます。基本的に、2000 を 4 回半分にして 125 にします。
ほとんどのカメラ メーカーは、手ぶれ補正が提供する手ぶれ補正のストップ数に関する情報を提供します。ブリッジ カメラの場合、最低でも 4 ストップをお勧めします。そうしないと、三脚を使用しない限り、より長い焦点距離で鮮明な画像を取得するのに苦労します.
価格
結局のところ、予算は、適切なカメラを選択する際の主要な要因の 1 つになる可能性があります。他のタイプのカメラと同様に、市場にはさまざまなブリッジ カメラがあり、価格は数百ドルから千をはるかに超えるものまでさまざまです。
価格に影響を与える主な要因は、レンズ内のセンサーのサイズ、レンズの最大口径、最大ズームです。
一般的に、予算モデルは約 250 ドルから 400 ドル、ミッドレンジ モデルは 500 ドルから 900 ドル、ハイエンド モデルは 1000 ドルを超えます。 $500 ~ $900 のスイート スポットで、ほとんどのユーザーのニーズを満たす優れたカメラを手に入れることをお勧めします。
より安価なモデルを探している場合は、古いバージョンを探し回ることをお勧めします。 Bridge カメラは 2005 年から市場に出回っており、過去 3 ~ 5 年間にリリースされたカメラはどれも妥当な選択肢である可能性が高いです。
中古カメラを購入することでお金を節約することもできます。掘り出し物を手に入れるには、お気に入りの場所で中古カメラを購入するためのガイドを参照してください。
サイズと重量
ブリッジカメラのサイズと形状はかなり似ていますが、すべてが同じというわけではありません。より大きな 1 インチ センサーとより広い開口部を備えたカメラは、通常、そうでないカメラよりも大きく、重くなります。
場合によっては、これらの大きなブリッジ カメラは、小さなミラーレス カメラや DSLR よりも大きくなります。 However, if you compare a large bridge camera with a DSLR or mirrorless camera equipped with a large telephoto zoom lens, then the bridge camera will invariably be smaller and lighter.
Weight varies, but expect it to be from around 600g (1.3lb) through to 1100g (2.4lbs). Obviously, a lighter camera will be easier to carry around and slip into a bag, whilst a heavier camera is going to be bulkier and more weighty to carry around all day.
RAW / Manual Controls
One of the nice features about bridge cameras is that they usually come with more manual controls than most point and shoot cameras, with the exception of some high end point and shoot cameras.
This means you get more control over the camera, and can control settings like aperture, ISO, and shutter speed. This gives you a lot more creative options, and as you learn more about photography, means you’ll be more likely to get the shots you really want to get.
In addition, most bridge cameras that we are aware of also allow you to shoot in RAW. This is a file format where all the image information is saved to the memory card, and which gives you lots of more options for editing your photos compared to JPG.
You can see more about why you should shoot in RAW here. We’d definitely recommend a camera with manual controls and the ability to shoot in RAW.
Video Features
Whilst this guide is focused on bridge cameras for photography, we can’t ignore the fact that pretty much every camera on the market today also offers support for shooting video.
If you think you will also be using your camera for video, then you will want to check what video features it offers. These will include support for different resolutions and frame rates, as well as support for things like external microphones.
You will also want to check what sort of focus features are available when shooting video. It is usually important for example that the camera can automatically track a moving subject when shooting video, so as to avoid out of focus moments.
We’d generally recommend the camera supports shooting at a resolution of 1080p where possible, which is the high definition standard. Newer more powerful cameras may also support 4K resolutions, although if this is something you want then a more video focused camera like the mirrorless Lumix GH5 might be a better option.
Connectivity Features
Most cameras these days offer a range of connectivity options, usually including WiFi and/or Bluetooth.
These wireless protocols allow you to do a number of things with your camera, such as control it remotely via an app and transfer files without needing to worry about wires or memory card readers.
This isn’t necessarily a make or break feature, but I love being able to wirelessly control my cameras from my smartphone, so this is a feature I do look for in a camera.
Battery Life
Every camera on the market requires power to make it work, which means there’s a removable and rechargeable battery which makes the magic happen.
Cameras are all given what is known as a CIPA rating for battery life, which will tell you how many photographs the camera will be able to take on a full battery. The CIPA rating tests the battery life of different cameras in the same conditions, which makes it easier to compare cameras against each other.
A bridge camera usually has quite a large rear screen as well as a electronic viewfinder. Both of these require a fair amount of energy to power, as do other features like the image stabilization.
We would say that a poor battery life for a bridge camera would be less than 200 shots per charge, average would be 200 – 400, whilst any camera that lasts for more than 400 shots on one battery is doing well.
Of course, different setups and situations will result in different real world performance, but as a general rule we’d suggest trying to get a camera that can shoot more than 300 shots on a single battery. We’d also always recommend traveling with at least one spare battery.
Weather / Dust Sealing
We’re coming towards the end of the features to look out for when purchasing a bridge camera. One feature that you may or may not find useful, depending on your needs, is weather and dust sealing.
A weather sealed camera will provide some measure of protection from water and dust. This latter is particularly important in a bridge camera, as you can’t easily take it apart to clean it as you can with a mirrorless or DSLR camera.
It should be noted that weather sealing is not the same as a camera being waterproof. You still won’t be able to submerge your camera in the water without a special waterproof housing. If you are looking for a camera that works underwater, see our guide to the best action cameras.
Instead, weather sealing just provides some piece of mind that you don’t have to worry too much if your camera gets a bit wet during a rain shower. It’s a good idea if you are buying a camera for hiking and backpacking for example.
We’d generally advise buying a camera with some weather-sealing if possible, although this is usually a feature that is only available on more premium models.
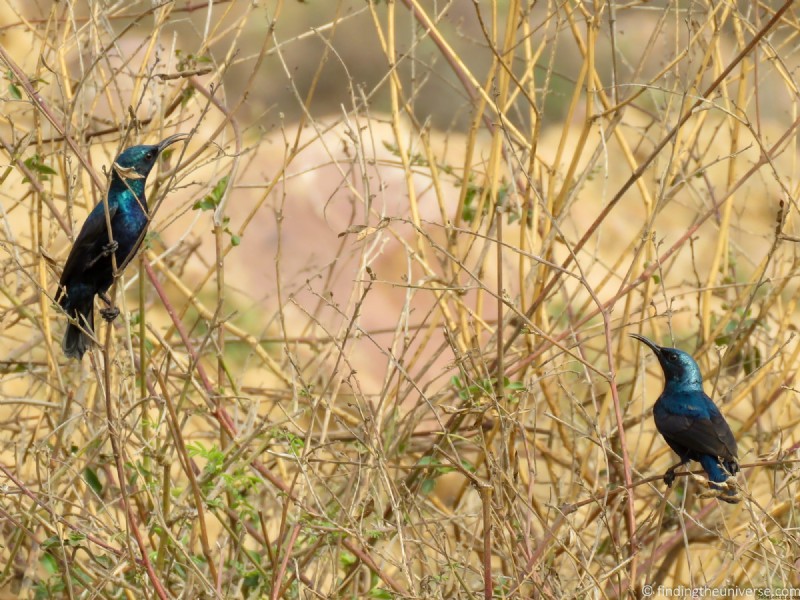
Image Burst Speed
The burst speed of a camera tells you how many pictures the camera can take in quick succession. This is important particularly for action photography, where the exact moment you want to capture might happen in a split second.
Burst speed is measured in the number of images that the camera can capture per second, and will usually vary from a slower number like three frames per second, up to a much faster ten or even twenty frames per second.
Even if you don’t plan on taking a lot of action photos, the burst speed of a camera is a useful number to be aware of because it also indicates how powerful the technology inside the camera is. A higher burst rate indicates a more powerful camera, whilst a lower burst rate suggests a less powerful camera.
We’d generally recommend aiming for a camera that can do at least 5 images per second if possible.
The Best Bridge Camera for Travel Photography
Now we’ve covered everything you need to look for in a bridge camera, let’s go through some of our favourite bridge cameras on the market today. This list is approximately ordered by price from low to high.
However, do be aware that camera prices vary over time, and there are often promotions, so we always recommend checking prices at a few retailers before making a purchase decision.
パナソニック ルミックス DC-FZ80 / FZ82
When you think of a bridge camera, a Panasonic may come to mind. This is hardly surprising, as Panasonic have been launching large zoom cameras under the Lumix FZ brand since the DMC-FZ18 in 2007.
The Panasonic Lumix DC-FZ80 (FZ82 in Europe) was launched in March 2017. It’s also the lowest priced option in our bridge camera round-up, although there’s still lots here to impress.
You get an image-stabilized 20-1200mm (60x) lens which offers around five stops of stabilization.これは、4K ビデオもサポートする 18.1 メガピクセルの 1/2.3 インチ センサーと組み合わされています。
The screen on the back is unfortunately fixed, but it is touch enabled. The camera is also WiFi enabled, and is a lightweight 616g (21.7oz). There’s no weather sealing, although that isn’t a surprise at this price point.
主な仕様 :20-1200mm (60x) 焦点距離、f/2.8-5.9 絞り、10 画像/秒、18.1 メガピクセル 1/2.3 インチ センサー
体重 :616g / 21.7oz
バッテリー寿命 :330枚
価格 :Amazon の最新価格はこちら、B&H はこちら、Adorama はこちら
Panasonic Lumix DMC-FZ300 / FZ330
The Panasonic Lumix DMC-FZ300 (FZ330 in Europe) was launched in 2015, so it is obviously getting on a bit now. However, its age means you can pick it up for a bargain, which is why we’ve included it in this round up.
For your money, you still get a lot of camera. It comes with a 25-600mm (24x) optical zoom lens which is stabilized and offers around 3 stops of stabilization. It also offers a fast f/2.8 aperture at all focal lengths, which is excellent.
Speed wise the camera can shoot at 6 images per second with autofocus enabled, or 12 frames per second when the focus is locked.
There’s a 3-inch tilting touch enabled LCD display as well as an OLED powered viewfinder. You also get 4K video support which is impressive given the age of the camera, and it’s both splash and dustproof. There’s also WiFi connectivity and a companion app.
The main drawback of this camera is that the 1/2.3″ sensor is only 12 megapixels. Whilst this will be fine for social media and small prints, it’s not large enough for larger prints.
Still, overall this is still a great bridge camera option, especially for the price.
主な仕様 :25-600mm (24x) focal length, fixed f/2.8 aperture, 12 images / second, 12 megapixel 1/2.3″ sensor
体重 :724 g / 25.5 oz
バッテリー寿命 :380枚
価格 :Amazon の最新価格はこちら、B&H はこちら、Adorama はこちら
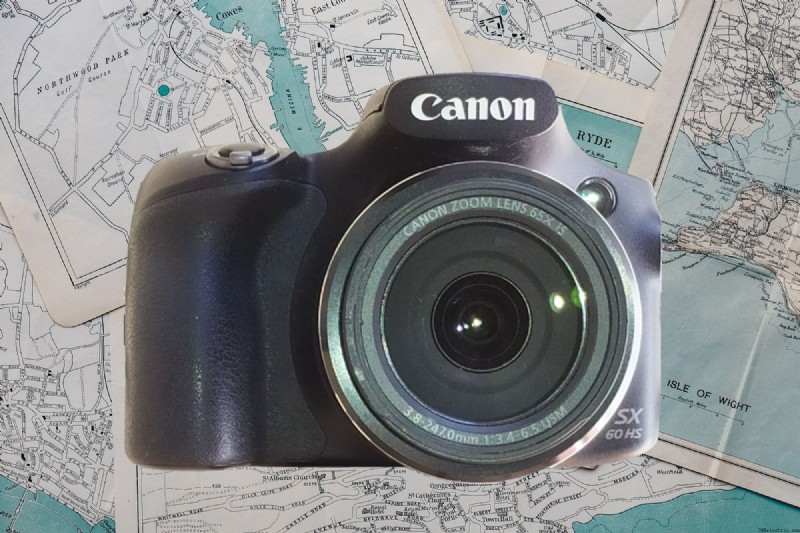
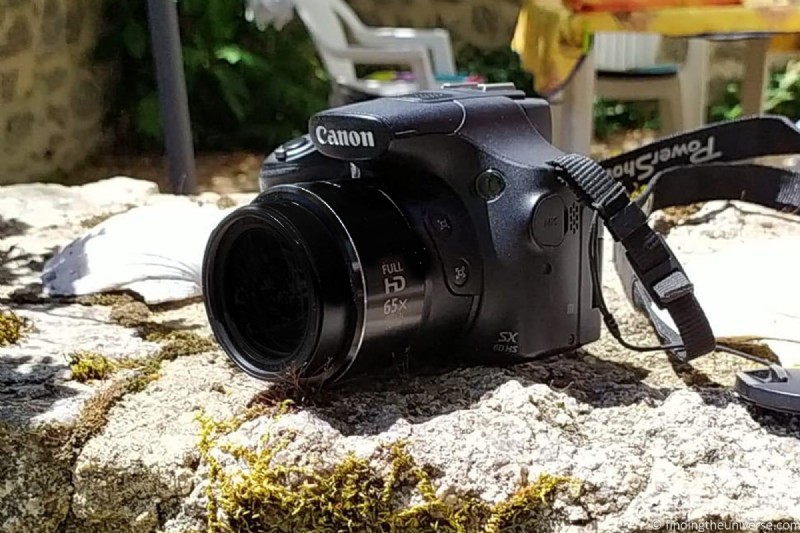
キヤノン パワーショット SX70 HS
Canon might not have the huge range of bridge cameras that some of its competitors on this list have, but what it lacks in quantity it doesn’t lose in quality.
The Canon Powershot SX70 HS is the latest bridge camera in Canon’s SX range. It features an impressive 21-1365mm (65x optical) zoom lens, which has a variable f/3.4-6.5 maximum aperture.
That’s not the widest aperture we’ve seen in a bridge camera, but it’s reasonable for this price, and this is also one of the lightest bridge cameras in our round up at only 610 grams (21.5 ounces).
レンズは光学的に安定しており、最大 5 ストップの安定性を提供します。 The 1/2.3″ sensor offers 20 megapixels, which will be enough for most users.
It has full manual controls as well as RAW support, and you get both Bluetooth and WiFi connectivity as well as 4K video support.
There are some drawbacks. Image quality at the zoom and wide angles is a little soft, and there’s no touch screen or weather sealing, although the screen does flip out and tilt at least.
主な仕様 :21-1365mm (65x) focal length, f/3.4-6.5 aperture, 10 images / second, 20 megapixel 1/2.3″ sensor
体重 :610 g / 21.5 oz
バッテリー寿命 :325 shots
価格 :Amazon の最新価格はこちら、B&H はこちら、Adorama はこちら
Nikon Coolpix P950
Like Panasonic, Nikon is well known for their bridge cameras, and they are particularly known for pushing the envelope when it comes to maximum zoom. In fact, it’s largely down to Nikon that the term “superzoom” has started to be used to describe these cameras instead of bridge camera.
The Nikon Coolpix P950, released in 2020, has a lot going for it. First, you get an impressive 24-2000mm lens, which is an 83x optical zoom. This is one of the longest lenses in our round-up. The maximum aperture starts at a wide f/2.8, and narrows down to f/6.5 when zoomed in. Given the length of the lens, this is to be expected.
The lens is stabilized, and the stabilization offers an impressive 5.5 stops of improvement. Sensor wise, you’re looking at a 1/2.3″ 16MP sensor, which offers a good balance between size and low light performance, and image quality is good although softens as you zoom further in.
The P950 has support for RAW photography as well as manual modes that let you set shutter speed, ISO, and aperture. There’s also 4K video support as well as WiFi and Bluetooth connectivity options.
There are a few downsides. Battery life is not fantastic at 290 shots, and the huge lens means this camera is heavier, weighing just over 1 kg (2.2 lb). There’s also no touchscreen, which is a glaring omission in a camera at this price point released in 2020. It’s also lacking weather / dust sealing.
It’s also worth pointing out that the predecessor to this camera, the P900, is very similar, featuring the same sensor and lens. It is missing RAW file support and 4K video, but otherwise is very similar in terms of image quality, and is also available at a much lower price.
主な仕様 :24-2000mm (83x) focal length, f/2.8-6.5 aperture, 7 images / second, 16 megapixel 1/2.3″ sensor
体重 :1005 g / 35.4 oz
バッテリー寿命 :290 shots
価格 :Amazon の最新価格はこちら、B&H はこちら、Adorama はこちら
Panasonic Lumix FZ1000 II
I appreciate there are a few Panasonic cameras in this list. This is for good reason though—Panasonic have really committed to the bridge camera category, and they’ve released a lot of great options.
The FZ1000 II, released in 2019, is definitely worth including because it features a 1 inch sensor. This means you get better low light performance than cameras with smaller sensors, as well as higher image quality.
Unfortunately, a larger sensor comes with some trade offs, namely the zoom. The FZ1000II features a 25-400mm lens, equivalent to a 16x optical zoom. This is definitely on the low end, but if you’re not too worried about shooting very distant subjects, 400mm is still on par with high-end DSLR or mirrorless zoom lenses.
The lens features a wide f/2.8 aperture which drops to f/4 when zoomed in, which is still very respectable. It’s also image stabilized, offering 3-5 stops of stabilization.
The display tilts and swivels out from the camera and is touch enabled. You also get WiFi and Bluetooth support, as well as good battery life of 440 shots. Video wise, you get 4K video support. Despite having a larger sensor, the camera is a reasonable weight at 810 g (1.79 lbs).
There’s no dust or water protection, which is a shame in a camera at this price point. Otherwise though, if you are happy with the zoom range, this is a solid option.
If the price is a little high, consider instead its predecessor, the FZ1000. This also has a 1″ sensor and 25-400mm lens, and despite being a few years older actually offers very similar performance. You do lose the touchscreen and some of the control dials, although for the price difference this might be a sacrifice you are willing to make.
主な仕様 :25-400mm (16x) focal length, f/2.8-4 aperture, 10 images / second, 20.1 megapixel 1″ sensor
体重 :810 g / 28.5 oz
バッテリー寿命 :440 shots
価格 :Amazon の最新価格はこちら、B&H はこちら、Adorama はこちら
Nikon Coolpix P1000
Another Nikon on our list, and I’ve included this one because it currently holds the title for the camera with the world’s longest zoom.
The Nikon Coolpix P1000 has a staggering 25-3000mm zoom range, which is a 125x zoom. That blows pretty much everything else on the market out of the water. Naturally the lens is image stabilized, offering up to five stops of stabilization.
In terms of aperture, it starts at a wide f/2.8, but stops all the way down to f/8 when zoomed all the way in. So that superzoom is going to need bright conditions for the best performance.
The sensor is a 1/2.3″ 16MP sensor, which is to be expected for a camera with a zoom this big.
Of course, a big zoom isn’t everything. You also get 4K video, RAW support, manual controls, Wi-Fi and Bluetooth. There’s also a flip out screen. However, the screen isn’t touch enabled, which is a huge oversight in my opinion. There’s also no weather sealing, and that lens makes it heavy, at 1415g (50oz).
Honestly, this camera is really only worth considering at this price if you absolutely need the crazy zoom. If a 3000mm equivalent lens is something you think your photography would benefit from, then go for it. Otherwise, I’d suggest that you might do better with one of the other options on our list, because you are definitely paying for the privilege of the world’s longest zoom lens.
主な仕様 :25-3000mm (125x) focal length, f/2.8-8 aperture, 7images / second, 16 megapixel 1/2.3″ sensor
体重 :1415g / 50oz
バッテリー寿命 :250 shots
価格 :Amazon の最新価格はこちら、B&H はこちら、Adorama はこちら
Sony Cyber-shot DSC-RX10 IV
If image quality and performance are your key criteria, then look no further than the stunning Sony Cyber-shot DSC-RX10 IV. Sony has been leading the way with high performance camera sensors for a number of years, and the RX10 IV is the current pinnacle of their bridge camera offerings.
This is definitely a premium offering, costing much more than the other cameras in our round-up. However, you get a lot for your money.
To start with, this is a 1″ sensor camera, with 20.1 megapixels of resolution. That means you do have to compromise a little on zoom, but with a 24-600mm (25x optical) lens, we think this will be enough for most consumers.
The lens starts out at a very wide f/2.4, meaning lots of light can reach the sensor. At 600mm the lens stops down to f/4. This is still very impressive, when you consider that a 600mm f/4 lens for a DSLR will set you back five figures! The lens is stabilized, offering around 4.5 stops of improvement.
You also get one of the fastest autofocus systems in the world, Wi-Fi, Bluetooth and 4K video, superb image quality, a touch-enabled screen, a weather sealed body, and a truly impressive 24 frames per second shooting speed. Naturally there are full manual controls and RAW support.
With all that tech onboard, combined with the large sensor and large lens, this camera does weigh quite a bit. In fact, at 1095g (2.4lbs) it’s heavier than some DSLRs. It’s also expensive. However, if quality and performance are your key goals, then this camera still offers excellent value for money. Overall, I would say that this is one of the best bridge cameras for low light situations.
If the price is a bit much, then consider the earlier model RX10 III, which offers similar features at a lower price point. You will lose the touchscreen, and the autofocus and shooting speeds are a little slower.
主な仕様 :24-600mm (24x) focal length, f2.4/4 aperture, 24 images / second, 20.1megapixel 1″ sensor
体重 :1095 g / 38.6 oz
バッテリー寿命 :400 shots
価格 :Amazon の最新価格はこちら、B&H はこちら、Adorama はこちら
Which Bridge Camera To Choose?
I’ve provided you with what we think are the best options on the market. Of course, you might still be wondering which one to go for. Here’s a quick summary of what we’d pick for different scenarios and budgets.
- If you’re on a really tight budget, then your best option is the Panasonic Lumix DC-FZ80 / FZ82, You get a great 60x zoom and solid performance, with only a few compromises
- If zoom is everything, then either the Nikon Coolpix P950 or the P1000 are your best options.
- If image quality is more important to you than massive zooms, you’ll want a 1″ sensor camera like the Panasonic FZ1000 II or Sony RX10 IV. These have less wild zoom options, but your image quality and performance in low light will be better.
Further Reading
Well, that’s it for our guide to our favourite bridge cameras on the market today! I hope you found it useful.
Before you head off, I wanted to share some more photography tips and advice that I’ve put together in the years of running this site.
- We have a guide to how to use a compact camera, how to use a DSLR camera, and how to use a mirrorless camera. We also have a guide to how a DSLR works
- Knowing how to compose a great photo is a key photography skill. See our guide to composition in photography for lots of tips on this subject
- We have a guide to what depth of field is and when you would want to use it, as well as a guide to bokeh in photography
- We are big fans of getting the most out of your digital photo files, and do to that you will need to shoot in RAW. See our guide to RAW in photography to understand what RAW is, and why you should switch to RAW as soon as you can if your camera supports it.
- We have a guide to the best photo editing software, as well as a guide to the best laptops for photo editing for some tips on what to look for.
- If you’re looking for more advice on specific tips for different scenarios, we also have you covered. See our guide to Northern Lights photography, long exposure photography, fireworks photography, tips for taking photos of stars, and cold weather photography.
- If you’re looking for a great gift for a photography loving friend or family member (or yourself!), take a look at our photography gift guide,
- If you’re in the market for a new camera, we have a detailed guide to the best travel cameras, as well as specific guides for the best cameras for hiking and backpacking, the best compact camera, best mirrorless camera and best DSLR camera. We also have a guide to the best camera lenses.
- If you want a camera or lens, but the prices are a bit high, see our guide to where to buy used cameras and camera gear for some budget savings options.
- We have a guide to why you need a tripod, a guide to choosing a travel tripod, and a round-up of the best travel tripods.
Looking to Improve Your Photography?
If you found this post helpful, and you want to improve your photography overall, you might want to check out my online travel photography course.
Since launching the course in 2016, I’ve already helped over 2,000 students learn how to take better photos. The course covers pretty much everything you need to know, from the basics of how a camera works, through to composition, light, and photo editing.
It also covers more advanced topics, including astrophotography, long exposure photography, flash photography, and HDR photography.
You get feedback from me as you progress through assignments, access to webinars, interviews and videos, as well as exclusive membership to a Facebook group where you can get feedback on your work and take part in regular fun photo challenges.
It’s available for an amazing one-off price for lifetime access, and I think you should check it out. Which you can do by clicking here.
And that’s it for our guide to the best bridge cameras for travel photography! If you have any questions or feedback, I’m here to listen and do my best to answer. Just pop them in the comments below and I’ll get back to you as soon as I can.
