スタジオでパッチベイをセットアップする方法
パッチベイとは?
パッチベイは、マイク、プリアンプ、アウトボード エフェクト、ミキサー、ヘッドフォン、またはシステム内のオーディオ ソースや宛先など、スタジオのすべてのコンポーネントを接続するためのハブとして機能します。
パッチベイを使用する前は、機材の入力と出力からケーブルを頻繁に抜き差ししていました。しかし今では、すべてをパッチベイに接続したままにしておき、必要に応じてパッチ ケーブルを使用してカスタム接続を行うことができます。これにより、セットアップ時間を大幅に節約でき、さらに時間がかかるパッチ適用ミスを防ぎ、ギアとケーブルを絶え間ない磨耗から保護します.
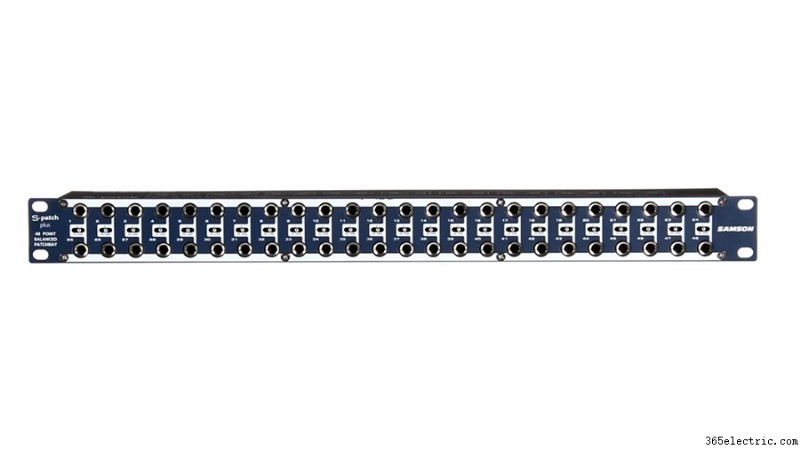
この ¼ インチ TRS パッチベイの背面には、上段に 24 個の入力ジャック、下段に 24 個の出力ジャックがあります。背面の 48 ジャックは、パッチベイ前面の 48 ジャックに対応しています。そのため、リアのジャックにすべてのギアを接続したまま、パッチ ケーブルでフロント ジャックを接続することで、カスタムのシグナル フローを設定できます。

パッチベイの設定方法
パッチベイをセットアップするときは、スタジオの一般的な信号の流れについて考えることが重要です。こうすることで、スタジオの基本機能がデフォルトで設定されるようにパッチベイをレイアウトでき、パッチ ケーブルは必要ありません。これは、ほとんどのオーディオ パッチベイに組み込まれているノーマリングと呼ばれる機能によって可能になります。
パッチベイの垂直方向のジャックの各ペアをモジュールと考えてください。 3 つの一般的なモードがあり、選択したモードによって、そのモジュールがどのように機能するかが決まります。
スルーモード
最初の最も基本的なモードは「スルー」モードです。これは、リアのトップ ジャックがフロントのトップ ジャックに単純に流れ、フロントのボトム ジャックがバックの一番下の列に単純に流れることを意味します。このモードでは、上部と下部のジャックが独立して動作します。

半分正規化
2 番目のモードはハーフノーマルと呼ばれます。ハーフノーマルモードでは、背面のジャックは依然として前面のジャックに対応していますが(「スルー」モードと同様)、パッチケーブルがない場合、デフォルトで上部のジャックからの信号が自動的に下部のジャックに流れます。つながっている。ハーフノーマル モードでは、フロント パネルの下部ジャックに何かを接続すると、このデフォルトの接続が切断されます。つまり、入力ジャックに何か他のものが接続されていない限り、上部の出力ジャックは下部の入力ジャックに流れます。

正規化
3 番目のモードはフルノーマルと呼ばれます。フルノーマル モードでは、ケーブルがフロント パネルの上部または下部のジャックに接続されている場合、上部から下部へのデフォルトの接続が切断されます。そのため、パッチ ケーブルを出力または入力ジャックに接続すると、デフォルトの接続が切断されます。

Patchbay Layout
There are lots of uses for each of these modes and the possibilities are endless, but here are some examples of how I have set up my patchbay to meet the needs of the various devices in my studio.

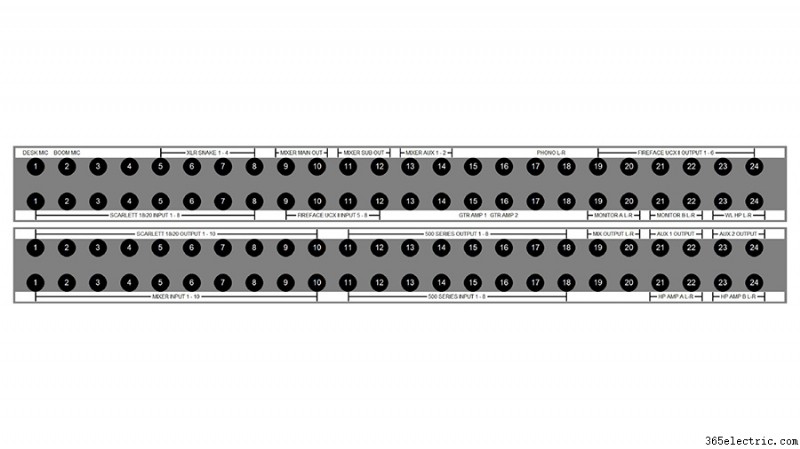
The top left corner of my patchbay is where my microphones come in. Some of my microphones (like this boom mic) are directly wired into the top row of jacks on the back of my patchbay. Alternatively, I could have an XLR panel in the back of the room that connects to the top row of jacks on the back of the patchbay. That way, I could connect a microphone to that XLR panel which would then be available on the top row of my patchbay.
I will almost always want my microphones to connect to the microphone preamps on my audio interface, so I’ve set these jacks up in full-normal mode. This means the mics will be connected to my interface by default without any patching. But if I want to patch the microphone to a different mic preamp I can simply do so with a patch cable.
I chose to use full-normal instead of half-normal, because I don’t want to accidentally connect my microphone to two preamps that are both supplying phantom power. When I connect a patch cable to the top jack, it automatically breaks the connection to my interface. This also prevents me from connecting two microphones to the same audio interface preamp.
The other essential connections for my typical workflow are set up using half-normal mode. For example, my interface outputs flow directly to the input of my monitors. If I want to patch my turntable directly into my monitors for a pure analog connection, I can patch from my phono output jacks to the monitor input jacks and bypass the other components of the system. Given that this is set up in half-normal mode, the default connection from the interface outputs will be broken when I connect to the monitor input jacks.
Half-normal jacks also provide a way to split a signal. Let’s say I want to send my interface output to the input of my monitors while also sending that output to my wireless headphones. I just patch the output of my interface to the input of my wireless headphone transmitter and the signal still flows down to the speakers, because nothing is connected to the bottom jack. Remember – in half-normal mode, the connection is only broken when there is a plug in the bottom jack.
I use ‘Thru’ mode for my outboard effects and preamps because I don’t want the outputs of my compressor or outboard preamps to feed into their own inputs and create a feedback loop. Setting these modules to ‘Thru’ mode keeps the top jack and bottom jack independent from one another, meaning I need to manually patch these devices anytime I want to use them.
Which Patchbay Should You Use?
I have two 48-point ¼-inch TRS patchbays. One is a Neutrik, which costs about $100. The other is a Samson S-Patch Plus, which is a little more expensive. I’ve had some time to compare these two options and I think the Samson is well worth the extra money.
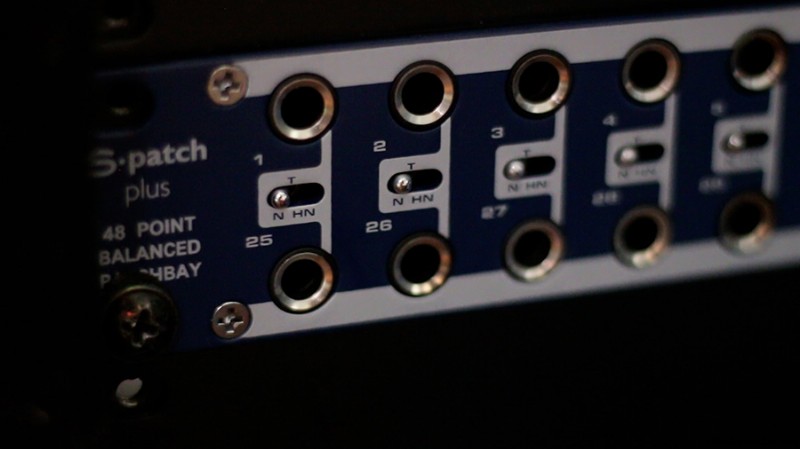
If I want to change the mode on any module in the Samson S-Patch Plus, I just need to toggle the switch between the top and bottom jack.

In order to switch the mode on one of the Neutrik modules, I need to disconnect the jacks from the front and back, remove the front panel of the entire patchbay, take the module out, flip it around, and reassemble everything.
This has caused me a few headaches as I have continued to add components and shift things around on the patchbays, so I would definitely recommend going with the Samson S-Patch Plus if you’re on the fence.
You should also consider how much space you have and how many connections you’ll need. These two 48-port patchbays take up 1RU of rack space each, which can really add up…
If you’ve got a larger collection of components or less rack space to work with, you may want to look into a TT (or tiny telephone connector) patchbay instead. These will be more space efficient, as the density of connection points is much greater with these smaller connectors.
You will also find patchbays that have multi-channel connectors in the rear rather than the same connection type on front and back. This can make for a cleaner setup, utilizing multi-channel fanouts rather than an individual cable on the rear panel for each connection.
