Canon カメラが濡れて電源が入らなくなった – 4 つの効果的な方法
キヤノンのカメラが濡れて電源が入らなくなった場合の対処法さて、これはカメラの所有者に起こりうる最も不幸な出来事です。
デジタルカメラの水による損傷は重大な問題のように見えるかもしれませんが、損傷を回復するのは非常に簡単です。問題を解決するために、デジタル カメラの修理の専門家である必要はありません。必要なのは、いくつかの基本的な手順だけです。このプロジェクトを完了するには、乾燥した換気の良い場所で作業し、以下の手順に従ってください。
水で損傷した Canon カメラの修理方法
以下の簡単な手順に従って、水で損傷したカメラを復活させてください:
<オール>- 乾いた布でカメラの外側の水を拭き取ります。
- デバイスからバッテリーを取り外します。
- バッテリー コンパートメントは開いたままにしておく必要があります。
- マシンから記録メディアを取り外します。
- メディア用のコンテナを開いたままにします (該当する場合)。
- カメラを暖かく乾燥した環境に置いて、少なくとも 24 ~ 48 時間、内部の湿気が放散されるようにします。
警告 :何かを壊す可能性があります。この時点では、カメラの電源を入れようとしないでください。少量の水がカメラ回路に漏れた場合、この時点でカメラの電源を入れると、バッテリーによって生成される電圧が原因で、カメラに深刻な損傷を与える可能性があります.
後で、カメラをリセットまたは復元して、カメラの電源を入れてみてください。
役に立つ:Canon カメラをリセットまたは復元する方法は?
この手法は、Canon EOS、Rebel、R、ミラーレス、PowerShot カメラ、および Nikon または Sony カメラにも同様に適用できます。
水で損傷したカメラを乾かす方法
カメラが水に触れた場合は、次の予防措置を講じる必要があります:
<オール>- 米袋を使って水分を取り除く
- カメラに直射日光を当てる
- ドライヤーを使う
Canon カメラが濡れて電源が入らなくなった場合は、乾かすことで最適化できます。
シリカゲルの使い方 濡れたカメラを乾かすには?
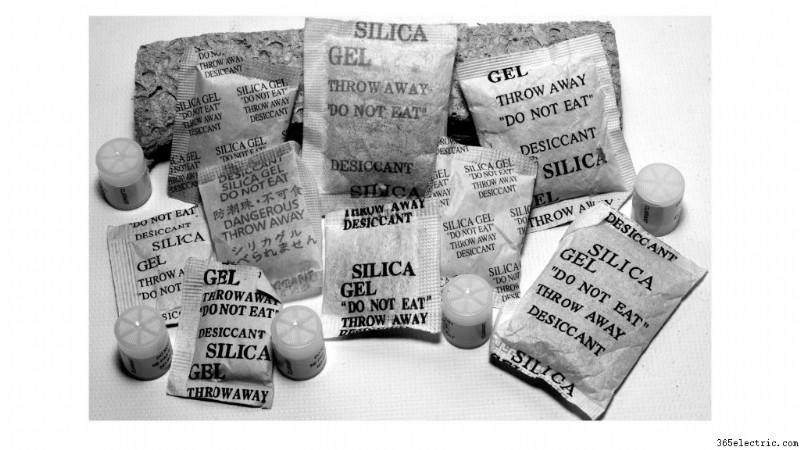
新しい靴、手帳、財布を購入したことがあるなら、「シリカゲル」と書かれた小さな白いパケットに気づいたことがあるでしょう。通常、これらのパケットは食べるものではないことが追加されています.
これらのパケットの目的は、オブジェクトに入る可能性のある湿気を吸収することです。これは、物が小売店や倉庫で販売されるのを待っているときに特に重要です.一部の人々は、これらのパケットを財布や財布に入れて持ち歩いて、水による損傷から保護しています.
手元にない場合は、地元の美術工芸品店をチェックしてください。一部のデパートと同様に、シリカゲルを頻繁に販売しています。少しの値段で大量に手に入れることができます。これが最も効果的な方法です オブジェクトから水を抽出するためのものなので、米に手を伸ばしたり、カメラを太陽の下に投げたりする前に試してください。
カメラやレンズを密閉瓶に入れます 大量のシリカゲルで 温かい場所に保管してください . 直火にならないように注意しながら、数日放置します または通気口の近く。シリカゲルが機能するまでに最大 1 週間かかることがあるため、レンズとカメラを調べる前に、その時間をおいてください。
この方法を使用してカメラ全体を乾かす場合は、バッテリーとメモリ カードを確認してください。 プロセスには含まれません。バッテリーに電力が蓄えられているため、本当にすべてを台無しにしてしまう可能性があるため、カメラのレンズが乾くのを待つ間、それらを隠しておきます.
この手法を使用して、湿った電子機器から水を抽出できます。本当に安全で簡単な手順です!携帯電話だけでなく、携帯していて濡れた可能性のある外付けハード ドライブでも機能します。
米袋の使い方 濡れたカメラを乾かしますか?
スマートフォンを水に落としたことがあれば、この典型的な乾燥手順について聞いたことがあるでしょう。シリカゲルのアプローチと同様の方法で、米の袋を使用して水を引き出すことができます.
明確にするために、この方法では生米を使用します カメラの湿気を吸収します。気密バッグを使用すれば、劣化する前に実質的にあらゆるデバイスから湿気を効果的に引き出すことができます。
これは生の白米を気密容器に入れることで実現されます .好みの米を使用できますが、手順が完了すると、外部のクリーニングやスパイシーな臭いの処理が必要になる場合があることに注意してください.その後、カメラのレンズをコンテナに入れ、密閉します。 、数日間脇に置きます .
数日待ってからチェックして効果があるかどうかを確認する必要があるという点で、シリカゲルと似ています.この方法を使用してカメラ全体を乾かすこともできるので、しばらくの間バッグに入れておくことを恐れないでください。

カメラを米に入れるのは早ければ早いほどよい。 家から遠く離れていたり、パントリーにアクセスできない場所で写真を撮っている場合は、次の食料品店に立ち寄って米の袋と冷凍バッグを購入する価値があります.カメラのレンズの価格にもよりますが、これにより、数千ドルとは言わないまでも、数百ドルを節約できます。
シリカゲルを利用する場合と比較すると、このアプローチははるかにアクセスしやすい 、そして一部の人々は、以前は彼らのために働いていたので、それを信頼しています.最初に試すのはシリカゲル アプローチですが、これもほぼ同じように機能することを覚えておいてください。
これは、予期せず水に落ちた可能性のある他のものに対する優れた手順でもあります.米は安価なので、食器棚にある半開きのパッケージを使い切るのに最適な方法です。
これは、Canon カメラが濡れて電源が入らなくなった場合に採用できる最も簡単な方法です。
どのように直射日光 濡れたデジタル カメラの復活に役立ちますか?
これは最後の作業であり、最初の 2 回の試行が失敗した場合にのみ使用してください。別の言い方をすれば、カメラを直射日光の当たる場所に何時間も放置して、乾くかどうかを確認してみてください。
一部のカメラを完全に損傷する可能性があるため、これは最後の手段です。ただし、カメラがすでに湿気を含んでいる場合はほとんど役に立ちません。
晴れた日の明るい屋外でカメラを直射日光の当たる場所に置いてください。 . 数時間そのままにしておく それをチェックして、プロセスの進行状況を確認します。気密容器に入れておく必要がある他の 2 つの手法とは異なります。そのため、状態を確認して様子を見ることができます。
安全で十分に管理された環境でこれを行っていることを確認してください。外が暑すぎるのは避けたいし、雨が降る可能性のある曇りの日も避けたいものです。この戦略を使用する場合は、天候に注意してください。
また読む:キャノン カメラの wifi パスワードをリセットする方法
直射日光が当たる場所に置く必要があるため、屋根付きのポーチなどに置くことはできません。直射日光の当たる場所に置いていても、日陰は一日を通して変化します。いずれにせよ、少なくとも 5 時間はカメラを外しておく必要があるため、その日の終わりまでにカバーされる可能性は低いでしょう.
今夜になったら、カメラを放置しないように注意してください .朝一番に芝生を踏んだことがある人なら、その理由がわかるでしょう。露はほんのわずかな水でもすべてを覆い、カメラを乾かすために行ったすべての努力を無効にします。
他に何も機能しない場合にのみ、この戦略を使用する必要があることに注意してください。他の機器、特に携帯電話のようにバッテリーが届かない機器では、これを行うべきではありません。暑さの中でバッテリーを伸ばすことができますが、特にこのアプローチはめったに機能しないため、価値がある以上の痛みを引き起こす可能性があります.
ドライヤーできます 濡れたデジタル カメラの修理に使用できますか?
カメラがあまり水にさらされていない場合は、ヘアドライヤーが最適なオプションです。カメラ内部がやさしく乾かされます。ヘアドライヤーの最高設定を使用しないでください。カメラの他の部分に水が浸入する可能性があります。これにより、取り返しのつかないさらなる損害が発生する可能性があります。
水の種類は何が起こるかに影響します
カメラのレンズに湿気が入った場合、乾かす方法がわかりました。それがあなたが達成する必要がある唯一のことだと言っているのではありません。キヤノンのカメラが濡れて電源が入らない問題は、水の種類によって異なります。
カメラをどこに落とすかによっては、湿気以外にもいくつかの問題に対処する必要がある場合があります。これを考慮してください:海の近くに住んでいる場合は、対処する必要があります 海水 .
塩や鉄などの他の物質は蒸発しませんが、水分は蒸発します。それらはレンズの中に留まり、カメラを水中のどこに落とすかによって、いくつか知っておく必要があります。
海の水
私は完全に理解しています。ビーチの写真は素晴らしいです。ただし、カメラが海水に落ちた場合、手に重大な問題が生じる可能性があります。
水分を取り除くだけでなく、レンズから塩分を取り除く方法を見つける必要があります (これは簡単な作業ではありません)。これは、見逃すことのできない、はるかに複雑なトピックです。
塩分は海水の残り物に含まれており、カメラ レンズの内部要素をすぐに腐食させます。
この種のコンテンツを公開するには、専門家を雇う必要があります。 You may seek a nearby repair shop, but such are few and far between. The best solution is to have your camera lens repaired or replaced by the manufacturer.
It will most likely be expensive, but it is the best option to save your camera lens. It’s also the only method to ensure that your camera has been repaired, cleaned, and won’t have any future issues as a result of any mistakes you made.
Lake Water
You don’t want to get your camera lens infected by germs and algae that are lurking in lake water.
Water seldom penetrates your lens deeply enough to cause harm. A camera that is immersed for a lengthy period of time is more likely to be affected by water damage.
Even if you’re able to get the lens out of a particularly sludged lake, you may still need to clean it. Fortunately, repairing a camera lens that has been submerged in ocean water is a lot easier than this.
The lens is already damp, so run it under the faucet to dry it out. Once you’ve cleaned your lens to the best of your ability, dry it using one of the methods described above. The fact that you’re already near a sink makes this an ideal moment to utilize rice.
Your camera lens won’t be harmed further than it already has been by this procedure. At this point, the camera lens has already been damaged, so don’t be concerned about getting it “too wet.”
Tap Water and Rain Water
If your camera lens is saturated by an unexpected rainfall or if you accidentally put it into some form of tap water, it should be OK. If you smell or see any particles on it, treat it the same way you would lake water after it has been fully dried.
If you reside in an area with high levels of air pollution, you may wish to wash your camera before using it. Rainwater in regions with poor air quality might reflect pollutants that don’t show up as particles on your lens but can nevertheless cause chemical harm.
Additionally, if you know that the tap water in your area is tainted with iron, you should also clean your camera lens. For those who are concerned about the quality of their tap water, buying bottled water is an excellent option. To ensure thorough cleaning, use at least two and preferably three gallons of water.
Even if the Camera works, Be Careful
Following a thorough drying of the device, it should start operating properly again. Corrosion from moisture may induce a short circuit and lead the gadget to fail within a few weeks. In the camera, bacteria from ponds, rivers, and tap water can accumulate on the cloth shutters, resulting in mold growth and eventual camera failure. Lenses that have been exposed to moisture over time may get cloudy and finally cease to function.
How to successfully dry your wet GoPro camera?
Here are some pointers to help you start drying your GoPro.
Please keep in mind that each of the suggestions should be used with caution because they have the potential to permanently harm your camera. Please don’t go any further if you aren’t sure about the consequences of your actions. Naturally, I’m not liable for any unsuccessful repairs or damages you suffer. These recommendations are presented as suggestions for you to think about, and they may or may not work on your model.
Remove the lens, battery, and SD card:
Remove battery, lens, and SD card to enable air to pass through the cavities in the camera.
Using fresh water, rinse:
Caution is advised! While it may seem counterintuitive at first, it is possible that you will need to rinse the camera before beginning the drying process. If the camera was submerged in salt, chlorine, or dirty water, you’ll want to remove the residue before removing the water. Otherwise, it may cling to the components and corrode them.
Remove the water by shaking the camera:
You may swing it to move the water out of the camera using centripetal force. You might also use compressed air or a vacuum cleaner to remove any remaining droplets. If you hold the vacuum too close to your camera, it can produce static electricity, which will harm it.
Place it in the rice:
This is a well-known method for rescuing wet electronics, although I’m not sure how effective it is. Online, the results appear to be mixed. After doing everything else I can to eliminate the moisture, I believe this will be my final step. And don’t do it without first rinsing off any residue (salt, dirt, or chlorine) with fresh water. You may also use silica gel, which comes in small sachets in modern electronics packaging. According to conventional thinking, thoroughly drying rice or silica gel can take up to a week. The outcome may differ.
Open the camera:
When you open the camera, proceed with caution! This is done by some users to let the camera to dry and remove any salt, rust, or other residues. Please keep in mind that opening the casing will void your warranty. Plus, if you’re anything like me, putting all the parts back where they belong might be difficult. After putting everything back together, I always have a few extra parts. This is not a good idea.
Keeping it near a dehumidifier:
It is a good idea:I dropped a full water bottle on my laptop keyboard a few days ago. I positioned the housing in front of a dehumidifier exhaust in our basement after dumping the water out of it. It has been showered in a steady flow of dry, warm air for the previous 36 hours. I’m going to attempt to switch it on later today, and I’m hopeful.
How long should you leave your camera in rice?
Give a proper time of 24-48 hours to your camera for drying by placing it in the rice. In this way, it can bring you effective results.
What happens if camera lens gets wet?
There is no risk to the electronics because there is no source of electricity in the lens, but the longer water lingers within your lens, the more harm it can do to other components of your lens.
How do you dry out a DSLR camera?
You can use any technique out of many. You can use rice, silica gel, a hairdryer, and direct sunlight to dry your DSLR camera. All these methods are easy to follow and most efficient.
Can a film camera get wet?
Water won’t harm the film chemically, but it may cause the emulsion to swell, causing everything to clump together when it dries. The best chance is to bring the (wet) film to a professional lab as soon as possible and have it processed.
What happens if a disposable camera gets wet?
A film that has been soaked in water (particularly salt water) will usually affect processing. It won’t break the machine, but it will affect the film and all subsequent films until the chemistry is fully flushed.
What do you do when your camera won’t turn on?
Make sure the camera’s battery is correctly inserted. Make an attempt to turn the camera on. If you have the optional AC power adapter, connect it to the camera and a functional electrical outlet if the problem persists. Make an attempt to turn the camera on.
結論
If your Canon camera got wet and won’t turn on, you can easily handle this situation. Remove the battery, memory card, and lens. Adopt any method to make it dry. Either use silica gel or use rice as well as your hairdryer to make it dry. Give it a proper time to dry and try to power it on now.
FAQs
Is there a reset button on Canon camera?
By removing the CF card, turning the camera off, and then holding down both the shutter and menu buttons while turning the camera on again, Canon cameras may be reset to their factory default settings. 3) While turning on the camera again, hold down both the Shutter and a Menu button.
What happens wet film?
What happens if you get your film wet? The base of a film that has been submerged in water is at grave risk of separating from the emulsion. This implies that the image-containing portion of the film will separate from the plastic backing that gives the film its form.
How do you get moisture out of a camera lens?
The use of silica gel is one of the most frequent and successful methods for removing moisture from camera lenses. Silica gel aids in the removal of moisture from electronics, including camera lenses. It may be found at department stores, art and craft stores, and other similar establishments.
Why won’t my Canon EOS turn on?
The most common cause of your camera not turning on is a dead battery or one that is not correctly installed. The first step is to charge your battery, then double-check that it is properly fitted into the compartment.
Why is my Canon not taking pictures?
Resetting all of the settings on your DSLR might sometimes help you fix the problem of your DSLR not capturing images. SOLUTION:All you have to do to get to the Reset button is go to the shooting menu and then to the Setup Menu. After then, try clicking the picture again to see if anything has changed.
Can a wet digital camera be repaired?
You must act fast if your digital camera becomes wet or is dumped in the water. Even a small bit of water can cause the camera to be permanently ruined. Use a rice bag or silica gel, and place the camera in direct sunlight as precautionary measures.
Does Canon warranty cover water damage?
Forget about it; Canon won’t fix water damage since they can’t guarantee the work, and something else always comes up to pose a problem. Warranty only covers the functional errors and faults.
Featured Image :Harry via unsplash.com