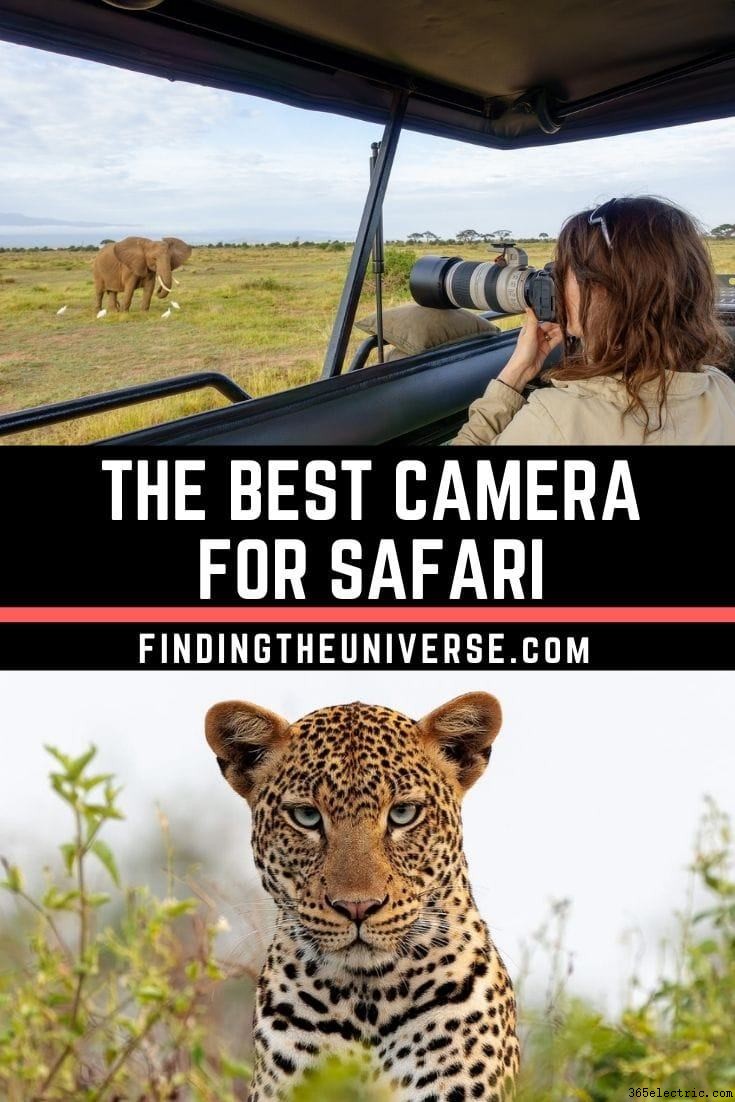
Safari の最高のカメラ、レンズ、写真用アクセサリー – 選び方
おそらく、サファリに行く前に決めなければならない最大の決断は、どのカメラ機器を持っていくかということです。これは大きな決断であり、出発前に決定することが重要です。
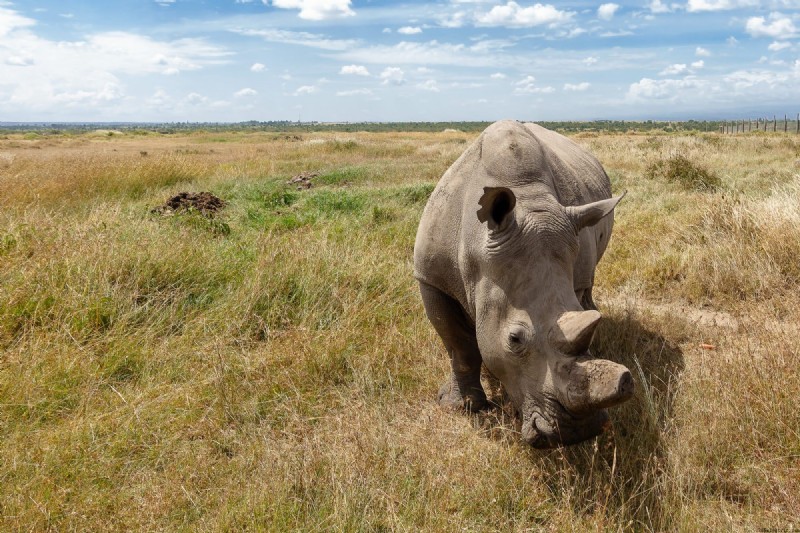
サファリにいるとき、人々がスマートフォンから巨大なレンズを備えた超ハイエンドのプロ用機器まで、あらゆるもので写真を撮っているのを見るでしょう.
カメラの選択は、予算、使いやすさ、サイズ、取得したい写真の種類など、さまざまな要因を検討する必要がある個人的な決定です。
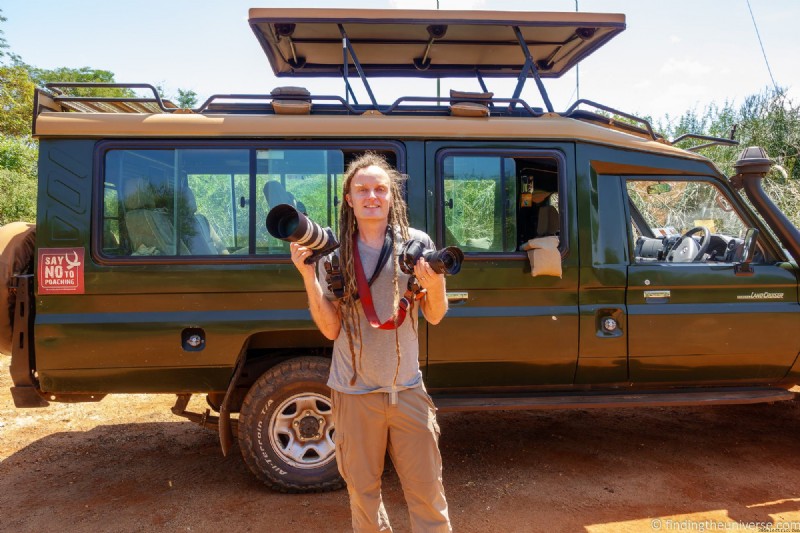
私は長年プロの写真家であり、オンラインで写真を教えています。私は幸運にも、世界中の多くの国で動物を撮影するサファリに時間を費やすことができました.
私の経験に基づいて、サファリに最適なカメラの種類と、サファリ用のカメラを選択する際の考慮事項について多くのことを学びました。
この投稿では、あなたとあなたのサファリに適したカメラ設定を選択する方法について知っておくべきことをすべてお伝えします.また、さまざまな予算とスタイルのカメラとレンズをいくつかお勧めします。
サファリで素晴らしい写真を撮るためのガイドと一緒にこの投稿を読むことをお勧めします。そうすれば、旅行の準備が整います。
Safari 用カメラに求めるもの
特定のカメラとレンズをお勧めする前に、サファリ用のカメラを選ぶ際に探すべき重要なことを共有したいと思います.この情報は、単にリストから何かを選ぶのではなく、十分な情報に基づいた決定を下すのに役立ちます.
旅行のために新しいカメラを探していると仮定しますが、すでにカメラを所有している場合は、現在のカメラ機器で目的の写真を撮影できるかどうかを判断するのに役立ちます。
価格
欲しいカメラの種類とその機能について考える前に、予算を決める必要があります。これは、最終的に入手するカメラに大きな影響を与えます。最初から現実的な予算を設定して、予算に合った適切なものを見つけることが重要です.
もちろん、予算は人それぞれです。予算にはカメラ自体だけを含めるべきではないことを忘れないでください。レンズを交換できるカメラを購入する場合は、購入時にレンズを含めたいと思うでしょう。レンズはカメラ本体と同じくらい高価になる可能性があります。
さらに、カメラ バッグ、カメラ ストラップ、メモリ カード、予備のバッテリーなどのアクセサリも必要になるでしょう。
一般に、以下の米ドルでの価格見積もりは、あなたのお金で何が得られるかのアイデアを提供するはずです:
- 200 ~ 800 ドル – 旅の素晴らしい思い出を撮影できるエントリー レベルのカメラ
- 800 ~ 2500 ドル – ほとんどの状況で素晴らしい写真を撮影できるミッドレンジ カメラ
- 2,500 ドル以上 – 現在、ハイエンドの領域に移行しています。この金額以上を使い始めると、よりプロフェッショナル向けのカメラを検討するようになります。時間をかけて方法を習得すれば、さまざまな照明条件で素晴らしい画像を撮影できます。適切に使用すること
ご覧のとおり、さまざまな価格帯があり、カメラ機器に多額のお金を簡単に費やすことができます.ただし、支出を減らしても優れた結果を得ることができます。
Safari のカメラの種類
予算を設定したら、実際にサファリに持って行きたいカメラの種類を決定する必要があります。
サファリ用のカメラを選択するには、主に 4 つのオプションがあります。これらは、スマートフォン、コンパクト カメラ、ブリッジ カメラ、またはレンズ交換式カメラ (DSLR またはミラーレス) です。
これらのオプションにはそれぞれ長所と短所があります。ここで各オプションについて簡単に説明します。
- スマートフォン .余分な機材を持ち歩く必要がなく、旅行の思い出に写真を撮っておけばよかったという場合は、スマートフォンが適しています。それらは一般的に使いやすく、最新のモデルにはある程度の光学ズームが含まれています。ただし、数ヤード以上離れた野生生物の素晴らしいショットを撮るのは難しく、光が少ないときに撮影した画像は非常に粗くなる可能性があります。
- コンパクト カメラ .コンパクトカメラは、スマートフォンとより大きなセットアップの間の良い妥協点です.それらは非常に携帯性に優れていますが、優れた光学ズームを備えたモデルがまだ入手可能です。また、使いやすいため、コンパクトカメラとも呼ばれます。ただし、一部のモデルには、より多くの制御を必要とするユーザー向けに、より多くの手動モードと高度な機能が含まれています。主な欠点は、大規模なセットアップに比べて画質が低下することと、暗い場所ではうまく機能しないことです。
- ブリッジ カメラ .サファリのより一般的なオプションの 1 つは、スーパーズーム カメラとしても知られるブリッジ カメラです。ブリッジ カメラはコンパクト カメラよりも大きく、遠くの被写体を捉えることができる大きなズーム レンズを備えている傾向があります。コンパクトカメラのようにミラーレスや一眼レフのようにレンズを交換することはできません。画質、ズーム、使いやすさ、手頃な価格のバランスが取れている傾向があります。
- DSLR / ミラーレス カメラ .画質の面で最高の結果が必要な場合は、デジタル一眼レフまたはミラーレスカメラが最適です.これらはより大きなセンサーを備えているため、他のタイプのカメラよりも多くの光を捉えることができます。つまり、暗い場所でもより良い結果が得られます。これらのカメラはレンズ交換もできるので、予算やニーズに合わせてレンズを選ぶことができます。また、リスト内の他のオプションよりもはるかに多くの手動制御があるため、画像の外観をより詳細に制御できます.欠点は、大きくて重く、真にマスターするには時間がかかり、通常はより高価なことです。
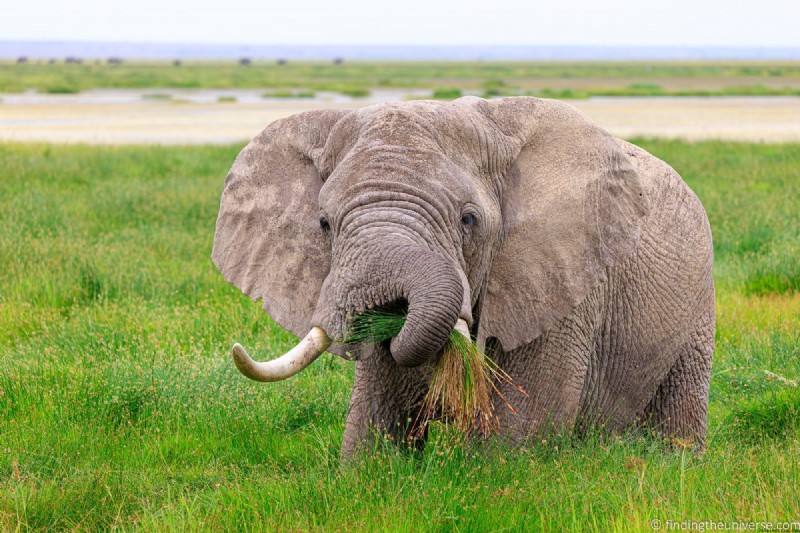
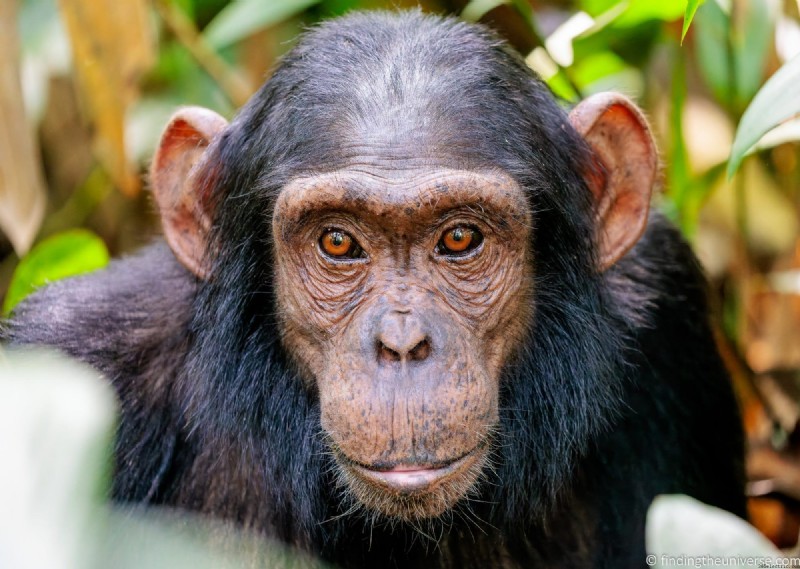
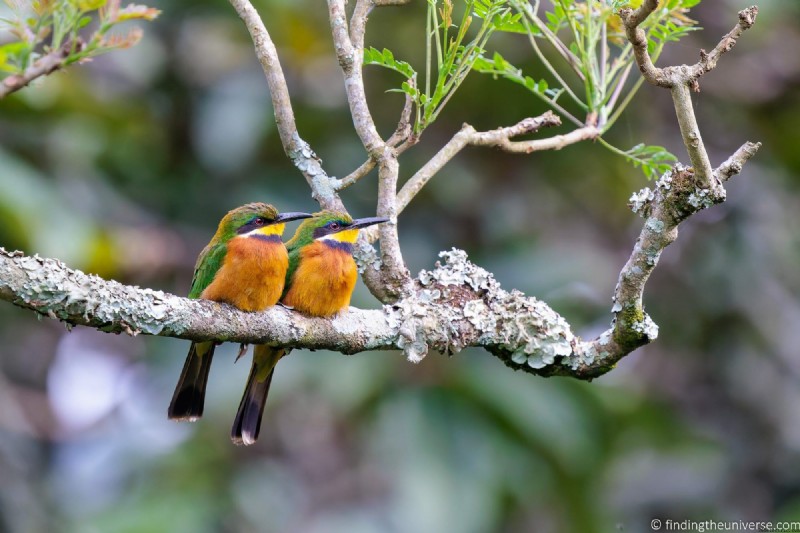
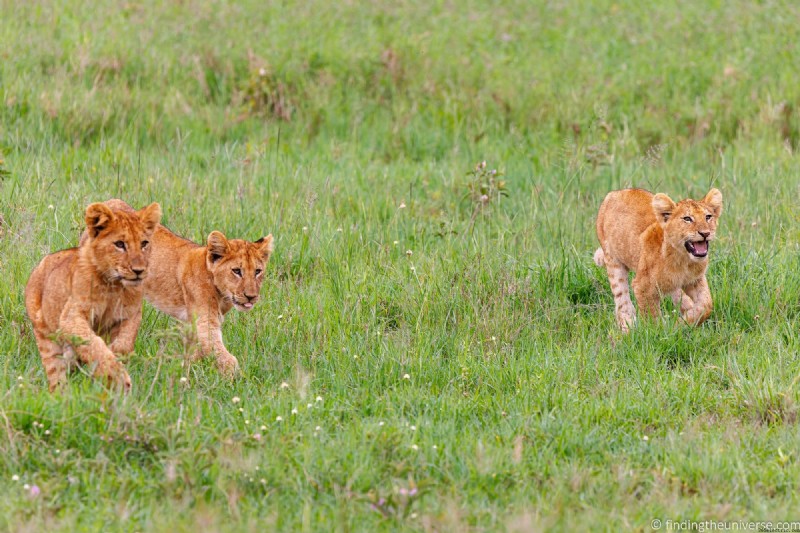
以上から正解はありません。どちらを選択するかは、予算、持ち運びたいカメラのサイズ、使用方法の学習に費やす時間によって異なります。以下は、何が可能かを示すために、さまざまなカメラからのさまざまな画像です。
Safari カメラのセンサー サイズ
センサーは、カメラ内の最も重要なコンポーネントの 1 つです。センサーはフィルムのデジタル版です。光を記録し、デジタル ファイルとして保存するものです。
ほとんどのカメラで固定サイズのフィルム ロールとは異なり、デジタル センサーは、カメラ メーカーの要望に応じて大きくも小さくもできます。小型のセンサーはスマートフォンやコンパクト カメラなどの小型カメラに搭載されており、大型のセンサーはミラーレス カメラやデジタル一眼レフ カメラに搭載されています。
センサーのサイズは、いくつかのことに影響します。まず、カメラとレンズの実際のサイズに影響します。センサーが大きいほど、それを収納するためにより大きなカメラ本体と、光を捉えるためにより大きなレンズが必要になります。小さいセンサーは小さいカメラ本体に収まります。
大きなセンサーは、より多くの光を取り込むこともできます。これは、暴風雨の中に大きなバケツを置いたままにしておくと、同じ期間に小さなバケツよりも多くの水を取り込むのとほぼ同じです.
これは、より大きなセンサーは通常、利用可能な光が少ない場合に優れたパフォーマンスを発揮し、ノイズの少ない画像を生成することを意味します.シャッター速度を速くすることもできます。
ただし、センサーが大きいほど製造コストが高くなるため、ハイエンドで高価なカメラに搭載される傾向があります。
目にする一般的なセンサーのサイズを、小さいものから大きいものへと順に以下に示します。ただし、特に非常に競争の激しいスマートフォン市場では、多くのバリエーションがあることに注意してください。
- 1/2.5インチ – 5.76mm x 4.29mm (25mm²)。スマートフォンのほか、一部のコンパクト カメラやブリッジ カメラに搭載されています。このあたりのセンサーのサイズは少し異なりますが、これはほぼ平均です。
- 1 インチ センサー – ハイエンドコンパクトカメラやハイエンドブリッジカメラに見られる13.2 x 8.8mm (116mm²)。 1 インチという名前は、センサーのサイズとは関係のないマーケティング用語です。
- マイクロフォーサーズ – オリンパスとパナソニックの「マイクロ フォーサーズ」カメラに搭載されている 17.3mm x 13mm (225mm²)。
- APS-C キャノン – 22.4mm x 14.8mm (329mm²) は、ほとんどの消費者向けの Canon DSLR およびミラーレス カメラに見られます
- APS-C Nikon、Sony、Pentax – 23.6mm x 15.7mm (370mm²) は、Nikon、Sony、Pentax、Fuji などの他のメーカーのほとんどの消費者向け DSLR およびミラーレス カメラに見られます。Nikon はこれらを DX センサーと呼んでいます。
- フル フレーム – 36mm x 24mm (864mm²)。 Sony、Canon、Nikon などのハイエンドのプロ用デジタル一眼レフ カメラやミラーレス カメラに搭載されています。35 mm フィルムとほぼ同じサイズであるため、このように呼ばれています。
比較する重要なことは、平方ミリメートル単位の表面積です。これは、各センサーの比較サイズを示しています。たとえば、フルフレーム センサーの表面積は APS-C センサーの 2 倍以上、スマートフォンやコンパクト カメラ センサーの 30 倍以上です。
これは、実際のパフォーマンスに大きな違いをもたらします。
一般に、センサーが大きいほど、より良い写真を取得できます。これは、光量が少ない状況で最も顕著になります。
理想的には、最高の写真を撮るには、APS-C またはサファリ用のフル フレーム センサーが必要です。ただし、トレードオフとして、これらのカメラはより高価でサイズが大きくなる傾向があります。そのため、予算と好みのカメラ サイズに適合する最大のセンサーを入手することをお勧めします。
サファリの焦点距離/光学ズーム
サファリ用のカメラやレンズを選ぶ際に考慮すべき非常に重要な仕様は、レンズの焦点距離です。これは「ズーム」とも呼ばれます。鳥、小動物、遠くの野生生物を撮影する場合、焦点距離は特に重要です。
より大きなズームレンズを使用すると、鳥や小動物などの小さな野生生物だけでなく、より遠くの鮮明な画像を取得できます.
ズームに関しては、光学ズームとデジタルズームという用語をよく目にします。重要な仕様は光学ズームです。
デジタル ズームは、撮影後に画像をトリミングすることと事実上同じであり、編集アプリケーションを使用して自分で行うことができるため、実際には役に立ちません。
光学ズームでは、カメラ内の光学要素を動かして実際に画像を拡大します。
サファリのズーム量の選択に関しては、コンパクトカメラやブリッジカメラのようにレンズが内蔵されているカメラを選択している場合は、少なくとも10倍の光学ズームが必要です.しかし理想的には、16 倍以上の光学ズームをお勧めします。
これらのカメラのいずれかを購入しようとしている場合は、光学ズームの数値は単なるマーケティングの数値であることを覚えておいてください。これは、レンズ間の倍率を比較するより正確な方法である、基本的な焦点距離を指します。混乱を招く可能性があるため、わかりやすくするために簡単に説明します。
すべてのレンズには、ミリメートル (mm) で測定される焦点距離と呼ばれるものがあります。 mm の数値が小さい場合、たとえば 20mm の場合、それは広角レンズであるため、フレーム内に多くのシーンが表示されます。数字が 50mm より大きい場合は望遠レンズで、画像を拡大します。
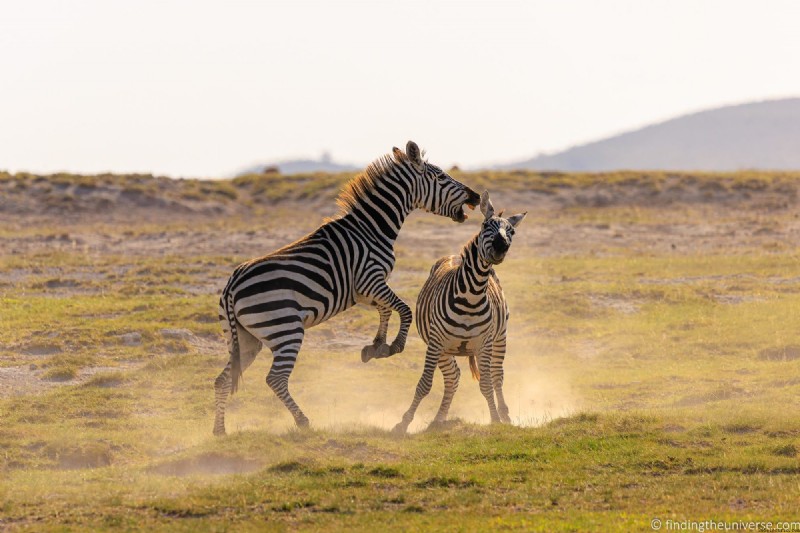
同じシーンを 2 つの異なる焦点距離で撮影した例をいくつか示します。違いがわかります。これらはトリミングされていない画像です。
上の画像からわかるように、400mm の焦点距離では明らかに被写体にもっと近づくことができます。トップ ショットをトリミングして同様の結果にすることもできますが、その結果、シャープさが大幅に低下し、粒子が粗くなります。
カメラにズームレンズが付いている場合、焦点距離を変更して、画像を大きく (ズームイン) したり小さく (ズームアウト) したりできることを意味します。光学ズームの数値は、最小の焦点距離数値と最大の焦点距離数値の差を表します。
たとえば、Sony RX10 IV のようなカメラをお持ちの場合、これは 24mm ~ 600mm 相当の焦点距離を持っています。 600 ÷ 24 は 24 なので、このカメラの光学ズームは 24 倍です。
150mm ~ 600mm レンズの DSLR またはミラーレス カメラを使用している場合、600 を 150 で割ると 4 倍になるため、これは技術的には 4 倍の光学ズームにすぎません。ただし、Sony と DSLR カメラの両方が、ズームインしたときのフレーミングに関して同じ結果をもたらします。
違いは、ソニーは広角ショットも撮れるということです。ただし、4x の数値と 16x の数値を比較すると、Sony の方がはるかに印象的です。これが、マーケティングを乗り越えるために、基礎となる数字を理解することが重要である理由です。
一般的に、サファリでの野生動物の写真撮影には、70mm から 400mm の間でズームできるレンズを備えたカメラが必要です。この範囲は、ほとんどの野生動物の写真撮影のシナリオに適しています。特にサファリでは、通常は車から降りたり道路を離れたりすることができないため、動物にどれだけ近づくことができるかによって制限されます.
現在では、400mm から 1200mm までの超望遠またはスーパーズーム レンズもあります。これらのレンズは、ほとんどの人にとって大きすぎて高価すぎるでしょうが、予算の多い熱心な野生動物写真家、特に鳥の写真に興味がある人にとっては興味深いものになるかもしれません.
あなたの主な焦点は、サファリ中に動物や鳥を撮影することになるでしょうが、風景、建物、食べ物、人物などの写真を撮るために使用できるカメラも必要になる可能性があります.
そのため、広角ショット (約 20mm) も撮影できるカメラが必要になる場合があります。これは、既存のカメラの汎用ズーム レンズ、別の広角レンズ、または広角ショット用のスマートフォンなどの別のカメラの使用を検討する場合があります。
Safari の絞り
焦点距離だけでなく、すべてのレンズには絞りと呼ばれる仕様があります。絞りは、光が通過するレンズの内側の穴です。瞳孔に少し似ています。
目の瞳孔のように、開口部は大きくなったり小さくなったりして、光を多かれ少なかれ通過させます。
すべてのレンズには絞りがあり、注目すべき主な仕様は、この絞りがどのくらい大きくなるかです。絞りは f/stop で測定され、数値が小さいほど穴が大きくなります。
たとえば、f/2.8 口径のレンズは、f/5.6 口径のレンズよりも大きな穴が特徴です。
一般に、開口部が大きいほど望ましい。開口部が大きいほど、より多くの光を通すことができます。つまり、シャッター速度を上げたり、ISO を下げたりすることができます。どちらもメリットがあります。
カメラやレンズを見ると、絞りが範囲 (f/3.5 – 5.6 など) で示されていることに気付くかもしれません。これが意味することは、焦点距離を変えると最大口径が変わるということです。広角では、最大絞りは f/3.5 になります。フルズームでは、f/5.6 になります。
これは、非常に大きなズームレンズや安価なレンズを備えたコンパクトカメラやブリッジカメラで特に一般的です.つまり、ズームインすればするほど、センサーに当たる光が少なくなるため、シャッター速度を速くするか、ISO 値を高くして補正する必要があります。
DSLR およびミラーレス カメラ用のより高価なハイエンドのスタンドアロン レンズは、焦点距離全体で固定絞りを備えている場合があります。これらはまた、大きくて重いレンズになる傾向があります。
サファリの場合、開口部が大きいほど (そして f/ストップ数が小さいほど) 優れていますが、もちろん、重量とコストに対してこれを予算化する必要があります。理想的な世界では、サファリ用に最大口径 f/2.8 または f/4 のレンズが必要ですが、コストと重量を考慮すると、これは必ずしも実用的ではありません。
使いやすさと学習曲線
使いやすさに関しては、カメラは平等に作られているわけではありません。たとえば、スマートフォンのカメラは、ボタンを押すだけで写真が撮れるという点で、非常に使いやすい傾向があります。また、コンピュテーショナル フォトグラフィーとして知られる多くの巧妙な技術も搭載されており、撮影したすべての画像で最高の結果を得ようとします。これは、あなたがよく知っていて定期的に使用しているデバイスでもあります。
ただし、他のタイプのカメラ、特にミラーレス カメラやデジタル一眼レフ カメラの学習曲線は急勾配になります。もちろん、ミラーレスカメラやデジタル一眼レフカメラには、コンパクトカメラやスマートフォンと同じように機能する自動モードもあり、ボタンを押して写真を撮ることができますが、通常は計算写真要素がありません.
これが、特に初心者ユーザーが撮影した場合に、スマートフォンのカメラ画像がミラーレスや DSLR からのショットよりも美しく見える理由です。
良いニュースは、すべてのボタンとダイヤルが実際に何をするかを時間をかけて学習すれば、ハイエンドのカメラで驚くべき結果を得ることができるということです。 .ただし、これには時間と練習の投資が必要です。
あなたがしなければならない決定は、カメラの使い方を学ぶのにどれだけの時間を費やしたいかということです.コンパクトカメラやブリッジカメラが最適なオプションです.もちろん、さまざまな機能を習得すれば、さらに良い結果が得られますが、すぐに使える設定で良い結果が得られるはずです.
一方、カメラがどのように機能するかを実際に学びたい場合は、デジタル一眼レフまたはミラーレス カメラが適しています。これには、完全に手動のオプションを含む幅広い撮影モードがあり、最終結果を完全に制御できます.
新しいカメラの購入を計画していて、それを使用して写真を改善するための助けが必要な場合は、たくさんの本、ワークショップ、クラスがあります。たとえば、誰もが写真を上達できるように設計されたオンラインの旅行写真コースを運営しています。
メガピクセル数
すべてのカメラ センサーにはメガピクセル数があり、通常は 12MP から 50MP+ の範囲です。
数値が大きいほど、画像を保存するときにカメラ センサーが記録するピクセル数が多くなります。メガピクセルは 100 万ピクセルを意味し、幅 1000 ピクセル、高さ 1000 ピクセルの画像を指します。 1000 かける 1000 は 100 万なので、メガピクセルです。
メガピクセルが多いほど、最終的な画像の幅と高さが大きくなります。これの利点は、詳細を失うことなく画像をトリミングできることです。
欠点は、画像ファイルが大きくなり、メガピクセルの画像が少し粗くなる可能性があることです。
鳥などの小さな被写体を遠くから撮影する予定がある場合や、大量の画像をより大きなサイズで印刷する予定がない限り、メガピクセル数についてあまり心配する必要はありません。このような場合、メガピクセル数が多い (30MP+) と、より多くのショットをトリミングしても、良好な結果が得られます。
それ以外の場合、スマートフォンの場合は 12MP 以上で十分であり、他のカメラの場合は 20MP 以上でサファリに十分です。カメラのズームが非常に大きい場合は、撮影後のトリミングが不要になるため、メガピクセル数を少なくすることもできます。
画像安定化
カメラを手に持って写真を撮っているとき、手の動きが画像のモーション ブラーに変換されることがあります。これにより、画像が鮮明ではなくなります。
これは、暗い場所での撮影など、シャッター スピードを遅くして撮影した画像に影響を与えます。また、より長いズームを使用すると、手の動きが誇張される可能性があり、より明白になります.これは、双眼鏡や望遠鏡で見たときに得られる効果に似ています。小さな動きでも画像がぼやけて見えるようになります。
画像安定化機能を備えたカメラは、これをある程度まで補正できるため、画像がよりシャープになります。画像安定化は、カメラ本体またはレンズ (またはその両方) に組み込むことができます。最良の結果を得るには、カメラ本体とレンズの両方に画像安定化機能を搭載することをお勧めします。
画像安定化ができることは限られていることに注意してください。画像の鮮明さをすべて修正するわけではありません。そのため、写真を撮る前にできる限りカメラを安定させ、撮影する焦点距離に適したシャッター速度を使用してください。
耐候性
サファリは非常にほこりの多い場所になる可能性があり、カメラはほこりがあまり好きではない傾向があります.世界の熱帯地域に行く場合や、雨季に国を訪れる場合も、雨や湿気に遭遇する可能性があります.市場に出回っている一部のカメラ、特に高価なモデルは、耐候性を備えています。
耐候性カメラには通常、レンズ マウントやメモリ カード スロットのゴム保護など、カメラへの湿気の侵入を防ぐためのさまざまな機能が備わっています。これは、にわか雨の際にカメラに水が入るのを防ぐのに役立ちますが、カメラにほこりが入るのを防ぐのにも役立ちます。
カメラ内のほこりは、センサーに落ちた場合に画像に見苦しいスポットを作成したり、センサーがまったく機能しなくなったりするなど、さまざまな悪影響を与える可能性があります。
ある程度の耐候性を備えたカメラを使用している場合は、水とほこりの両方から保護できるため、心配することが 1 つ少なくなります。すべてのカメラで利用できる機能ではありませんが、理想的には、サファリ写真用のウェザー シーリング付きのカメラが必要です。
オートフォーカス システム
動いている野生動物の写真を撮るのは、特に焦点を合わせて維持するのが難しい場合があります。優れたオートフォーカス システムを備えたカメラを入手することが重要です。
最新のオートフォーカス システムは、動物やその目などを自動的に識別して追跡できるため、心配する必要があるのは被写体をフレーム内に収めることだけです。
サファリ写真用のカメラを見るときは、オートフォーカスシステムがどのような機能を備えているかを確認してください。具体的には、焦点を合わせる速度 (速いほど良い) と、何らかの種類の被写体検出またはアイ トラッキングを提供するかどうかを確認します。これにより、鮮明な写真を簡単に取得できます。
バースト速度
カメラの連写速度は、1 秒間に何枚の写真を撮影できるかを表します。ハイエンドのカメラは、1 秒間に 12 ~ 30 枚の画像を撮影できます。ミッドレンジのカメラは、1 秒あたり約 4 ~ 12 枚の画像を処理できます。
連写速度が速いということは、特定の瞬間、特に飛行中の鳥や走っている動物などのより速い動きを捉える可能性が高くなることを意味します。
さらに、連写速度はカメラの全体的な技術的能力に直接関係するため、連写速度が速いカメラは、連写速度が遅いカメラよりも適切に指定されます。
サファリの場合、少なくとも毎秒 5 フレームを撮影できるカメラが適していますが、常に高いほど優れています。

Safari に最適なカメラ
以上で、サファリ用カメラに求められる主な機能について説明しました。サファリにおすすめのカメラのリストをいくつか紹介します。明らかに多くの選択肢があるため、このリストはすべてを網羅しているわけではありません。
このリストと、サファリ カメラで何を探すべきかに関する情報を組み合わせることで、適切な出発点が得られるはずです。レンズを交換できるカメラについては、次のセクションで推奨されるサファリ レンズも紹介します。
これらのカメラは、安いものから高いものまで、おおよその価格で注文されますが、価格はさまざまであるため、もちろん自分で価格を確認する必要があります.価格は約 400 ドルから始まり、ハイエンド モデルでは 3,000 ドル以上になります。
パナソニック ルミックス DC-FZ80 / FZ82
使いやすくズーム性能の高いサファリ向けの価値あるカメラが必要な場合は、Panasonic の Lumix DC-FZ80 ブリッジ カメラを検討することをお勧めします。

2017 年 3 月に発売された、これはサファリ用カメラのリストの中で最も低価格のオプションですが、それでも十分な価格のカメラを手に入れることができます.
まず、約5ストップの安定化を備えた画像安定化20-1200mm(60x)レンズがあります.これは、4K ビデオもサポートする 18.1 メガピクセルの 1/2.3 インチ センサーと組み合わされています。
背面の画面は固定ですが、タッチ対応です。カメラは WiFi 対応で、616g (21.7 オンス) の軽量です。主な欠点は、この価格帯では驚くことではありませんが、天候による密閉がないことです.バッテリーの寿命も素晴らしいものではありません.
ただし、優れたズームが得られます。これは、さらに遠くの被写体をキャプチャできるズームを備えた堅実な予算のサファリ カメラ オプションです。
主な仕様 :20-1200mm (60x) 焦点距離、f/2.8-5.9 絞り、10 画像/秒、18.1 メガピクセル 1/2.3 インチ センサー
体重 :616g / 21.7oz
バッテリー寿命 :330枚
価格 :Amazon の最新価格はこちら、B&H はこちら、Adorama はこちら
Panasonic Lumix ZS70 / (英国では TZ90)
手頃な価格でサファリ用のコンパクトなカメラが必要な場合は、この Panasonic Lumix モデルをチェックしてください。 30 倍の光学ズーム レンズ (24mm – 720mm)、20.3MP 1/2.3 インチ センサー、画像安定化、完全な手動制御、さらには RAW サポートを利用できます。
電子ビューファインダーもあり、この価格帯のコンパクトカメラには間違いなくボーナスです.これにより、明るい日光の下での画像の合成が容易になります。スピードに関しては、毎秒最大 10 フレームで撮影できます。

2019 年には新しいモデル ZS80 がリリースされました。これにより、Bluetooth と高解像度の EVF が追加されますが、他にはあまりありません。
価格差を正当化するのに十分なアップグレードかどうかはわかりませんが、それはあなた次第です.それらが同じ価格で見つかった場合は、ZS80 を購入したほうがよいかもしれません。それ以外の場合は、ZS70 がまだ入手可能である限り、私たちの選択のままです.
主な仕様 :24-720mm (30x) 焦点距離、f/3.3-6.4 絞り、10 画像/秒、20.3 メガピクセル 1/2.3 インチ センサー
体重 :322g / 11.36オンス
バッテリー寿命 :380枚
Amazon の価格はこちら、B&H はこちら、Adorama はこちら
キヤノン パワーショット SX740
キヤノンは何十年にもわたってさまざまなカメラを製造しており、このリストにいくつかのカメラを見つけることができます.サファリ向けの優れたズーム機能を備えたコストパフォーマンスに優れたコンパクト カメラをお探しの場合、これはお勧めの Canon オプションです。

あなたのお金のために、1 / 2.3インチの20.3MPセンサーと40倍の光学ズーム(24-960mm)を手に入れます.長いズームを備えた他のコンパクトカメラと同様に、最大絞りがf3.3までしか行かないというトレードオフがあります。最大ズームでは、f/6.9 まで絞り込みます。バッテリーの寿命も 265 ショットとあまり長くなく、ビューファインダーもありません。
それでも、特にこの価格帯では最も価値のあるコンパクトズームカメラの1つであり、価格はあなたが得るものに対して優れています.画質や低照度でのパフォーマンスの面で奇跡を期待しないでください。特にズームインした場合はなおさらです。
主な仕様 :24-960mm (40x) 焦点距離、f/3.3-6.9 絞り、10 1 画像/秒、20.3 メガピクセル 1/2.3 インチ センサー
体重 :299g / 10.55oz
バッテリー寿命 :265枚
Amazon の価格はこちら、B&H はこちら、Adorama はこちら
Panasonic Lumix ZS200 (英国では TZ200)
画質と低照度性能がズームよりも重要な場合は、Panasonic の Lumix ZS200 をチェックしてください。

このコンパクト カメラには 20.1 メガピクセルの 1 インチ センサーが搭載されており、標準の 1/2.3 インチ コンパクト カメラ センサーの約 4 倍の大きさになります。
また、可変 f/3.3 – f/6.4 絞りと画像安定化を備えた 15x (24-360mm) レンズも入手できます。これは、遠くの小さな鳥類を除いて、ほとんどのサファリの状況では実際にはかなり妥当なズームです.
また、完全な手動コントロール、タッチスクリーン インターフェイス、電子ビューファインダー、RAW 撮影も備えています。
サファリ用のコンパクトカメラに関しては、間違いなく少し高価なオプションですが、その光学ズームは、特に 1 インチセンサーのカテゴリでは間違いなくボーナスです.
主な仕様: 24-360mm (15x) 焦点距離、f/3.3-6.4 絞り、10 画像/秒、20.1 メガピクセル 1 インチ センサー
重量: 340g / 11.99oz<強い>
バッテリー寿命 :370ショット<強>
Amazon の価格はこちら、B&H はこちら、Adorama はこちら
キヤノン パワーショット SX70 HS
キヤノンのブリッジ カメラ製品は、もう 1 つの有効なオプションです。印象的な 21-1365mm (光学 65 倍) ズーム レンズを備えており、最大絞り値は f/3.4-6.5 まで可変です。また、重量を考慮すれば、市場で最も軽量なブリッジ カメラの 1 つです。

レンズは光学的に安定しており、最大 5 ストップの安定性を提供します。 1/2.3 インチ センサーは 2,000 万画素を提供します。これは、ほとんどのユーザーにとって十分な値です。特に、印象的なズームは、あまりトリミングする必要がないことを意味します。
It has full manual controls as well as RAW support, and you get both Bluetooth and WiFi connectivity as well as 4K video support.
There are some drawbacks. Image quality at the zoom and wide angles is a little soft, and there’s no touch screen or weather sealing. The screen does flip out and tilt though.
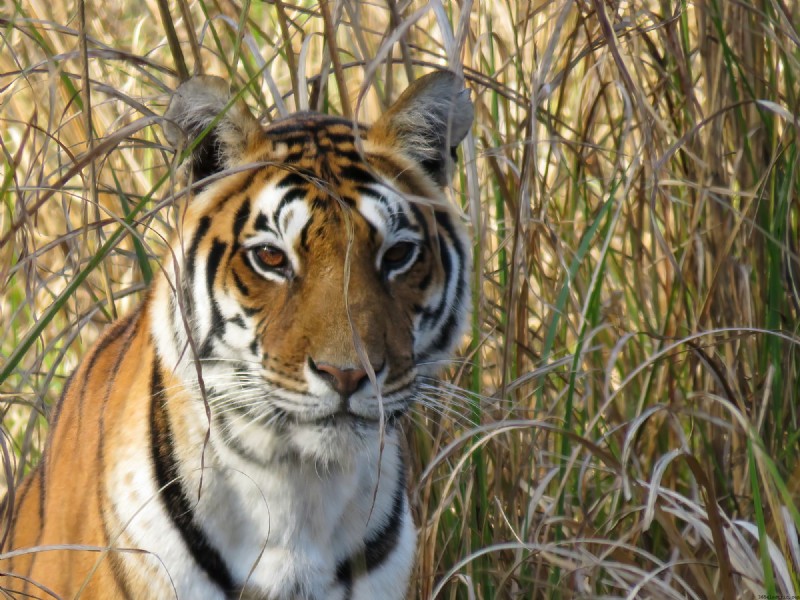
My parents have an earlier model of this camera (they provided the tiger photo earlier in the post) and they have been very happy with the results from safaris in destinations around the world.
Key Specifications :21-1365mm (65x) focal length, f/3.4-6.5 aperture, 10 images / second, 20 megapixel 1/2.3″ sensor
Weight :610 g / 21.5 oz
Battery life :325 shots
Price :Check latest price on Amazon here, B&H here, and Adorama here
Nikon D3500
Nikon are a well known brand well it comes to DSLR cameras, and the Nikon D3500 is an excellent value DSLR. It also comes with the big advantage that you get access to all the Nikon and Nikon compatible lenses, which is a huge choice.
For your money, you get a 24MP APS-C sized sensor, full manual controls and RAW support. Burst speeds are a little slow at 5 frames per second, but battery life is incredible at 1,550 shots. It’s also relatively light for a DSLR.
There’s no weather sealing, and the screen doesn’t feature any touch or flip out technology. There’s also no image stabilization, but a great many lenses are available which do feature this technology. If you want a budget DSLR for safari, this is a good option.
Key Specifications: 5 images / second, 24 megapixel / APS-C sensor
Weight: 365g / 12.87oz
Battery life: 1550 shots
Price on Amazon here, B&H here and Adorama here.
Canon Rebel SL3 (EOS 250D in Europe)
The SL3 (or EOS 250D) is one of Canon’s budget-oriented DSLR cameras. The Canon Rebel line is an excellent series of good value entry-level DSLR cameras (my first DSLR was a Rebel), and the SL3 is no exception.
It’s one of the smaller SLR cameras Canon has made, and it offers great performance for an excellent price. Specs include a touchscreen, 24.2MP APS-C sized sensor, WiFi, 1070 shot battery capacity, 4K video support, and compatibility with all of Canon’s lenses (and a great many third party lenses.).
There’s no image stabilization, but as with the Nikon there are a great many lenses available which do feature this technology. It’s also not weather sealed.
Key Specifications: 5 images / second, 24.2 megapixel APS-C sensor
Weight: 449g / 15.84oz
Battery life: 1070 shots
Price on Amazon here, B&H here and Adorama here.
Nikon Coolpix P950
The Nikon Coolpix P950, released in 2020, has a lot going for it. First, you get an impressive 24-2000mm lens, which is an 83x optical zoom. That should be more than enough for any kind of safari photo, and in particular for those of you looking for a camera for bird photography.
The maximum aperture starts at a wide f/2.8, and narrows down to f/6.5 when zoomed in. Given the length of the lens, this is to be expected.

The lens is stabilized, and the stabilization offers an impressive 5.5 stops of improvement. Sensor wise, you’re looking at a 1/2.3″ 16MP sensor, which offers a good balance between size and low light performance.
Image quality is good although softens as you zoom further in. This is quite common on compact and bridge cameras with big zooms. There is a reason high end mirrorless and DSLR lenses cost thousands of dollars after all! However, I think most users will be happy with the performance.
The megapixel count isn’t particularly high, but you are unlikely to need to crop much given you have an incredible zoom.
The P950 has support for RAW photography as well as manual modes that let you set shutter speed, ISO, and aperture. There’s also 4K video support as well as WiFi and Bluetooth connectivity options.
There are a few downsides. Battery life is quite low at 290 shots, and the huge lens means this camera is quite heavy for a bridge camera, weighing just over 1 kg (2.2 lb). There’s also no touchscreen, or weather sealing.
Key Specifications :24-2000mm (83x) focal length, f/2.8-6.5 aperture, 7 images / second, 16 megapixel 1/2.3″ sensor
Weight :1005 g / 35.4 oz
Battery life :290 shots
Price :Check latest price on Amazon here, B&H here, and Adorama here
Nikon Z50
The Z50 is Nikon’s more entry level mirrorless camera, which features a 20.9MP APS-C sized sensor, which Nikon calls DX sized.

Despite being entry-level, you still get a lot for your money. There’s 11fps burst shooting, 4K video support, a tilting touchscreen display and an OLED viewfinder. You also get Bluetooth and WiFi connectivity, with battery life rated to around 300 shots.
This is a great lightweight mirrorless camera at a good price, however do be aware when comparing this and other DSLR and mirrorless cameras to other cameras on our round up that you will have to buy a lens as well. It is also compatible with most of Nikon’s lenses via an adaptor, which gives you a huge choice.
It even has some weather-sealing, although the pop-up flash means it isn’t considered as weather-sealed as some of its more expensive siblings.
Key Specifications :11 images / second, 20.9 megapixel APS-C sensor
Weight :450g / 15.87 oz
Battery life :320 shots
Price on Amazon here, B&H here, and Adorama here
Panasonic Lumix FZ1000 II
If you like the idea of a bridge camera but would prefer improved image quality and low light performance over a huge zoom, check out the FZ1000 II from Panasonic.

Released in 2019, this camera features a 20.1 Megapixel 1 inch sensor. This means you get better low light performance than bridge cameras with smaller sensors, as well as higher image quality.
Unfortunately, a larger sensor comes with some tradeoffs, namely the zoom. The FZ1000II features a 25-400mm lens, equivalent to a 16x optical zoom. This is definitely on the low end for a bridge camera, but if you’re not too worried about shooting very distant subjects, 400mm is still on par in terms of magnification with DSLR or mirrorless zoom lenses.
When I go on safari, I find a 400mm lens works fine 99% of the time. The only exception really is for small birds, where a longer lens is nearly always helpful.
The other nice thing about this lens is that it features a wide f/2.8 aperture. This drops to f/4 when zoomed in, which is still very respectable. A wider aperture lets more light in, meaning you can shoot at higher shutter speeds and lower ISO values. The lens is also image stabilized, offering 3-5 stops of stabilization.
The display tilts and swivels out from the camera and is touch enabled. You also get WiFi and Bluetooth support, as well as a relatively good battery life of 440 shots. Video wise, you get 4K video support. Despite having a larger sensor, the camera is not too heavy at 810 g (1.79 lbs).
There’s no dust or water protection, which is a shame in a camera at this price point, and probably the main downside. Otherwise though, if you are happy with the zoom range, this is a solid option.
Key Specifications :25-400mm (16x) focal length, f/2.8-4 aperture, 10 images / second, 20.1 megapixel 1″ sensor
Weight :810 g / 28.5 oz
Battery life :440 shots
Price :Check latest price on Amazon here, B&H here, and Adorama here
Samsung Galaxy S22 Ultra / iPhone 14 Pro Max
I appreciate it’s a little jarring to go from cameras to smartphones, but I know that many of you might not want to take anything other than a smartphone on safari. For many shots, a smartphone will work just fine, especially in those scenarios where the animals are very near.
If you are going to take a smartphone for your safari camera, then you might as well pick the best option. The two contenders I recommend are either the Samsung Galaxy S22 Ultra or the iPhone 14 Pro Max. I’ve put these together because at this point, most people have likely settled on Android or iPhone.
Specs wise they are not dissimilar when it comes to the camera technology. The most important feature, and the reason I chose these two phones for safari photography, is that they both have a relatively good optical zoom (by smartphone standards at least). That means you’ll still be able to shoot wildlife that is a little further away and get good results.
The Samsung S22 Ultra actually has four cameras, each with its own sensor. Most importantly, there’s a 10x (230mm equivalent) optical zoom on a 10 megapixel 1/3.52″ sensor. It’s quite a small sensor even by smartphone standards, but that 10x zoom could definitely come in handy.
The iPhone 14 Pro Max has three cameras. The longest reach it has is from a 2x (77mm equivalent) optical zoom on a 1/3.4″ sensor.
Both phones offer a range of photography focused features, from image stabilization through to powerful computational technology to improve how your images look. If you really want a smartphone for your safari, one of these two options would be our pick.
Price on Amazon for Samsung here, Apple on Apple store here.
Sony RX100 VII
If you like the idea of a compact camera but don’t want to sacrifice too much image quality, consider the RX100 VII. Released in August 2019, in our opinion this is one of the best compact cameras for safari that money can buy, and we travel with an earlier version ourselves.

The RX100 VII has an 8x optical zoom, equivalent to a 24mm – 200mm lens. That’s about the absolute minimum focal length we’d recommend for a safari. It also has a 20.1 megapixel 1-inch sized sensor like the Panasonic ZS200, which is the closest alternative.
The main differences are that the ZS200 has more zoom at the expense of a narrower aperture. The RX100 has a faster burst rate at 20 frames per second, and it also has a much-improved focus system which can lock on and track subjects very quickly. As you might imagine, that can come in very handy for safari photography.
Sony have used the learning acquired from the focus technology in their high-end professional cameras and it definitely shows.
Image quality in the Sony is also a little better than the Panasonic.
The RX100 also has image stabilisation, a tilting screen and an impressive electronic viewfinder. This is a great all-round compact camera, although it is quite expensive. If the price is too high, the ZS200 offers a great deal at a much more reasonable price.
Key Specifications: 24-200mm (x) focal length, f/2.8-4.5 aperture, 20 images / second, 20.1 megapixel /1″ sensor
Weight: 302g / 10.65oz
Battery life: 240 shots
Price on Amazon here, B&H here and Adorama here
Sony A6600
Sony have been making excellent consumer oriented mirrorless cameras for a long time. The A6600 is the current top of their A6xxx range.
The A6600 has a lot of technology packed into its relatively diminutive body. There’s a 24.2 megapixel APS-C sized sensor which can shoot at 11 frames per second. It has Sony’s impressive real-time subject tracking which can recognise and track human and animals’ eyes very quickly.
You also get in body image stabilization, a flip up touch screen, WiFi and Bluetooth connectivity, an impressive 810 shot battery life and weather sealing. All in all, this is a feature packed camera that would be a great option for safari photography when paired with a good telephoto lens.
Key Specifications :11 images / second, 24.2 megapixel APS-C sensor
Weight :503g / 17.74oz
Battery life :810 shots
Price on Amazon here, B&H here and Adorama here
Canon EOS R7
This mirrorless camera for Canon was launched in 2022, and it is packed with features that make it an excellent choice for a safari camera. In fact, a lot of the technology in this camera, especially around autofocus, is borrowed from Canon’s high-end EOS R3, a camera which retails in excess of $6,000 USD.
At the heart of this camera is a 32.5MP APS-C sized sensor. That is fully image stabilized, and it supports shooting at 15 frames per second (mechanical) and a staggering 30 frames per second (electronic).
Perhaps the most impressive feature though is the autofocus. This can identify and track a range of subjects, including animals and birds. I have used this system extensively and it is amazing how well it can lock onto even a fast moving subject to enable you to get sharp shots every time.
You also get a touch-enabled flip screen, weather sealing, Wi-Fi and Bluetooth connectivity, and compatibility with a massive selection of Canon lenses. Battery life is reasonable at 660 shots, and the weight without a lens is also good at 612g/ 21.58oz.
If you are looking for an APS-C sensor camera for safari photography, this would be at the top of my list.
Key Specifications :30 images / second, 32.5 megapixel APS-C sensor
Weight :612g / 21.58oz
Battery life :660 shots
Price on Amazon here, B&H here and Adorama here
Sony Cyber-shot DSC-RX10 IV
If you love the idea of a bridge camera but don’t want to sacrifice image quality, speed and weather sealing, look no further than the stunning Sony Cyber-shot DSC-RX10 IV. Sony has been leading the way with high performance camera sensors for a number of years, and the RX10 IV is the current pinnacle of their bridge camera offerings.
This is probably the best bridge camera for safari, although as with every decision, there are of course some compromises. The main one being price. This is definitely a premium offering. However, you do get a lot for your money.

To start with, this is a 1″ sensor camera, with 20.1 megapixels of resolution. That is paired with a 24-600mm (25x optical) lens, which we think will be enough for most safari needs.
The lens starts out at a very wide f/2.4, meaning lots of light can reach the sensor. At 600mm the lens stops down to f/4. This is still very impressive, when you consider that a 600mm f/4 lens for a DSLR will set you back five figures! The lens is also stabilized, offering around 4.5 stops of improvement.
You also get one of the fastest autofocus systems in the world, Wi-Fi, Bluetooth and 4K video, superb image quality, a touch-enabled screen, a weather sealed body, and a truly impressive 24 frames per second shooting speed. Naturally there are full manual controls and RAW support.
With all that tech onboard, combined with the relatively large sensor and wider aperture zoom lens, this camera does weigh quite a bit. In fact, at 1095g (2.4lbs) it’s heavier than some DSLRs. However, if quality and performance are your key goals, and you just want an all-in-one camera that will just work, then this camera still offers excellent value for money.
If the price is a bit much, then consider the earlier model RX10 III, which offers similar features at a lower price point. You will lose the touchscreen, and the autofocus and shooting speeds are a little slower.
Key Specifications :24-600mm (24x) focal length, f2.4/4 aperture, 24 images / second, 20.1megapixel 1″ sensor
Weight :1095 g / 38.6 oz
Battery life :400 shots
Price :Check latest price on Amazon here, B&H here, and Adorama here
Sony A7c
If you like the look of the Sony A6xxx line but want something with a full frame sensor, consider the Sony A7C.

Somehow, Sony has managed to fit a full frame sensor into a body that is almost identical in size and weight to the A6600, making it one of the smallest full frame mirrorless cameras on the market today.
They haven’t cut corners in terms of features either. You get a 24.2MP sensor, 10fps shooting, in body image stabilization, 4K video, WiFi, Bluetooth, vari-angle touchscreen and weather proofing. It also has excellent animal and people tracking with Sony’s eye-tracking autofocus system.
It even manages 740 shots on a charge. A fantastic option if you want something with a full frame sensor but in a relatively compact size.
The only downside is that it can feel a bit small and fiddly in the hands. However, that is a minor niggle for what is otherwise a standout option.
Key Specifications :10 images / second, 24.2 megapixel full frame sensor
Weight :509g / 17.95oz
Battery life :740 shots
Price on Amazon here, B&H here, and Adorama here
Canon EOS R6
In 2020, Canon launched two excellent mirrorless camera options, namely the Canon EOS R6 and the Canon EOS R5.

These were the first full frame mirrorless cameras from Canon to feature in-body image stabilization, which offers an amazing 8 stops of stabilization when used with a compatible lens.
The R6 is the lower priced version of the two, but it is still very capable. It has a 20.1MP full frame sensor, autofocus that can track both people and animals, up to 20 frames per second burst shooting, Wi-Fi &Bluetooth, 4K video, as well as a flip-out touchscreen. It’s also dust and drip-proof.
The fantastic autofocus system is brilliant on safari, as is the high burst shooting rate.
There’s a lens adaptor which will let you use all EF and EF-S Canon lenses with the camera, which opens the door to a massive choice.
The main downside is that on paper the megapixel count does feel a bit miserly when stacked up against the competition. Honestly though, we don’t think it’s that big of a deal, and it does mean that high ISO and low light performance is fantastic. The battery life is also not that great compared to its peers.
You can see our full Canon EOS R5 review here, which covers a lot of the features of the R6, to see if it might be the camera for you.
Key Specifications: 20 images / second, 20.1 megapixel full frame sensor
Weight: 680g / 23.99oz
Battery life: 360 shots
Price on Amazon here, B&H here and Adorama here.
Sony Alpha a7 IV
Sony effectively started the mirrorless camera revolution, and the Sony a7 IV, as the name suggests, is the fourth iteration in their excellent a7 range.
It comes with a full frame 33MP full frame sensor, flip out LCD display, a high refresh rate EVF, WiFi, 10fps burst shooting and a fast autofocus system that includes Sony’s excellent animal and people eye tracking.
It also has good battery life at 580 shots per full charge, and includes weather sealing, meaning it’s an excellent all-round camera and a solid option for safari. The burst rate is a bit slower than the Canon R6, but you do get a higher resolution sensor as a trade-off, as well as extended battery life.
Key Specifications :10 images / second, 33 megapixel full frame sensor
Weight :659g / 23.25oz
Battery life :580 shots
Price on Amazon here, B&H here and Adorama here.
Nikon Z7 II
The Nikon Z7 II is the second iteration of the Z7 model, which is towards the upper end of Nikon’s mirrorless camera range. You get a lot for your money. There’s a 45.7MP full frame sensor, weather sealeding, tilting touch screen and it has WiFi and Bluetooth. Battery life is also good enough at 420 shots.
The main downside is reviews suggest the autofocus system, whilst good, isn’t quite up to the performance of the Sony and Canon options. A burst speed of 10 frames a second is also at the lower end in this price bracket, similar to the Sony A7 IV.
However, Nikon users will likely appreciate the familiar interface and the fact that it’s compatible with the whole range of Nikon lenses with an adaptor.
Key Specifications :10 images / second, 45.7 megapixel full frame sensor
Weight :705g / 24.87oz
Battery life :420 shots
Price on Amazon here, B&H here and Adorama here.
Canon EOS R5
I will admit to being a little bit biased as this is the camera I actually use on a day-to-day basis, and that I have shot my most recent safaris on. I wrote a full review of the R5 here.
In summary though, I think this is a phenomenal camera. Let’s look at the specs. You get a 45 megapixel full frame sensor, with built-in image stabilization. It can shoot up to 20 frames a second. The autofocus system for tracking animals and people is truly incredible. It’s also remarkably versatile as an all-round camera, able to do everything from landscapes to wildlife.
There’s WiFi, bluetooth, a flip out touchscreen, and loads of customization options so you can set it up to work for you. It also supports 8K video, if you want to shoot video. You also get access to Canon’s massive range of lenses, including the older EF and EF-S lenses via an adaptor.
The only real downside is that it’s expensive, and the battery life at 320 shots means spare batteries are an essential purchase. Other than that though, this was my pick for my favourite camera for safari.
Key Specifications :20 images / second, 45 megapixel full frame sensor
Weight :738g / 26.03oz
Battery life :320 shots
Price on Amazon here, B&H here and Adorama here
Safari Camera Recommendations Summary
If you are finding the above list of recommended cameras and their specifications a bit overwhelming but have a general idea of your budget and what kind of camera you want, here are some personal recommendations of the best camera for safari across budgets and types of cameras:
- Best Safari Camera Under $500 :Panasonic Lumix DC-FZ80 / FZ82
- Best Safari Camera under $1000: Nikon Z50
- Best Safari Camera under $5000: Canon EOS R5
- Best Smartphone for Safari :Samsung Galaxy S22 Ultra
- Best Compact Camera for Safari :Sony RX100 VII
- Best Bridge Camera for Safari :Sony DSC-RX10 IV
- Best Mirrorless Camera for Safar i:Canon EOS R5
Hopefully if you are having a hard time deciding, the above list will give you a good place to start your search for a specific camera.
But if you have any questions, just ask me in the comments section at the end of the article and I am happy to try to provide advice on which camera (and lens) might be best for you given your budget and what you want to do with it.
The Best Lenses for Safari
If you decide to buy a mirrorless or DSLR camera, then you are going to also need to buy a lens to go with it. Whilst some cameras may come with a lens, in most cases this won’t be ideal for safari as it won’t have sufficient reach.
There are a great many lenses on the market, and they are not generally compatible with different camera systems due to different mounting systems. If you want more background on lenses and what to look for in general, see my guide to the best lenses for travel photography, which breaks down all the terminology in detail.
I’m not going to be able to cover every lens out there, but I will provide a quick rundown of what I think are some of the best options on the market across a variety of camera systems and price points. This should give you some ideas for what to look for.
I’m going to primarily focus on longer focal lengths for wildlife photography, but do also consider bringing a wide-angle lens for the landscape opportunities as well. Ideally, for wildlife photography you want around a 400mm lens if your budget will allow for it.
I will also be recommending zoom lenses, meaning you can change the focal length, as this gives a lot more compositional control compared to a fixed focal length lens. There is a small loss in image quality and maximum aperture as a result, but this is very much worth the trade-off in my opinion for most users.
70-300mm lenses for safari
Sony, Nikon, and Canon all have at least one 70-300 lens available, which tends to be a fairly reasonably priced offering.
Most of these lenses have a variable aperture of f/4-5.6 and offer a good compromise between size, weight, image quality and affordability.
For example, see this Canon 70-300, this Nikon 70-300 and this Sony 70-300. This popular focal length is also available from third party manufacturers, such as with this Tamron for the Sony mount. If you are looking for a more budget safari lens, one of these is likely going to be a good pick.
300mm would be the absolute minimum I’d recommend for a lens for safari. However, I appreciate not everyone wants to spend a huge amount on camera equipment, and one of these lenses is a good way to get a reasonable reach in a relatively lightweight package.
100-400mm lenses for safari
The 100-400mm range is one of the most popular for safari photographers. 100mm lets you get quite a lot of the scene in shot, whilst 400mm will let you zoom in quite close on most subjects. Most of these lenses come with a variable aperture of around f/4.5 – f/5.6.
There’s a wide range of choice at the 100-400mm range across a number of systems. At the higher end you have the weather-sealed, heavier options like this Canon 100-400, this Sony 100-400 and this Nikon 100-400.
If you are willing to sacrifice your maximum aperture, you can save a bit of money with something like this Canon 100-400 f/5.6-8 for RF mount cameras, or this Sigma 100-400 f/5-6.3.
Generally, I’d advise trying to get the widest aperture you can afford as it will make a big difference in low light situations. However, I did want to make it clear that there are options out there across a range of budgets.
Other telephoto lens options for safari.
There are of course other options that are worth considering. If you want more reach, consider the Canon 100-500 f/4.5 – 7.1 for RF mount, or the excellent Sony 200-600 f/5.6-6.3.
If you want more reach but don’t want to spend as much, you can save money by using third party lenses from the likes of Sigma and Tamron for example. Image quality and autofocus speeds might be marginally impacted, but the price difference can be significant.
For example, check out this Tamron 150-600 f/5 – 6.3, which is available in a range of mounts for different camera systems. You get an excellent focal range, image stabilization and weather sealing at what is a very reasonable price. Sigma also do a range of 150-600mm lenses for different mounts.
Lens and Camera Rental for Safari
A high-end camera and lens can be a very expensive investment, which might not make a lot of sense for one-off usage. You obviously want to get great photos on your trip, but buying an expensive telephoto zoom lens or high specification full frame body that you only plan to use once might not make sense.
In this case, consider renting your camera equipment. A company like Lens Rentals will allow you to rent a lens and a camera body at a much lower cost than buying it outright. They also give you the option to purchase the gear rather than return it, so if you love the experience then you can invest having tested the gear out.
This is definitely worth looking into if you want high end gear but don’t want to invest into an expensive setup for long term use. You can browse what they have available here.
Accessories for Safari
Now that you have your camera and lens figured out, I wanted to share some tips for what camera and photography accessories you may want to bring on safari.
Memory Cards
You are going to be taking a lot of photos when on safari. Memory cards are not very expensive these days, and it is worth having a backup memory card as well as plenty of memory.
I recommend at least a 64GB memory card. If you are travelling with a laptop then you can back up your photos as you go. If you prefer to travel light, then you will want to pack many more memory cards so you don’t run out of space on your trip.
Spare Batteries
It is definitely worth bringing at least one spare battery for your camera, and ideally two. These are easy to keep on you or in your photography bag and come in handy when you are out all day.
You don’t want to be half way through a busy day and run out of battery, and then potentially miss some great shots. Modern mirrorless cameras in particular can eat through batteries quickly, so a spare or two is definitely a must in my opinion.
USB Battery Charger / Power Pack
As well as spare batteries, you might consider bringing a USB power pack and USB powered camera battery charger. This will allow you to charge your camera batteries while on the go from the battery pack (or a USB outlet in your vehicle).
Some locations you stay at on safari may also have limited power outlet availability, especially in the more remote areas or if you are staying in tented camps. In these scenarios, they often have USB power outlets from solar panels, but might not have higher voltage outlets.
In these situations, a USB battery charger for your camera batteries will be invaluable. I travel with both a USB battery pack and a USB powered battery charger for my Canon camera batteries, and it has come in handy many times.
Monopod / Tripod
A common question is whether or not you should take a tripod on safari. I would say that in general, for wildlife photography from a vehicle, a tripod is not going to be very useful. There likely won’t be enough room to set it up unless you have a vehicle specifically set up for it.
Another option is a monopod, which is certainly something to consider, depending on your vehicle configuration. If you are also likely to be doing foot-based safaris and have big lenses, then a monopod is definitely something to consider.
For example, I used a monopod when shooting chimpanzees in Uganda, a trip which required a hike through the jungle. A monopod allows for very quick movement of your camera, often necessary in wildlife photography, whilst still taking most of the weight off your shoulders.
A good option if you want to pack a tripod for your safari trip but are maybe also thinking you may want a monopod is to bring a travel tripod that can convert to a monopod such as the recent VEO 3 range from Vanguard.
I’ve been an ambassador for Vanguard for many years now. If you see something on their store that works for your equipment, you can save money using our exclusive Vanguard discount code. This will give you 20% off everything in the Vanguard store.
Just use the code FindingTheUniverse for your discount! This code works in the Vanguard USA, UK, Australia, Spain, and Germany stores.
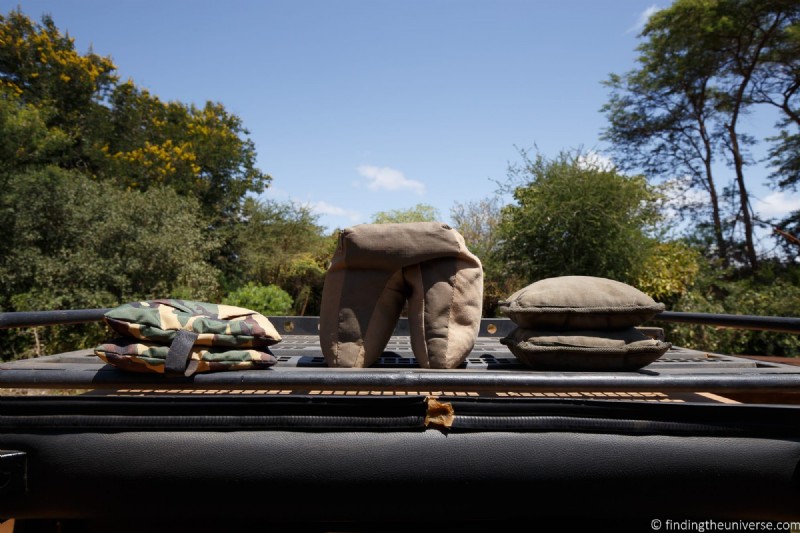
Photography Bean Bag
For vehicle-based photography, the most useful accessory in my opinion is a photography bean bag rather than a tripod or monopod. I used these every day we did vehicle safaris on our recent trip.
Photography bean bags can be placed on the roof of the vehicle for use when looking out a pop-up top, or over a window or window sill for in-vehicle use.
Photography bean bags are normally made out of a durable canvas (or similar material), and have a zipped opening so you can add or remove the contents. These can be polystyrene beads, or you can simply fill them with something environmentally friendly like dried kidney beans when you arrive in a destination.
I used a photography bean bag extensively on my safari trips, and they are really an invaluable item. You can see some options online here.
Appropriate Clothing
Whilst this isn’t camera specific, having the right clothing for your safari can improve your overall experience. If you are comfortable and prepared for the weather, you are also likely to get better photos.
Personally, I prefer clothes with lots of pockets where I can store things like spare batteries, lens wipes and lens caps. Most safaris tend to be hot, so you also want lightweight clothing.
A vest is a popular option for photographers such as those by ScotteVest, and I own a couple of these vests. They are great for travel days and airports as well.
But my preference on safari are the safari focused shirts from the brand Craghoppers. These have a range of features for travel, including being quick-drying and sun proof. They are really lightweight, and are available in safari appropriate colors (light greens and beige are good, blue and black are bad if going to teste fly infested areas). Some models, like the NosiLife line, even come with built-in insect repellent.
The main thing I love about them though is that they have lots of pockets and so it’s easy for me to quickly access a spare battery without having to root around in my bag. You can get them from REI in the US here, as well as on their Amazon store here and in the UK here.
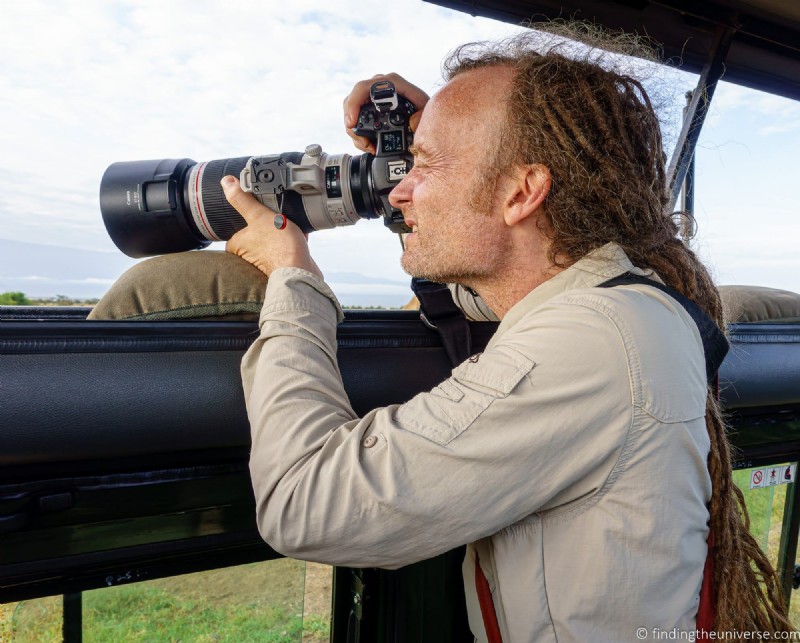
Comfortable Camera Strap
A safari trip is going to involve you carrying and using your camera a lot. You are likely going to be bumping along on dirt roads, sticking your head out of the safari vehicle, and hiking along in forests during your trip. So you want to make sure you have both a secure and comfortable camera strap.
It is likely that your camera came with a manufacturer branded strap such as one from Canon or Nikon. This strap may be fine for some people. For others, especially if you have a heavy camera setup, it may not provide enough support or comfort.
I personally use Peak Design straps, as I find them much more comfortable than a standard camera strap. You can purchase them from Peak Design here, as well as on Amazon or B&H Photo.
A Good Camera Bag
A safari can be a dusty and bumpy experience, two things that can cause damage to cameras and lenses. To protect your gear in between shoots, I highly recommend getting a good camera bag.
Camera bags are specially designed to provide padding and protection for your gear, and many of them also come with rain covers. This means that you have somewhere safe, protected and padded to put your gear.
Personally, I use Vanguard photography bags and I’ve been an ambassador for Vanguard for many years now. If you see something on their store that works for your equipment, you can save money using our exclusive Vanguard discount code. This will give you 20% off everything in the Vanguard store.
Just use the code FindingTheUniverse for your discount! This code works in the Vanguard USA, UK, Australia, Spain, and Germany stores.
There are of course a range of other camera bags available, you can see the options on Amazon here and B&H Photo here.
Camera Cleaning Kit
No matter how well you protect your camera and lens, it is inevitable that it is going to get some dust or dirt on it. To help keep it clean, I recommend picking up a camera cleaning kit. These are normally fairly inexpensive and some come with carrying cases which are handy for travel.
They can come with a range of different items. My recommendation is to get one which includes a blower and a lens cloth like this, which will make it easier to remove the dust.
Further Reading
That’s it for my guide to the best safari camera. If you found this useful, you might enjoy some of my other photography content. Here are some articles to get you started.
- I have a detailed guide full of safari photography tips to help you get great photos whatever your camera is
- I have a guide to my favourite photo editing applications, as well as the best alternatives to Lightroom
- Once you’ve taken all your photos you don’t want to lose them! Read our guide to backing up your photos for an idea of how to keep them all safe.
- Wildlife photography can often result in noisy images. See my guide to the best noise reduction software for some ideas on how to get the best out of your photos even when they might be a bit noisy
- We have a guide to how to use a compact camera, how to use a DSLR camera, and how to use a mirrorless camera. We also have a guide to how a DSLR works
- Knowing how to compose a great photo is a key photography skill. See our guide to composition in photography for lots of tips on this subject
- We have a guide to what depth of field is and when you would want to use it.
- We are big fans of getting the most out of your digital photo files, and do to that you will need to shoot in RAW. See our guide to RAW in photography to understand what RAW is, and why you should switch to RAW as soon as you can if your camera supports it.
- You’re going to need something to run your photo editing software on. See our guide to the best laptops for photo editing for some tips on what to look for.
- If you’re looking for more advice on specific tips for different scenarios, we also have you covered. See our guide to Northern Lights photography, long exposure photography, fireworks photography, tips for taking photos of stars, and cold weather photography.
- Color accuracy is important for photography – see our guide to monitor calibration to ensure your screen is set up correctly.
- If you’re looking for a great gift for a photography loving friend or family member (or yourself!), take a look at our photography gift guide,
- If you’re in the market for a new camera, we have a detailed guide to the best travel cameras, as well as specific guides for the best cameras for hiking and backpacking, the best compact camera, best bridge camera, best mirrorless camera and best DSLR camera. We also have a guide to the best camera lenses.
- If you want a camera or lens, but the prices are a bit high, see our guide to where to buy used cameras and camera gear for some budget savings options.
- We have a guide to why you need a tripod, a guide to choosing a travel tripod, and a round-up of our favourite travel tripods
Looking to Improve Your Photography?
If you found this post helpful, and you want to improve your photography overall, you might want to check out my online travel photography course.
Since launching the course in 2016, I’ve already helped over 2,000 students learn how to take better photos. The course covers pretty much everything you need to know, from the basics of how a camera works, through to composition, light, and photo editing.
It also covers more advanced topics, including astrophotography, long exposure photography, flash photography, and HDR photography.
You get feedback from me as you progress, access to webinars, interviews and videos, as well as exclusive membership of a Facebook group where you can get feedback on your work and take part in regular challenges.
It’s available for an amazing one-off price for lifetime access, and I think you should check it out. Which you can do by clicking here.
以上です! I’d love to hear about your thoughts on wildlife photography on safari, and am happy to answer any questions you have. Just pop them in the comments below and I’ll get back to you as soon as I can.