車のスピーカーをテストする方法:完全ガイド
車のスピーカーをテストして正しく機能するかどうかを確認するのは、複雑な作業のように思えます。
ただし、いくつかの小さなステップに分割すると、見た目ほど難しくないことがわかります。では、車のスピーカーをテストする方法は?調べてみましょう。
車のスピーカーが機能しているかどうかをテストする最も簡単な方法は、9V バッテリーを使用することです。スピーカーのコーンが動く場合、スピーカーは正しく機能しています。車のスピーカーをテストするもう 1 つの方法は、マルチメーターを使用してインピーダンス、抵抗、電圧を測定することです。
この記事では、車のスピーカーをチェックしてテストする方法を詳しく説明します.
車のスピーカー ワイヤーを調べる
車のスピーカーをテストする前に、スピーカー ワイヤをテストすることをお勧めします。これにより、トラブルシューティングのためにスピーカーにエラーが見つかった場合に、元に戻る必要がなくなります。
車のスピーカー ワイヤーをテストするには、次のものが必要です。
アナログ電圧計またはデジタル マルチメーター
これらのツールは、整備士や自動車愛好家の必需品です。ただし、これらのいずれかをまだお持ちでない場合は、Amazon で比較的手頃な価格で見つけることができます。例としては、AstroAI デジタル マルチメーター、Waterwich 防水電圧計、Linkstyle 自動車電圧計があります。
アナログ電圧計は、針を使用して結果を出すため、少し時代遅れですが、いまだに好む人もいます。電圧計は電圧の測定専用ですが、マルチメーターは電圧、抵抗、および電流を測定します。他のものを測定する予定がない場合は、電圧計に固執することができますが、自動車愛好家であれば、マルチメーターが多くの点で役に立ちます。
もちろん、スタート前に、短絡を防ぐためにすべてがオフになっていることを確認する必要があります。短絡によりヒューズが飛んでしまうことがよくありますが、ヒューズを交換することで簡単に修理できます。
ただし、内部スピーカー コンポーネントの損傷など、短絡によってより大きな損傷が発生する場合もあります。この場合、スピーカー自体の交換が必要になる場合があります。
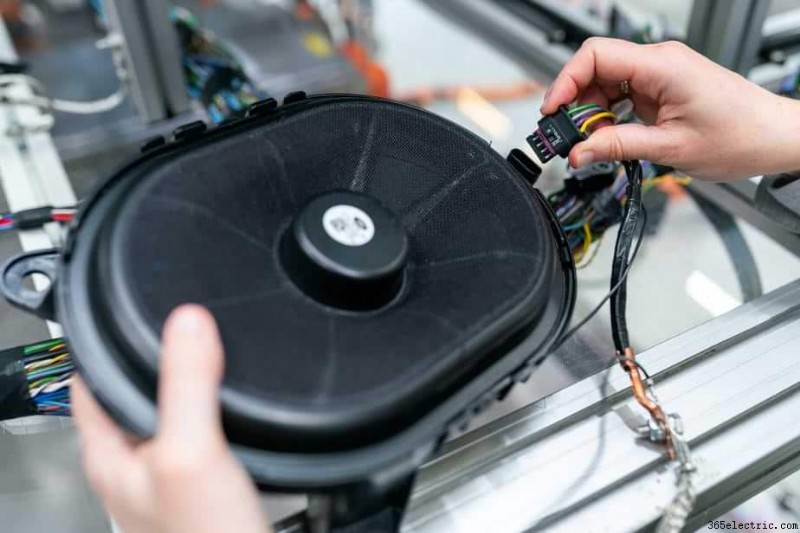
車のスピーカー ボックスからワイヤーを取り外します
これを行うには、次の 2 つのいずれかに従います。
- まず、2 つのコネクタを時計回りにねじると、ワイヤーが外れます。
- 次に、プラスとマイナスの両方のクリップを押して、スピーカー ワイヤーを取り外すことができます。
適切な方法は、車のモデルとスピーカー自体によって異なります。
アンプまたはレシーバーからワイヤを分離する
上記の方法と同様に、クリップを押すか、2 つのコネクタをねじるという 2 つの方法でこれを行うことができます。繰り返しますが、使用する必要がある方法は、車のスピーカーと車のモデルによって異なります。アンプまたはレシーバーの背面に配線があります。
ワイヤで閉回路を設計する
スピーカー ワイヤをスピーカー、アンプ、またはレシーバーから取り外したら、閉回路の作成に進むことができます。この回路を使用して、導通テストを実施します。 GalcoTV によるこの YouTube クリップで、導通テストとマルチメーターを使用したテストの実行について詳しく知ることができます。
この目的のために閉回路を設計するのは簡単です。端のワイヤーをきつくねじりますが、後で簡単に分離できるようにねじりすぎないようにしてください。
電圧計またはマルチメーターを準備する
マルチメーターを使用している場合は、キャリブレーションが不要なため、この手順をスキップできます。ただし、電圧計を使用している場合は、校正する必要があります。
電圧計を準備するには、まず電源を入れてから、セレクターをオームの位置に配置して、ワイヤー抵抗を評価するために必要なオーム設定を選択します。
マルチメーターまたは電圧計のスケーリング
マルチメーターまたは電圧計が故障しているのではなく、正確であることを確認する必要があります。これを行うには、黒と赤のリードを一緒に案内します。ツールが正常に動作していることを確認するには、0 オームの結果が得られるはずです。マルチメーターまたは電圧計が 0 オーム以外の値を示している場合は、故障しています。
ガイダンスについては、Clyde Lettsome によるデジタル マルチメーターの修理に関する詳細な YouTube チュートリアルをご覧ください。
車のスピーカー ワイヤーをテストする
必要な準備がすべて完了したら、ワイヤをテストできます。これを行うには、電圧計またはマルチメーターを使用して、回路の開放端にある赤と黒のプローブを微調整します。ワイヤーに損傷がない場合、電圧計は抵抗のレベルを表示します。
一方、ワイヤーが切断されたり損傷したりすると、ツールに無限の抵抗が生じることに気付くでしょう。ただし、マルチメーターを使用している場合は、「OL」または Open と表示され、一定のトーンが生成されます。スピーカー ワイヤーに損傷の兆候が見られる場合は、修理するか交換する必要があります。
車のアンプに損傷がないかチェック
実際にはアンプの修理が必要なのに、スピーカーが壊れていると思うことがあります。損傷したアンプは歪んだオーディオを生成します。スピーカーのせいだと考える人もいます。車のアンプに損傷がないかチェックするには、次のことを行う必要があります:
<オール>コンデンサが最適な容量で動作している場合、ツールはコンデンサの定格とほぼ一致する読み取り値を表示する必要があります。
それで、ワイヤとアンプをテストしたところ、満足のいく結果が得られました。これで、車のスピーカーのテストに進む準備ができました。車のスピーカーに問題がないか、または正常に機能しているかどうかを調べるには、次の 4 つの方法を自分で利用できます。
スピーカーを物理的に調べる
最初に物理的に調べなければ、車のスピーカーをテストしたとは言えません。ワイヤーの緩み、コーンのぐらつき、コンポーネントの破損など、目に見える損傷がないかどうかを目で確認してください。また、ケーブルの周りに、目で観察したときに気付かないような小さな切り傷があるかもしれません.
音声出力を手動で聞く
適切かつ最適な音量でオーディオ出力を聞くことで、スピーカーが故障しているかどうかを判断できます。範囲の不足を示す出力は、車のスピーカーに適切なイコライズが必要であることを意味します。
一方、オーディオのパチパチ音やガタガタ音は歪みを意味します。最後に、こもった音は吹き飛ばされたスピーカーを示します。これが発生した場合は、向きまたはパン オプションを使用して車のスピーカーを分離し、どのスピーカーが壊れたかを特定する必要があります。
バッテリーを使用してテストを実行する
この方法では、車のスピーカーを取り外す必要があります。バッテリーを使用してスピーカーをテストすると、正常に動作していることを示すポップ音が聞こえるはずです。何も聞こえない場合は、スピーカーが破損しています。
スピーカーをテストするために 9 ボルトのバッテリーを選ぶ人が多いことに気付くでしょうが、12 ボルトのバッテリーを選ぶ人もいます。これをどのように進めればよいかわからない場合は、YouTube にアクセスして、Sound Speaker Repair の 9 ボルト バッテリーを使用したスピーカーのテストに関する明確なクリップをご覧ください。
マルチメーターを使用してテストを実行する
車のスピーカーでマルチメータ テストを行うには、スピーカーが固定されているワイヤの部分を見つけます。次に、マルチメータをそこに置きます。読み取り値が無限大の場合は損傷を示し、1.0 オームの読み取り値はスピーカーの正常性を証明します。
車のスピーカーをマルチメーターでテストするための視覚的なガイドが必要な場合は、Audio Talk の次の YouTube クリップをご覧ください:
専門家に助けを求める
適切なテストを確実にするために、いつでもスピーカーを経験豊富な人に持って行くことができます.これは、車に関する知識がない場合や、すでにいくつかのテストを行ったものの、許容できる結果が得られなかった場合に最適です。 People with experience in dealing with speaker problems may offer you valuable insight and save you from stressing over your car speakers.
Common Car Speaker Problems, Causes, and Quick Fixes
You’re testing your car speakers for two reasons:you’re trying to diagnose a problem, or you’re thinking of buying those speakers. So, knowing the typical car speaker issues and their quick fixes will help you a lot and save you time, especially if your speakers are already there and are not returnable.
Blown Speakers
Blown speakers occur from various causes:
- You can misuse your speaker by carelessly and continuously listening to audio beyond optimal volumes. This results in thermal and electrical failure, which damages your speaker’s voice coils. When this happens, you end up with speakers that produce gritty sounds.
- Your car speakers can receive too much power. This can happen when you’re using the wrong wires, or you installed the speakers incorrectly. Alternatively, it can also occur from heat buildup that melts your speaker components’ binding glue.
- Internal materials can loosen up and blow your speaker. As you travel, there’s a chance of loosening your car speakers’ components and stressing them out, which causes damage that result in blown speakers.
To figure out if your speakers are blown, watch out for these signs:
- Hissing, fuzzy, and distorted sounds
- Rattling and popping noises
- Speakers that don’t produce vibrations
The easiest way to fix blown car speakers is to replace them with new speakers rather than repair them. However, you may also commence on a do-it-yourself session where you remove all the speakers’ components, clean the speaker itself, and place new voice coils and cones in them.
Here’s the step-by-step guide for this quick fix:
<オール>Disconnected Speakers
Disconnected speakers result from wear and tear. They often happen when wires, cables, and internal speaker components loosen overtime or get subjected to misuse and abuse.
Signs of disconnected speakers are:
- The inability to produce sounds
- Audio that keeps getting cut off
- Speakers that feel glitchy
To fix constantly disconnecting speakers or speakers that don’t produce any sound:
<オール>If the cables aren’t your problem, your car speakers’ polarity may cause audio disruption. When this happens, you need to reconnect the speakers’ polarities properly.
Frequently Asked Questions About Car Speaker Testing
You learned all about car speaker testing. You also gained more knowledge about two common car speaker problems, their causes, and their quick fixes.
However, if you’re still left with a couple of questions, in this section, we’ll answer typical questions people ask when it comes to testing car speakers.
What Are Some Great Songs to Test Your Car Speakers With?
If you can’t think of songs to test your speakers with, here are some recommendations:
- Boom Boom Pow by Black Eyed Peas correctly tests if your car speakers can accurately produce powerful bass beats.
- Rock that Body by Black Eyed Peas allows you to check if lyrics are still clearly comprehensible despite a persistent and loud bass beat.
- No One by Alicia Keys can examine if your speakers can display clear vocals over wide background music.
- Blue Jean Blues by ZZ Top offers a smooth guitar solo that tests your speakers’ stableness while you’re cruising.
- Royals by Lorde surround you with electronic bass to check your sound quality.
What Is Speaker Polarity?
Speaker polarity essentially determines whether the speakers’ terminals are connected properly or not. So, if two positive terminals and two negative terminals are attached, respectively, it results in incorrect polarity.
However, if they’re reversed, it results in incorrect polarity that causes destructive interference. This results in sound cancellation, which displays bad quality audio or no audio at all. On the other hand, note that using only one speaker may give you an unnoticeable outcome, so you may not notice the reversed polarity if that’s the case.
How Do You Test Your Speakers for Polarity?
To test your car speakers for polarity:
<オール>If you prefer watching video tutorials, check out Sonic Electronix’s YouTube clip about speaker polarities and how to test for them:
What Should I Do if My Speakers Are New but Distorted When I Turn the Volume High?
If you don’t find any other problems with your car speakers during testing, your wisest decision is to obtain a bass blocker set. They’ll guard your speakers against distortion by acting like high-pass crossovers. Speakers smaller than four inches work well with 600 Hz bass blockers, while speakers larger than that need 800 Hz bass blockers.
How Do I Obtain Sharper Highs and Great Stereo Imaging?
If you’re using factory car speakers, you’ll find that they produce lifeless and dull sounds. This is because most of them utilize dual-cones, which consist of a paper Whizzer that produces high frequencies.
So, to achieve sharper highs and excellent stereo imaging, obtain some tweeters. They create ultra-high frequency notes that impact your audio’s overall realism, which renders your music’s specific timbres to a great quality.
Which Car Speakers Are the Best Car Speakers?
You tested your car speakers and didn’t like the results. Your next step is to buy new speakers. The best car speakers in the market at the moment are:
- JBL GTO Coaxial Speakers, feature 3-ohm speakers, a dedicated 12dB octave, a dual-level tweeter volume adjustment function, and large, carbon-injected cones.
- Rockford 3-Way Co-Axial Speakers, which suit you if you’re on a budget and trying to upgrade your stock car speakers:featuring polypropylene cones, an integrated tweeter crossover, and a silk dome Piezo tweeter.
最終的な考え
Testing car speakers may seem like a complicated task, but it’s doable for beginners. To test car speakers, start by checking your wires and amplifier. Then, physically inspect your speakers, listen to their audio output, and do a battery or multimeter test.
If the test results show no signs of damage, yet you somehow feel something is wrong with your car speakers, it’s best to contact a professional for help. However, you may also opt to conduct more diagnostic tests and try a few quick fixes to see if they do the trick.